
Fix and Flip
How to flip a condo
Follow along this condo fix and flip, including the actual income report, expenses, profit, and sales info.
It’s done! During the Covid pandemic break from school and over the summer, my son Eric worked on his first condo flip. You may have considered condo flipping so I wanted to show you our results. I’m so excited to share the outcome and walk you through the entire process so that you can do this yourself, or help your kids do it and hit a record high sales price like we did. I’ll go through our experience from start to finish, and you can also login to my private library to see the exact breakdown of the numbers and what the final profit was. First, let me start from the beginning…….just over a year ago…..
When Eric was graduating high school last year, we didn’t know quite what to get him. We didn’t want to get him something that would quickly go to waste, and there didn’t seem to be too many sentimental gift items for boys (other than maybe a watch). However, around that time I learned of a condo unit for sale in Ventura Country Club. That’s a gated community close to the airport here in Orlando.
What is wholesaling in real estate?
The property wasn’t on the MLS; it was sold by a wholesaler. If you don’t know what a wholesaler is, here’s the definition from investopedia.com :
In real estate wholesaling, a wholesaler contracts a home with a seller, then finds an interested party to buy it. The wholesaler contracts the home with a buyer at a higher price than with the seller, and keeps the difference as profit.
Details of the condo deal
This wholesaler had a contract with the seller to purchase the property at $57,500
He was charging us a wholesaling fee of $10,000 to purchase the contract. That made our price $67,500 plus we had to pay for all of the closing costs.
In this type of transaction, there was:
- NO inspection period
- NO financing (it’s a cash only purchase)
- QUICK closing (14 days from contract to closing)
Is a condo inspection necessary for flipping?
Obviously it would be scary to buy a home with no inspection, but remember this is a condo. The exterior and the roof are covered by the association. I scheduled with the wholesaler to meet him at the property and take a quick look inside. This particular property had a tenant inside, and a property manager overseeing the property, so the timing had to be coordinated so as not to inconvenience them.
Once inside, the property manager told me there had been a leak inside the unit. A pipe had burst in the wall but they’d already had a professional plumber come and fix it, and they had installed new carpet. The carpet was a regular brown cheap material, and I did get the contact info and warranty info for the plumber who had done the repair. The cabinets and bathroom looked ok. Not amazing, but there was a tenant in there who was happy and paying rent, and everything was in good working order. It just looked outdated. It’s easy to see past that when you get used to seeing how easily things can be renovated.
The air conditioner was a concern, because that would be the biggest expense in a unit like this. It looked old, but it was running and pumping out cold air.
Buying a Condo with a Tenant in Place
The tenant wanted to stay in his lease, which for us was an added bonus. He was paying $895 per month and had 7 months remaining on his lease.
The property manager was charging 10% of the rent every month, so that was a fee of $89.50 per month. Although it would have been nice financially to terminate the property management agreement and keep that additional $90 per month, there are three reasons that we didn’t.
- It didn’t seem right that this property manager had gone through and taken care of the unit and especially a unit that needed repairs, and that she would be dumped once she had finished taking care of those things.
- The property manager was the one who had coordinated all of the repairs and she had a long working history with the plumber; so if something were to happen again, we felt that it would be most effective to have her demand that the plumber repair it correctly without extra fees.
- She had a relationship with the tenant and he was paying well under her management and we didn’t want to create waves in the payment relationship
We made an agreement with the property manager to keep her on until the end of the lease. That would give us 7 months to establish a relationship with the tenant and to make sure there were no further plumbing leaks.
How we made debt our son’s graduation gift
I know you probably want me to get to the point, but before we even get to the condo flip, I wanted to explain how we got to the starting point and how this became a graduation gift.
We figured that the best gift we could give Eric was a great investment like this one. The other 1 bedroom units in the complex were selling, at that time, at an average of $80,000.
However, we weren’t simply going to buy it for him as a gift, that would be ridiculous…
We were willing to gift him the “down payment” on the unit and we would finance it for him.
At a purchase price of $67,500, if someone were to get a loan with 3% down payment, their down payment amount would be $2,025 and they would obtain a loan for $65,475.
This $2,025 investment was going to be our graduation gift to Eric. But it came along with a mortgage for the balance. The mortgage was at 4% for 20 years.
So, essentially, our high school graduation gift to Eric was a mortgage in the amount of $64,475. It sounds strange to give the gift of debt, but it came backed with a great condo and the opportunity to learn about how investing works.
Are condos a good investment?
Here was the monthly breakdown of income and expenses at that point:
Monthly Rental Income $895
Property Management Fees $89.50
Monthly Condo Dues $365
Mortgage Payment $396
Monthly income remaining: $45
Doesn’t look all that desirable right? It isn’t. It’s even a bit risky to leave such small margins because any repair will have you upside down. However, he had us as a safety net, and he wasn’t to use any of the monthly income anyways. That $45 per month had to stay in the account and start to grow as a cushion for emergency repairs.
Also, I had to explain to Eric, as he paid his mortgage to us every month, the amount of the loan debt was going down. And that wasn’t coming out of his pocket, it was being paid down by the income generated from the tenant’s rent. He just needed to be patient, allow the reserves to grow, pray for no repairs, and let the investment do it’s job.
Months went by……and thankfully things were quiet– until they weren’t.
Eric became a whiz on Quicken and monthly bank reconciliations, and knows how to write an old fashioned check.
Rental Property Repairs
Just two months into the lease, unfortunately, the a/c blower motor went bad. So much for my ability to judge an a/c by looking at it! The property manager handled the repair and deducted the cost from the rental income. You can see this in the detailed profit and loss when you sign into the private resource library.
After the 7 months, we already had a good history with the tenant, and we felt comfortable that there were no plumbing issues. So we let go of the property manager, increased the rent upon the lease renewal (to $950 per month), and the monthly income increased to $175 per month.
Then the tenant indicated that the dishwasher wasn’t working. We felt it was better to replace the dishwasher than send out for a repair. We purchased a brand new stainless steel unit at a total cost of $403.64.
Selling the Investment Property
At the end of June, 2020, the tenant moved out (he lost his job due to covid and we mutually agreed to end the lease because he was relocating to another area) and we knew the unit needed renovation to re rent it. And those renovations would lose value with the wear and tear of the next tenant. So what to do?
A search of the sales in the community showed us that units there were going for up to a maximum sale price of $92,000. That was a $12,000 increase in average price in just one year! But what if we made it even better than those? Could we ask even higher? Could we keep expenses to a minimum and turn a decent profit after materials, labor, commissions, and closing fees? We definitely thought we could, and with Covid, and being out of school, Eric had the time to participate in doing the work and learn about renovating at the same time.
The renovation journey…
We decided to make this a condo flip and it was time to get to work! Here are the rooms, one at a time, with before and after photos and links to the materials where possible. As Eric can now attest to, it takes a long time to find the right products that look expensive and are great quality, but while remaining very budget friendly. So, that’s why I provide the links when I can.
As an Amazon affiliate, so I do earn from qualifying purchases. This means that I may earn a small commission if you end up buying one of these products, but it does not change your price in any way.
In addition to the cost of the items below, I’ve compiled the actual income and expenses and final net profit, I’ve detailed those in a PDF located in the resource library which you can sign into and view.
Kitchen
Bathroom
Bedroom
Living Room
Porch
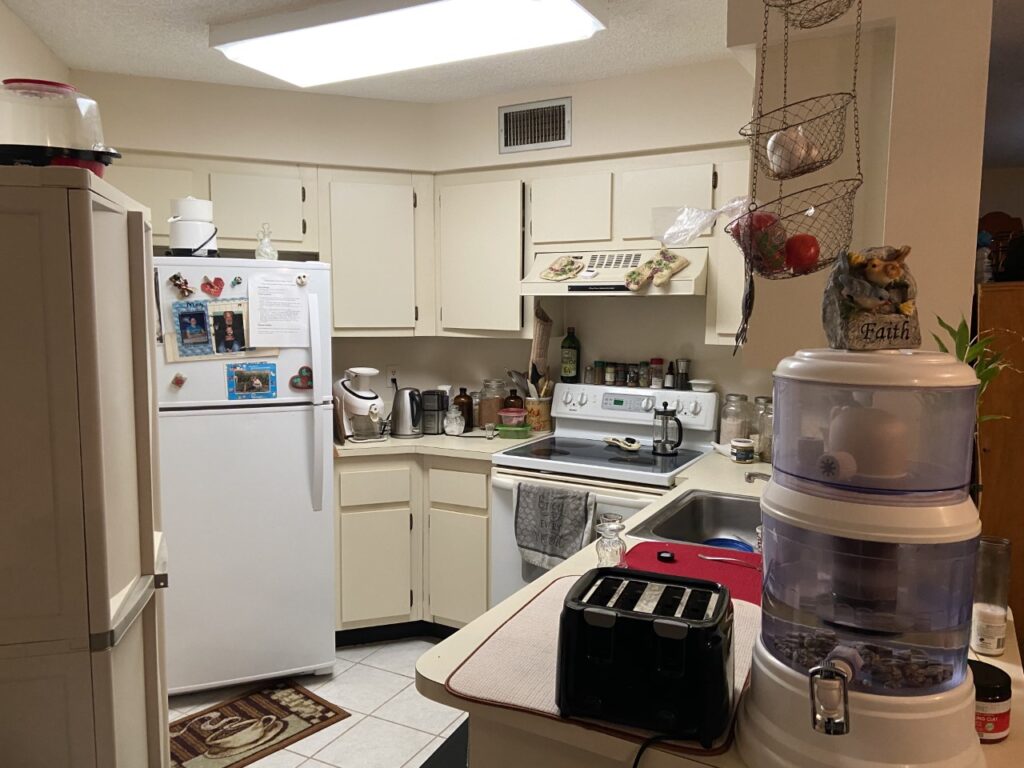
The Condo Flip Kitchen
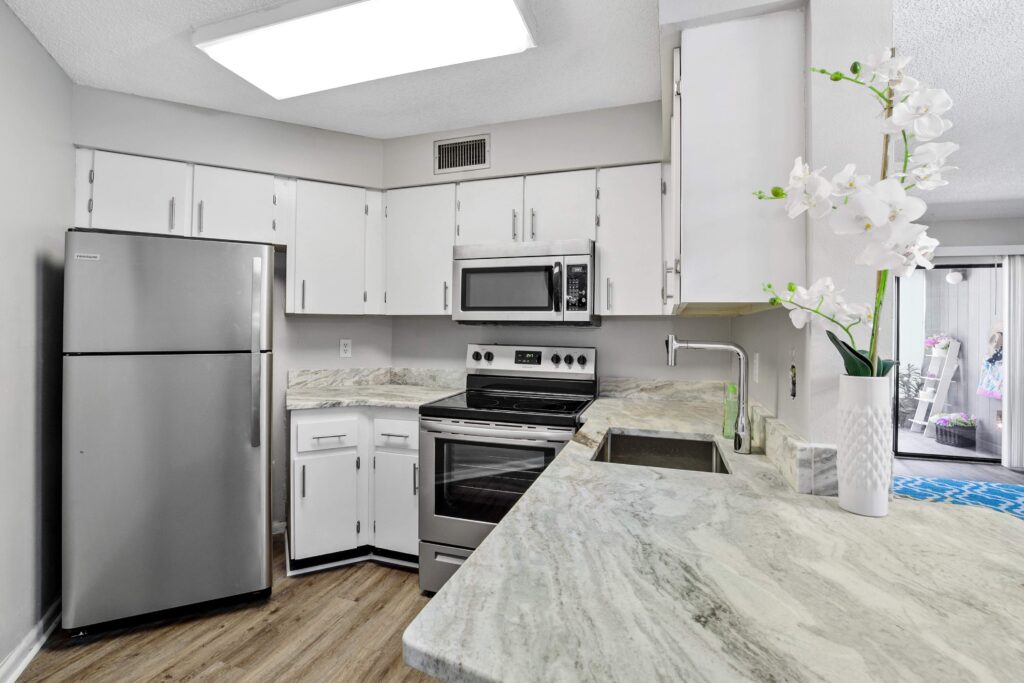
Here’s the way the kitchen looked at the start. The cabinets were yellow/beige, the formica counters were in good condition but really dated, and the appliances worked but were not ideal for selling. Since this is a small kitchen, it’s really worth the money when doing a condo flip to get some great granite and stainless steel appliances in here so that a buyer will fall in love with it.
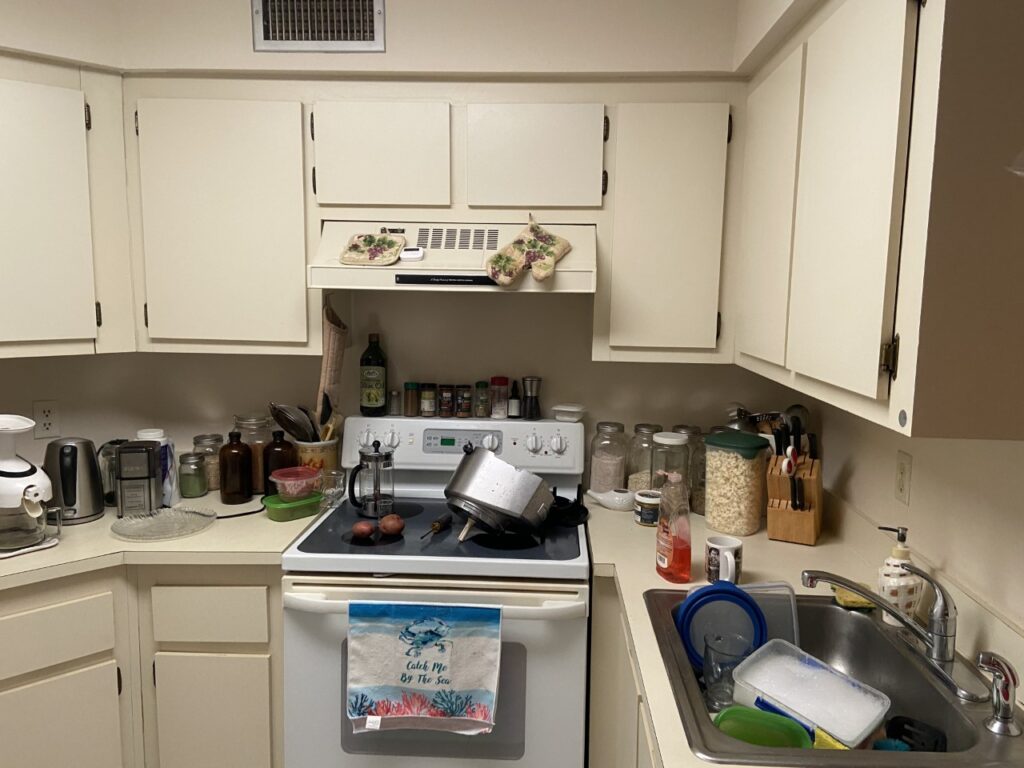
Here’s another view of the kitchen so you can see it’s not very wide. Changing the overhead light was an option, but we ultimately decided it wasn’t necessary.
In order to save money in the condo flip, and because the cabinets were really in good condition on the inside, we removed the doors and painted the cabinets. We used a Cabinet Transformation kit which I’ll link to below. Please note, Eric didn’t buy the whole kit. We had some deglosser left over from another project, so he just used that and bought only the Cabinet Transformation White Paint.
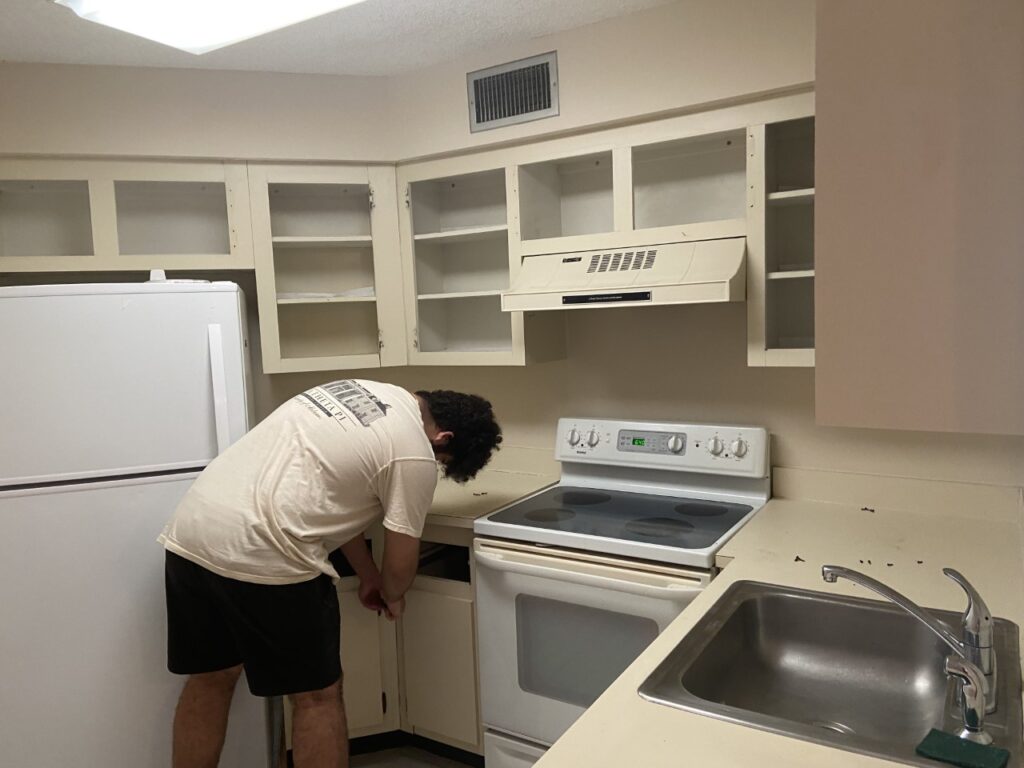
Painting the cabinet frames is super easy. Painting the doors and avoiding any drips or brush marks is quite difficult (at least for me). So, rather than spending time and energy on that, we purchased Haggeby doors from IKEA. The price is amazing, with most of the doors costing only $5 or less!! We also purchased nice pulls to make the kitchen look more modern.
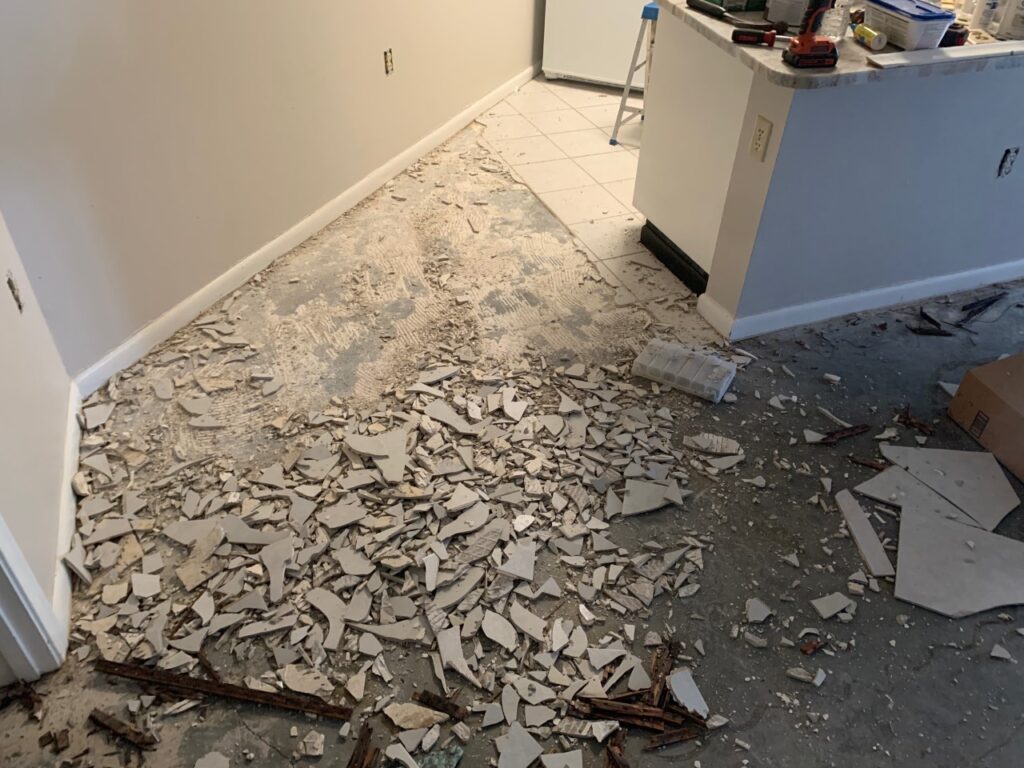
We also decided to remove the kitchen tile. With new flooring going into the main living room, and the kitchen area being relatively small, it just made sense to use Eric’s free labor to get that tile broken up and out of there.

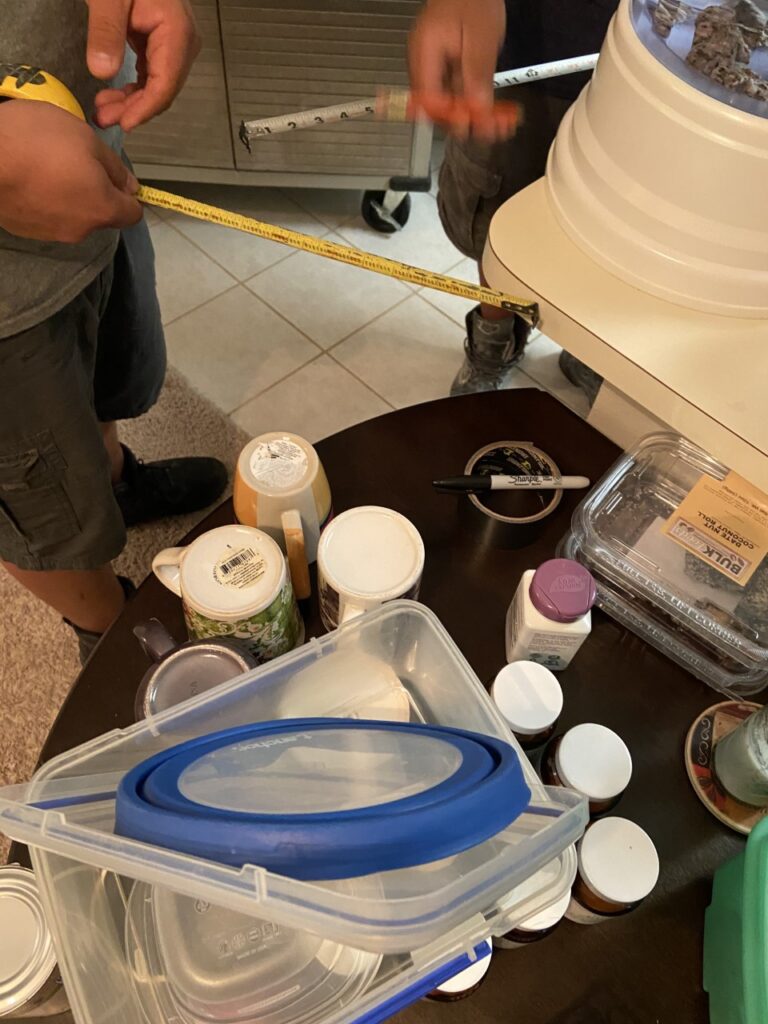
By the way, one of the great things when changing out the granite is that you can change the area of the countertops. We felt like the original counters were a little too small. We worked with the granite folks to expand the corner as you can kind of see in this photo where they have the measuring tapes out planning the new larger area. (They really thought I was weird for taking a picture of them with their measuring tapes, but I wanted to document the change to the size in some way.)
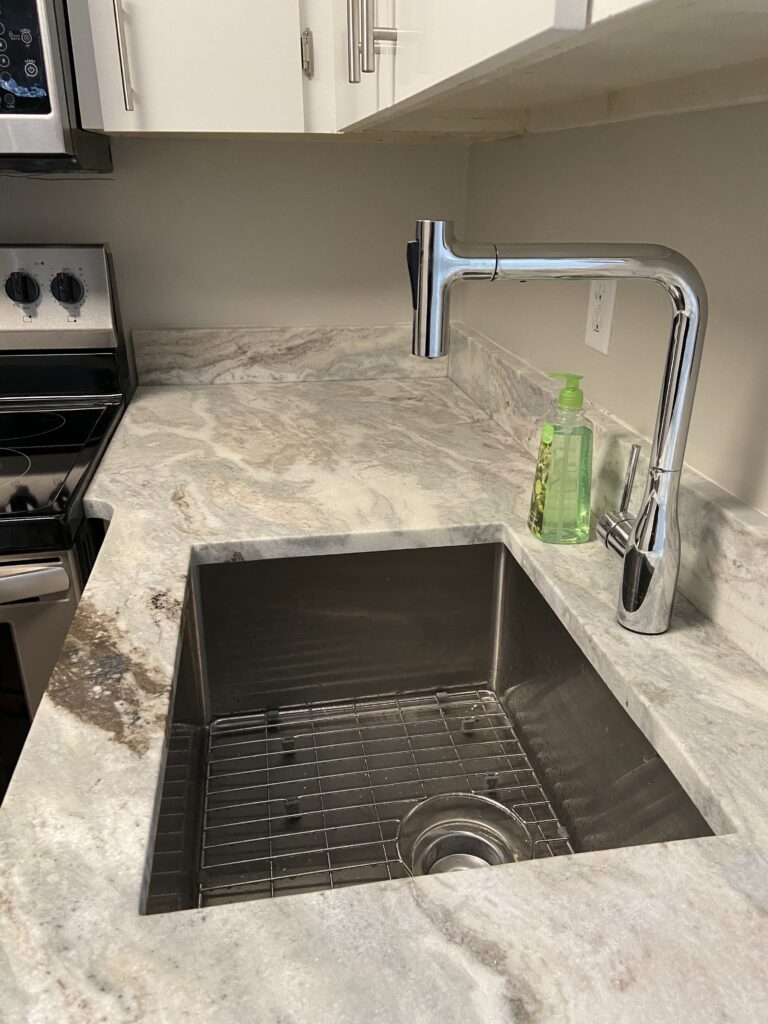
The other great thing about changing the counters in this condo flip is that you get to install cool new fixtures. I love the sink and faucet that Eric chose to really modernize the way this kitchen looked. Here’s a photo as well as a link to them on Amazon.
We added this really cool and very deep sink for under $200. It allowed me to add this great language to the condo flip marketing: “16 GAUGE thick premium T-304 grade stainless steel – 37% thicker than most standard kitchen sinks”. The only complication we had with this sink is that it’s really deep. This is what Eric wanted since the sink space is small, but it meant that no garbage disposal could be installed underneath. Just keep that in mind and take measurements.
Check out how nice it looks:
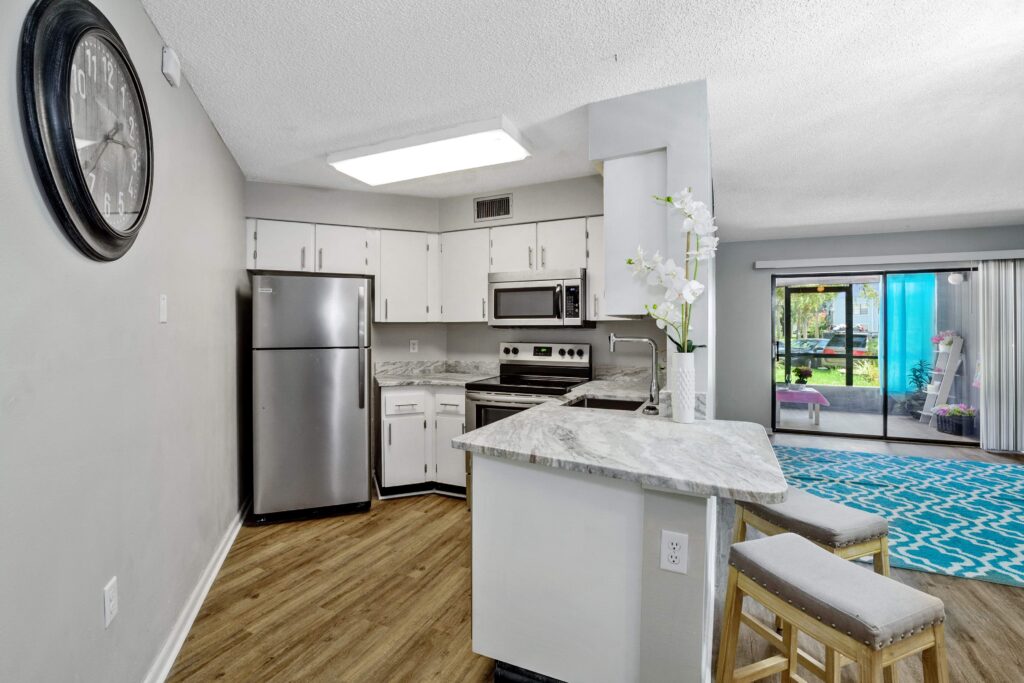
As for the appliances, we got them from Lowe’s. We didn’t need to get a dishwasher since we had just gotten than a few months ago.
Here’s how it came together, I think he did a fantastic job!
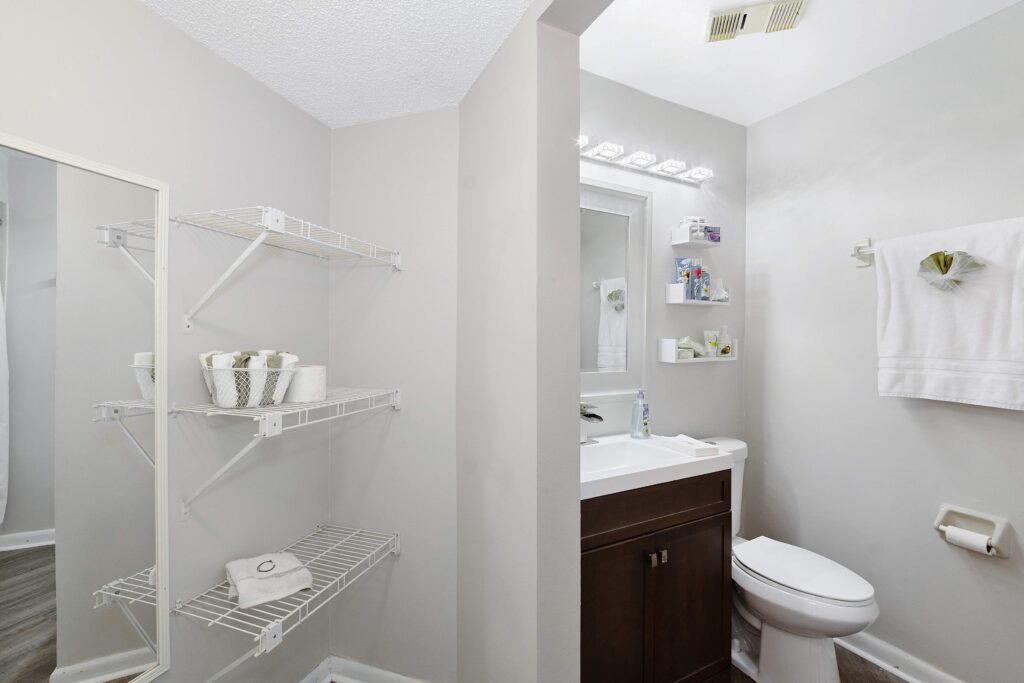
Renovating a condo Bathroom
This is what we were starting with:
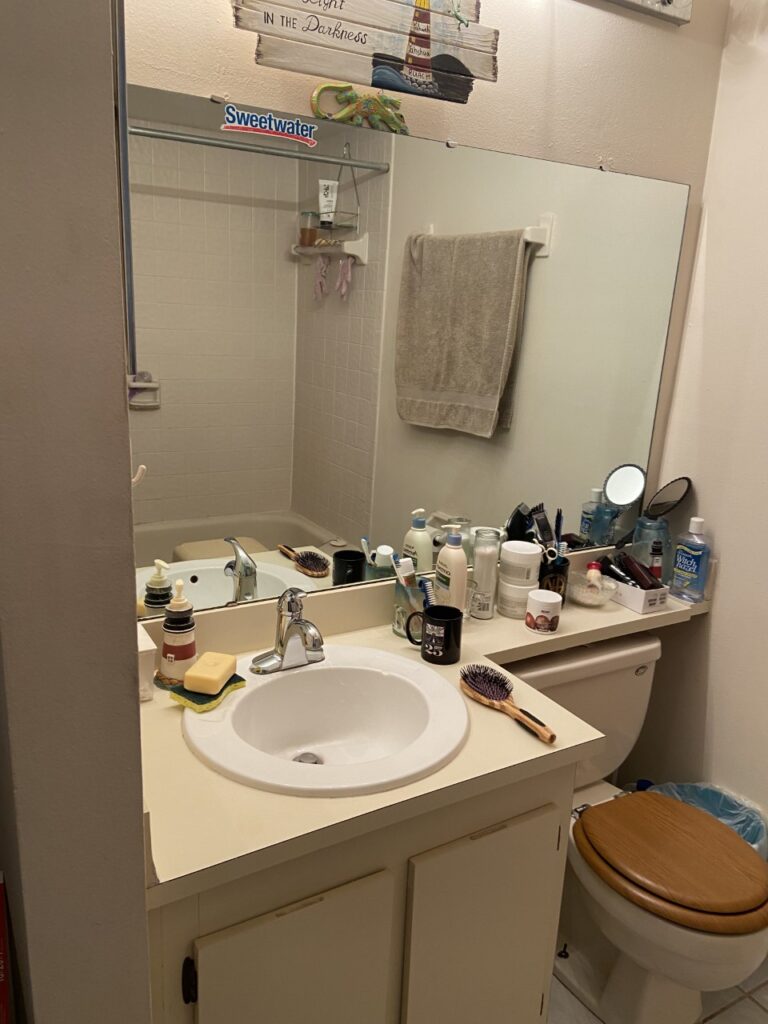
A new vanity was definitely needed, for the condo flip and Eric picked it up from Lowe’s as well.

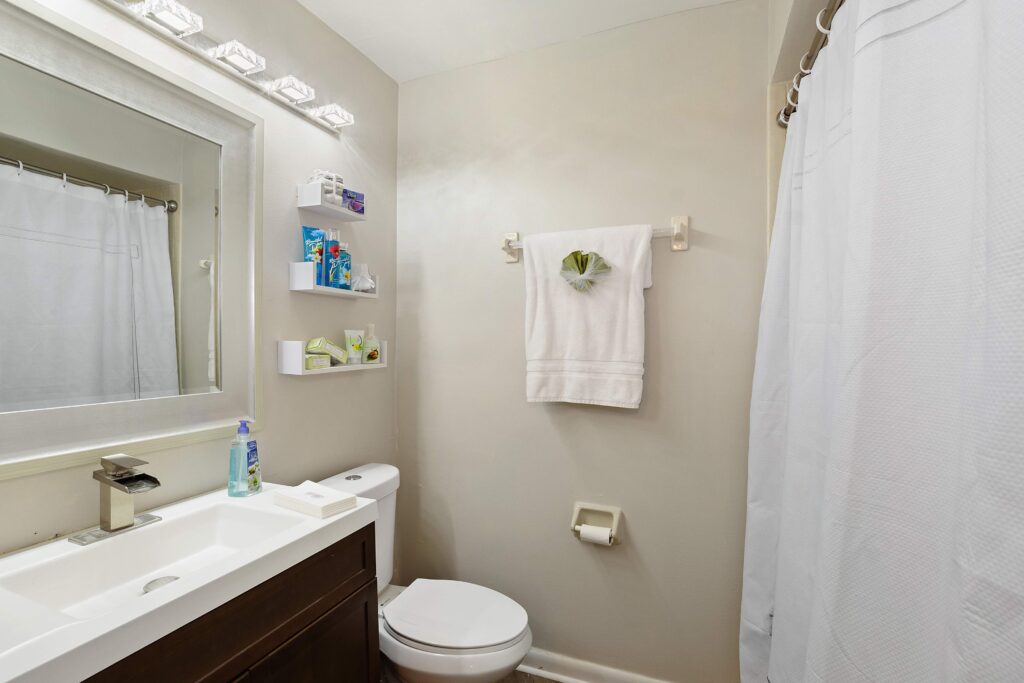
We also replaced the lighting. This is always a good idea because lighting is such an easy and inexpensive way to update a space.
Condo Flip Materials:
Here’s a link to the vanity light we used, currently priced under $90.
Here’s the sink faucet Eric loved, and we found it for under $50 at the time we purchased it.
And here’s an amazing looking shower faucet set that is waaaaay less expensive than it looks!
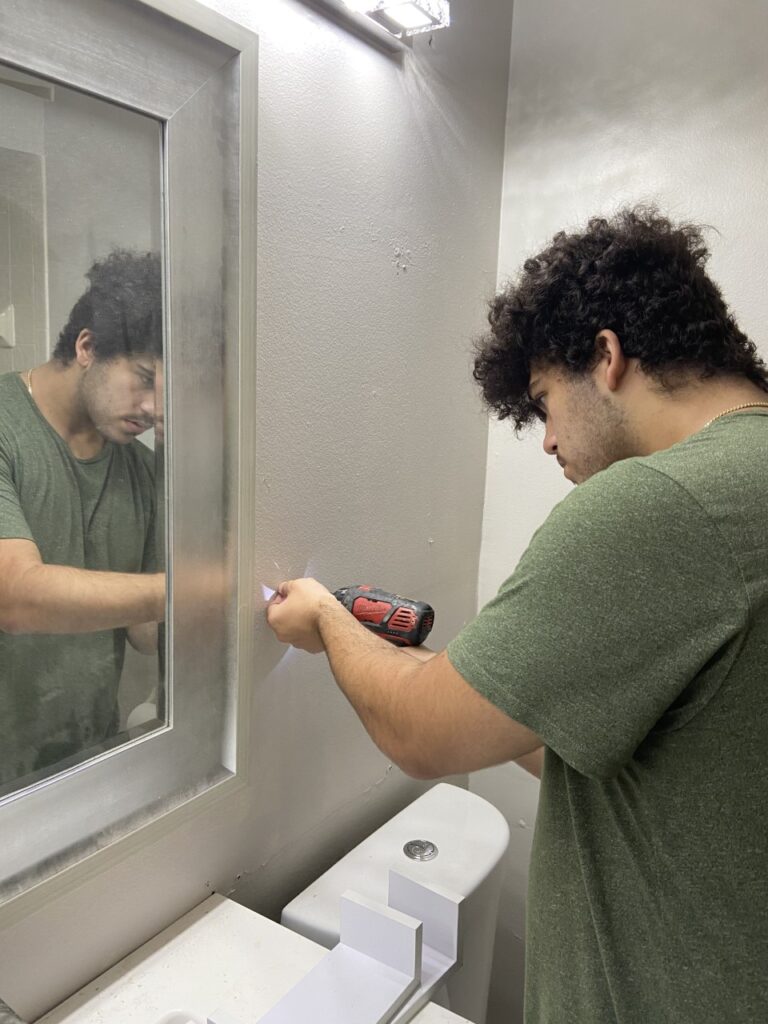
For staging, I also love to use these inexpensive shelves.
Here’s Eric installing the shelves for me on the condo flip
Here’s the final result:
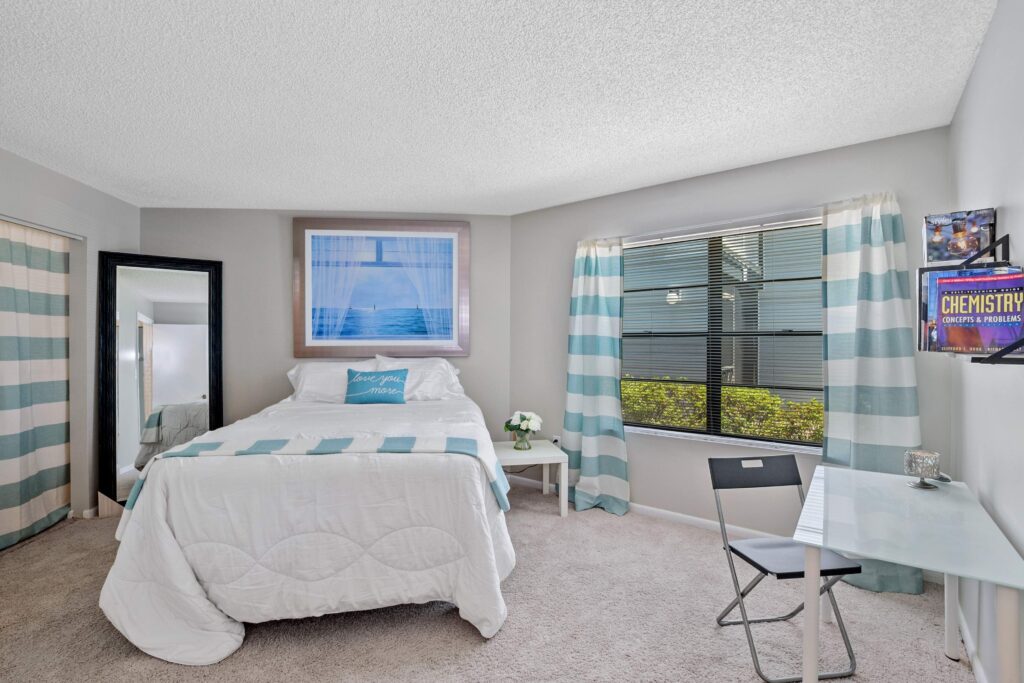
Bedroom
There’s only one bedroom in this unit, but it’s pretty big. Just oddly shaped and difficult to capture in one photo:
We immediately painted the walls throughout the unit Agreeable Gray by Sherwin Williams. It’s neutral and makes every property look great.
Paint is the only thing this room needs for the condo flip. Then some light staging:
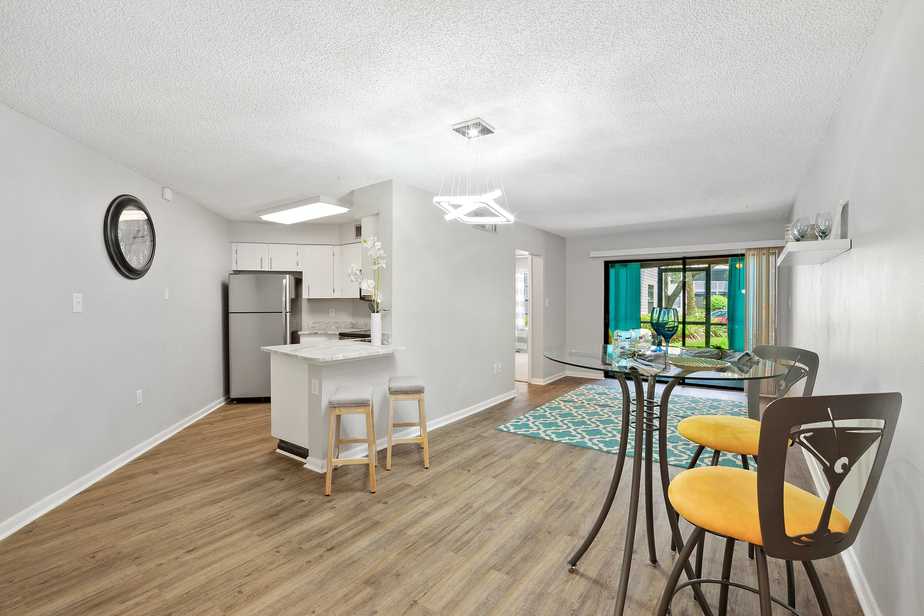
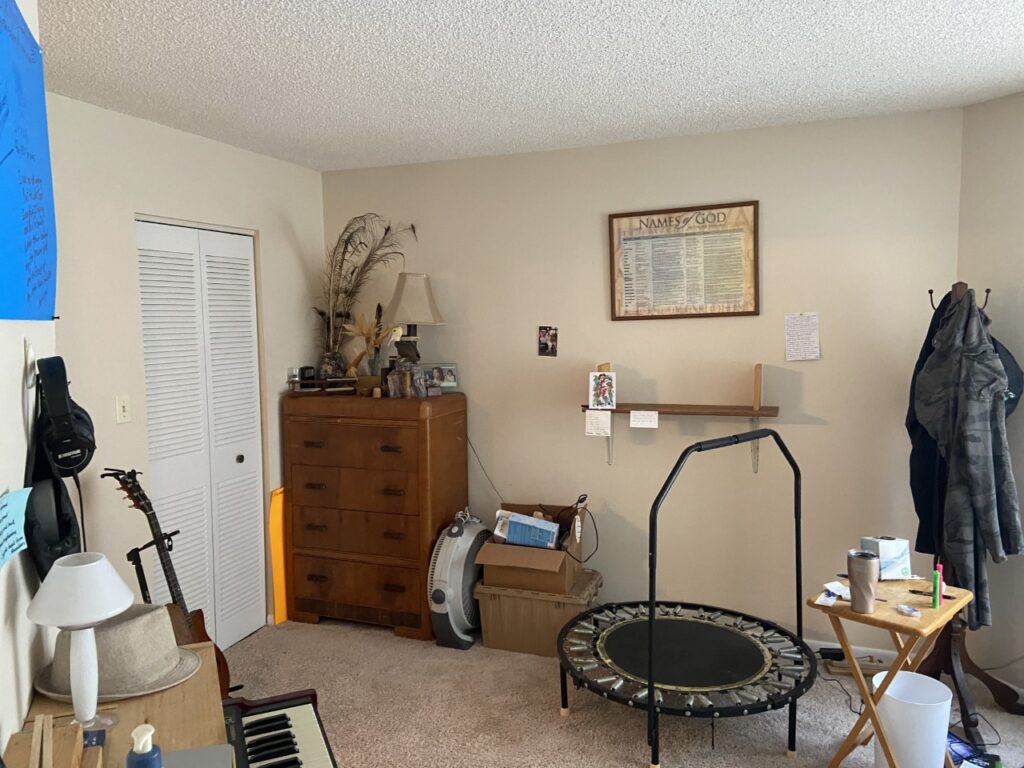
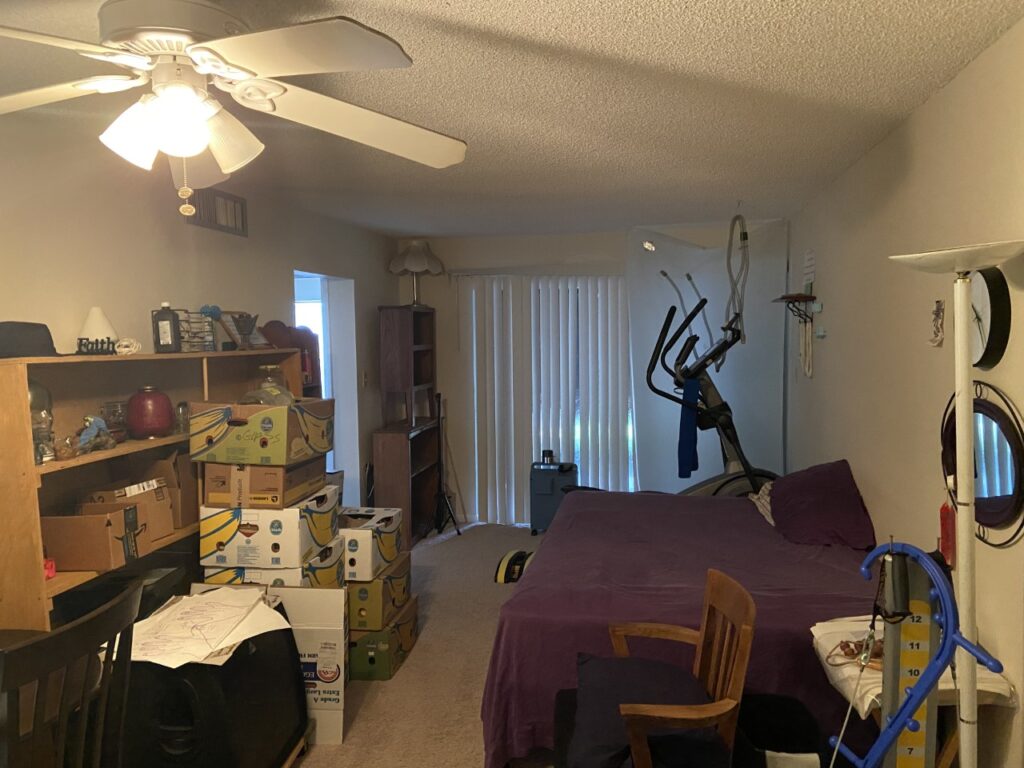
Living Room in the Condo Flip
The before photo here is pretty busy. The picture was taken while the tenant still had his stuff in there
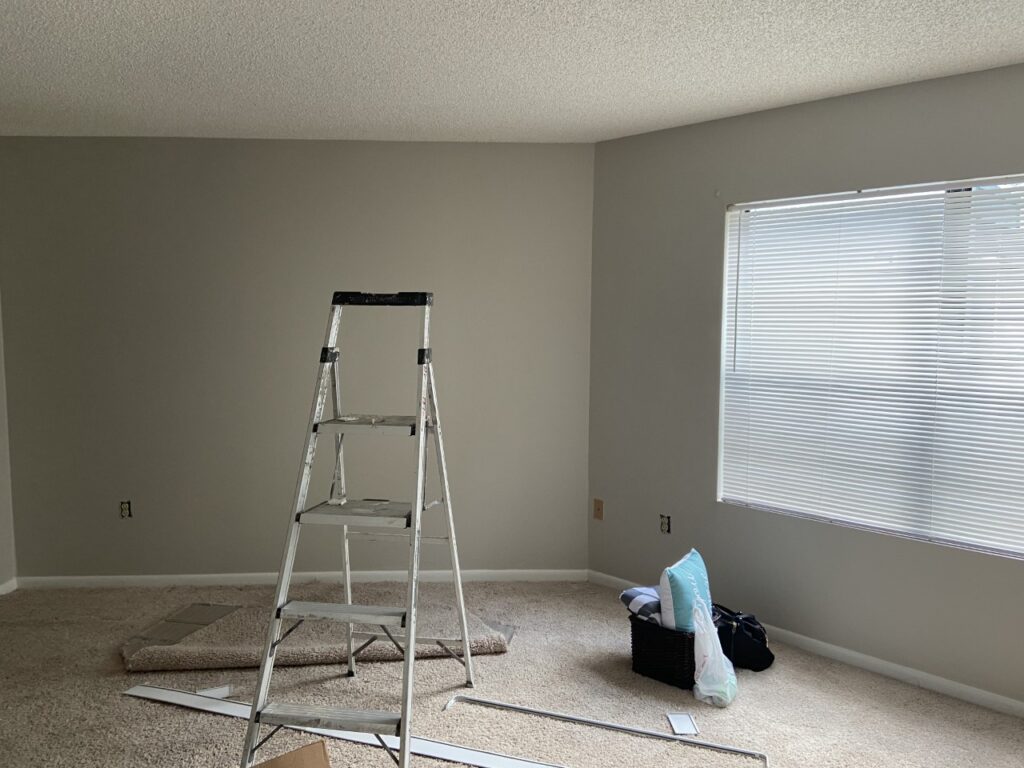
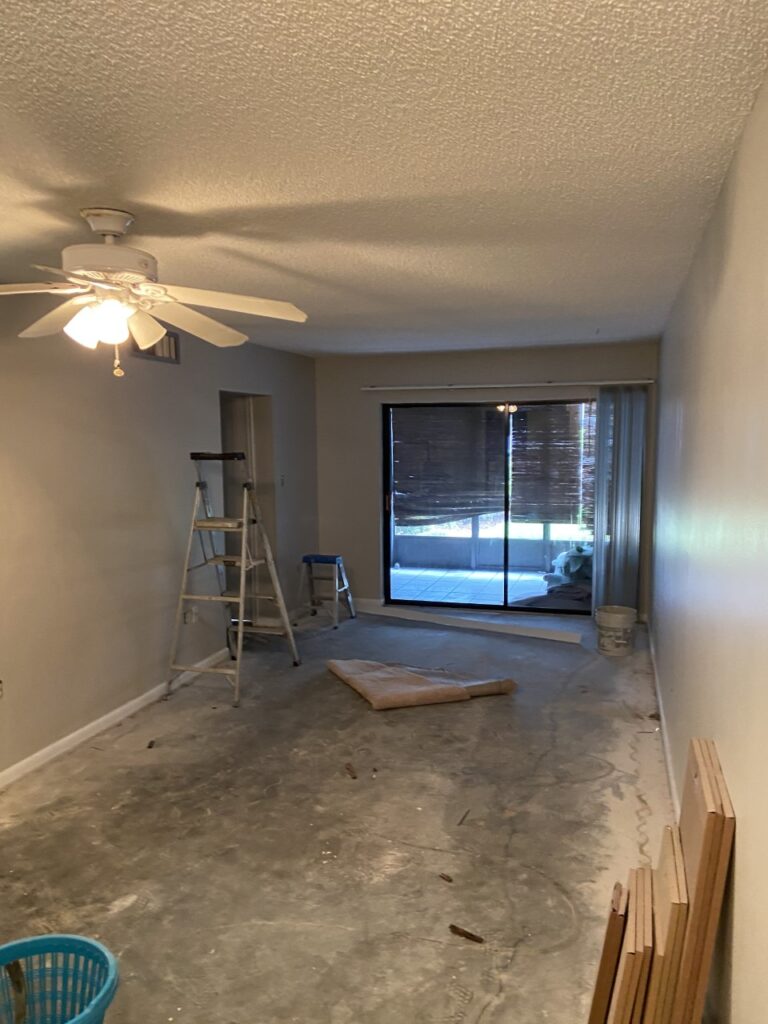
This is the emptied out living room.

And here with the carpet removed and the walls painted. Notice the old fan which we’ll change and which will totally change the look of the room:
After:
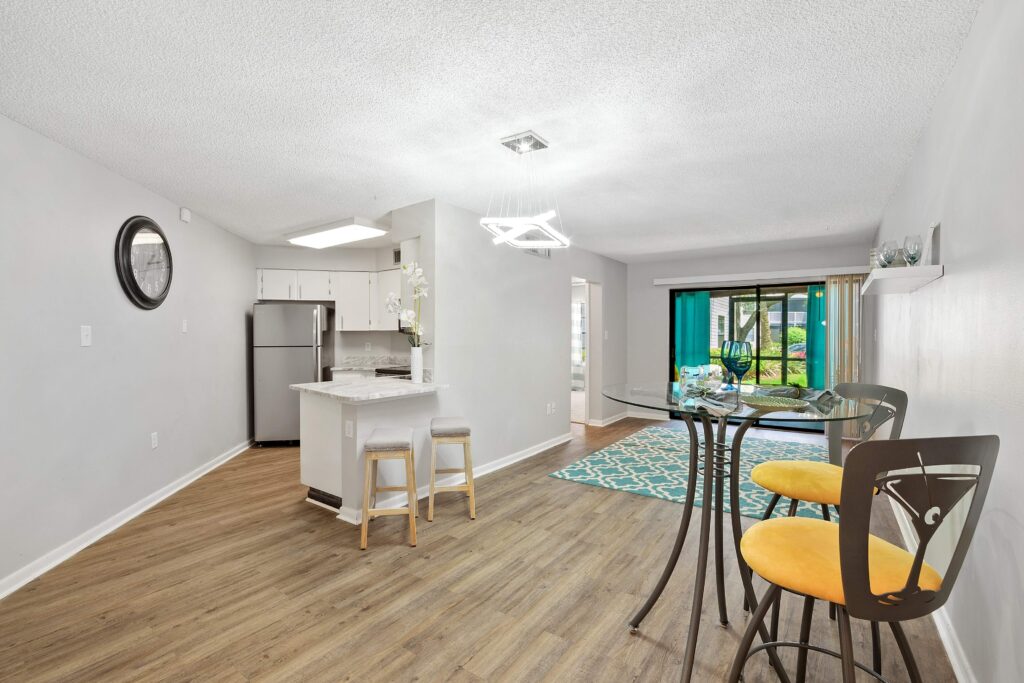
Here’s a link to the specific chandelier we used. Hard to believe this changed the look of the space so much for under $125.
And here’s vinyl plank flooring, which is super easy to install. So easy an 18 year old can do it…
Here’s a link to the vinyl plank flooring from Home Depot:
https://www.homedepot.com/s/vinyl%2520plank%2520flooring?NCNI-5
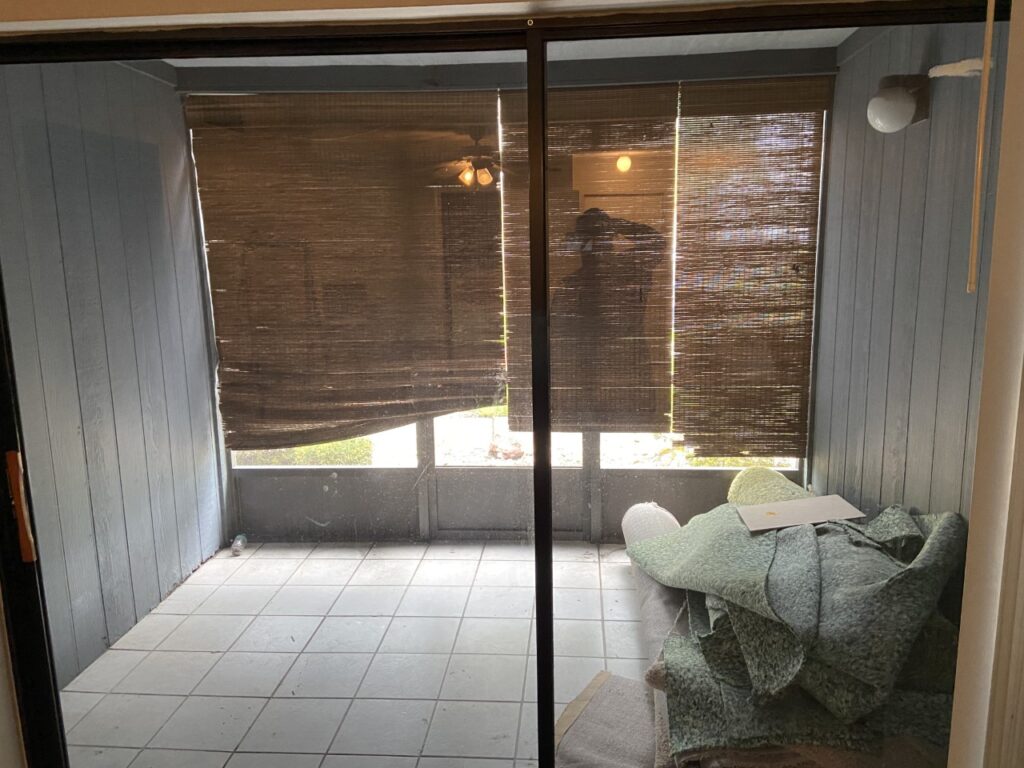
Back Porch
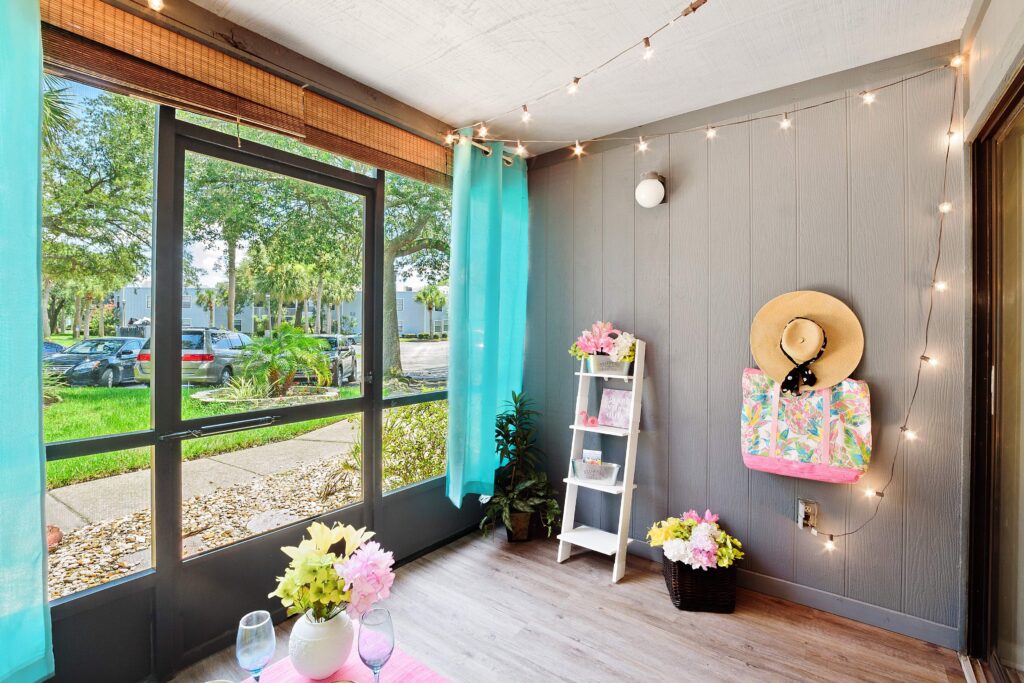
This was personally my favorite part! Eric let me do what I wanted in terms of decorating. That is really what I love to do. Here’s the porch before:
The only thing needed was vinyl plank flooring. We installed it right over the existing tile. And then I decorated Lilly Pulitzer style, but I did it using just Dollar Store items. All of the decorations here cost less than $50! I’ll create a separate blog on how I did it and what I used, in case you want to do anything similar.


The Sale!!
We were so happy with how this condo flip turned out! The highest sale price in the neighborhood was $92,000, but we pushed it and went for a price of $105,000. Luckily for us, the very first person who viewed it placed a full price offer.
When it came time for the appraisal, we left a sheet on the kitchen counter. In it we showed sales in the neighboring area that would support our price. We also left a list of all of the upgrades to the property. This prompted the appraiser to take those into consideration.
The property appraised and today we sold the unit for $105,000. This was the highest price in the community for a 1 bedroom unit in over 12 years! (since the market highs back then).
Please know, we anticipated this sale to happen two weeks ago, but it was delayed. This is the way things sometimes go, so be ready for it. Changes to lending delayed the financing. It was tense for a while, but remember that when you have the property, you have the asset, and although it may take longer, you will sell.
How much does it cost to Flip a Condo?
The Final Condo Flip Numbers
So…for the important part, how did the final condo flip numbers turn out?? We’ve put them into a spreadsheet. After walking you through the process step by step, I wanted you to see the actual condo flip expenses and profit.
It’s weird sharing everything so openly. But I want you to see what a realistic return from flipping can be.
The only thing I ask is that you sign in to my site to get the password to view the document. This way I’m not just publicly posting it. Once you sign up, you’ll get the password immediately and you’ll have access to everything in my resource library and you’ll be added to my email list so I can email you occasionally about home flipping and flipping opportunities. Don’t worry, I won’t fill your inbox with a bunch of messages.
Here’s the signup for you to get the password. Input your info. You’ll automatically be sent the password.
How long does it take to flip a condo?
Our process in this step by step condo flip took 3 weeks for the condo renovation as seen in the photos. We were on the market for only a day or two before receiving a full price contract. The buyer was obtaining financing, so that process took 30 days to get to closing.
House Flipper Buyer’s Guide:
If you’re looking for an organizer to help you with your next flip, download my guide:
- Home Flipping2 products
Here are other posts you may like:
Marketing Rental Property for Maximum Income Successfully
How to use Leverage in Real Estate, An Analysis
Here’s a Pinnable link, in case you want to Pin this for later:
Amazing story – thank you for sharing! My favorite part is that you provide so many exact details.
Wow. For someone like me who wants to get into doing this and learning as much as I can… THIS!!! I cannot thank you enough for all of this information. Amazing, amazing!!! Thank you sooo much.
Thank you so much for your wonderful comment! When I posted the info, I could only hope that someone would read it and that it would help. I’m so very happy to hear that it was helpful to you and I hope you’ll let me know how it goes for you!
hi great info but I don’t see the links (for instance living room fan/light)
HI Brit! Thanks so much for reading and commenting. The links to the products should all be in the writeup. I tried to put a link to every item we used. The link for the living room light is under the living room photo. It’s a great light and only cost us around $125. Please let me know if you still don’t see the links–and if you’re viewing the page on a mobile device or desktop–maybe I need to change some setting on the page if the links aren’t showing. Thank you!
Hello there,
Thank you for posting this very helpful start to finish project. Do you use a staging company to stage your flips? Is there a cost to stage?