
This shiplap project is a great option for your leftover shiplap boards.
I’m renovating a condo for one of my fix and flip projects, and I had some leftover shiplap pieces from another project that I wanted to use. This DIY project provided a perfect entryway accent for the small area I had to work with. Here’s how you can create it yourself.
Throughout my site I provide affiliate links to products that I hope will help you with your DIY project supplies. As an Amazon Associate, I earn from qualifying purchases. This means that I may receive a small commission if you use these links to purchase products, but it does not change your price in any way.
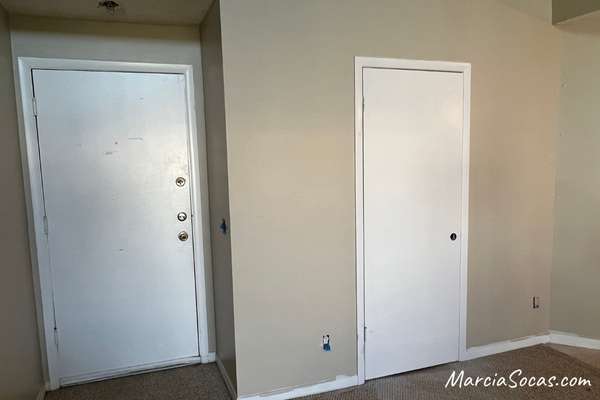
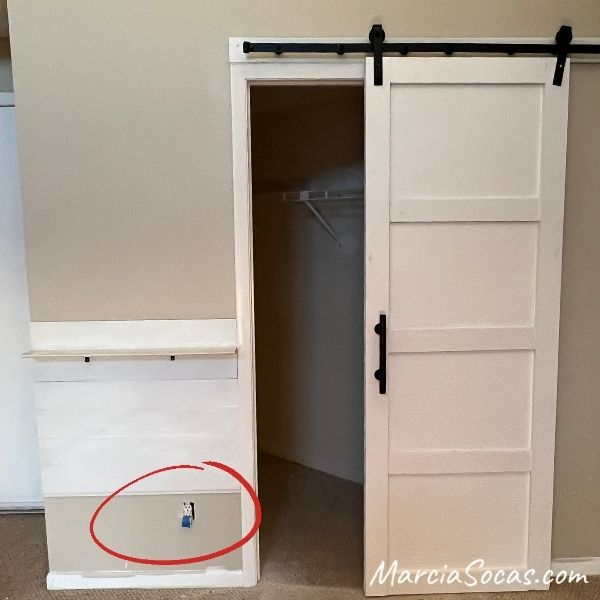
By the way, here was my starting point for the project:
Materials:
- Leftover shiplap pieces (the cheapest way to start a project!)
- Outside corner trim
- 2 L-brackets to support the shiplap shelf
- Hooks
- Caulking
Power tools:
- Nail gun with air compressor
- Miter saw (this is what I used, however I didn’t cut any 45-degree angles so a regular table saw would work fine too)
I purchased my materials at Home Depot, but you can also find them at your local hardware store.
Here’s a link to some Home Depot deals and coupons to help with your project.
The Project
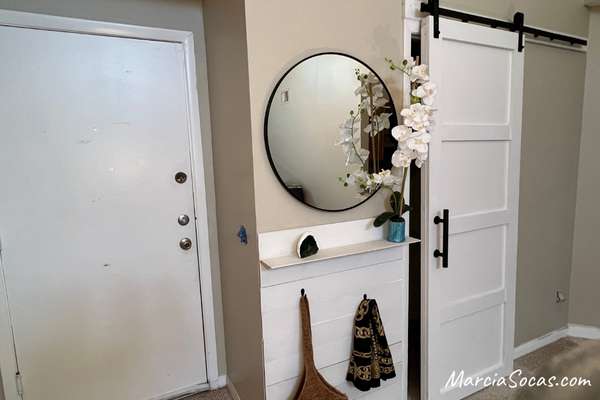
I created just a half wall located at the entryway next to the front door. This would allow for the condo to have a bit of a modern farmhouse look with the shiplap accent wall and shelf. The addition of the mirror and hooks make the diy shiplap wall very functional in the smaller space this condo offers. It’s the perfect place to drop your mail, charge your phone, and hang your bag, umbrella, scarf, etc.
The Steps in Creating Your Shiplap Entryway
Creating the Shelf
The first thing I did was to measure the space from the edge of my pantry door over to the wall. I then marked the back of the shiplap piece and cut my pieces to size.
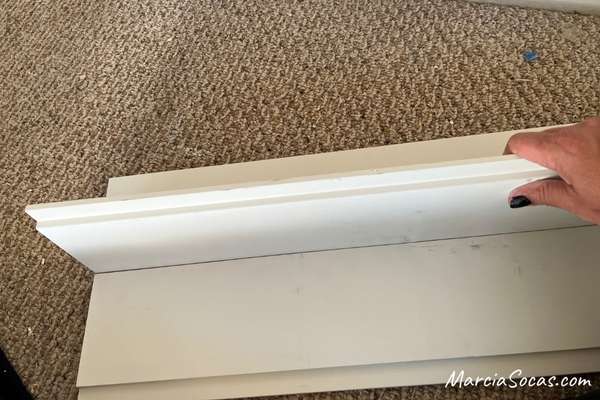
The next step is to create the top shelf. Do this using some leftover shiplap and avoid the extra cost in buying a shelf. Using scrap lumber is always a plus for me! The best thing about the built-in shelf is that it eliminates the need for a console table, which wouldn’t fit in this space anyways!
This is how it looks from the underside of the shelf. It’s important to orient it this way so that the shelf top itself in smooth, without the tongue part of the shiplap piece showing on the top of the shelf ledge.
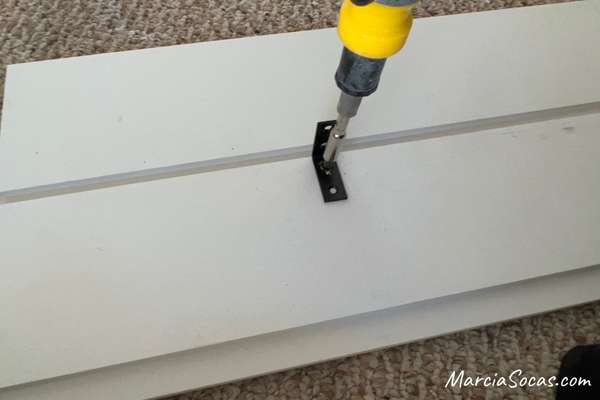
You can utilize the shape of the real shiplap boards and set them together like a puzzle piece, fitting in the shiplap shelf. It fits well but doesn’t sit in tightly like a jigsaw puzzle piece. So you’ll need to reinforce this area. The best way for me to do this was to use L-brackets and small screws.
Create Your Shiplap Entryway Wall
Start the first board at the bottom of the wall, just above your baseboard. Use your level to make sure it’s level since all of the other boards will build on this one. If you have a long wall that your creating a shiplap entry for, you’ll want to use a stud finder and find the studs so that you’ll know where to place your nails. However, in a small easy diy space like this one, it wasn’t really necessary because I knew there’s always a stud that runs along the end of a door frame and also at the corner of the wall. Use your judgement if you have a small space. Using a stud finder and marking the vertical line location of the studs doesn’t take much time and would certainly make for a more sturdy shiplap wall.
If you don’t have a baseboard, and you’d prefer to run the shiplap down to the flooring, you can start with your bottom board at the bottom of the wall and then add a piece of bottom trim to make the shiplap look more finished.
Please note that in a traditional shiplap installation, you install the shiplap boards with the tongue facing up. This allows you to place the nail holes in this protruded area and then they get covered up by the next board. However, in this shiplap entry wall with shelf, I ran the shiplap upside down so that it would fit properly into the shelf piece at the end.
As a result, you do see my nail holes, but we will cover these up in our finishing touches to our shiplap foyer.
Dealing with an Outlet at your Shiplap Entry Wall
On this foyer entry wall, I do have an electrical outlet. I had a handyman help me use an extender box at the outlet. This way the outlet would sit flush on the shiplap. Once that was done, I simply cut around the outlet and then added the face place over the shiplap. If the cutting doesn’t go as smoothly as you’d like, please know that there are oversized face plates. These can hide any imperfections in your cutting.
Moving up from there, add the next row, and the next, up to the height that is comfortable for you.
At the top of the wall, attach the shelf and screw it securely into the wall. Once this top piece is done, you can add your hooks wherever it suits you best. I love how the hooks create some storage space for bags and other hangables. It helps utilize the whole space in a small condo like this.
Finishing touches for your Shiplap Entryway Wall:
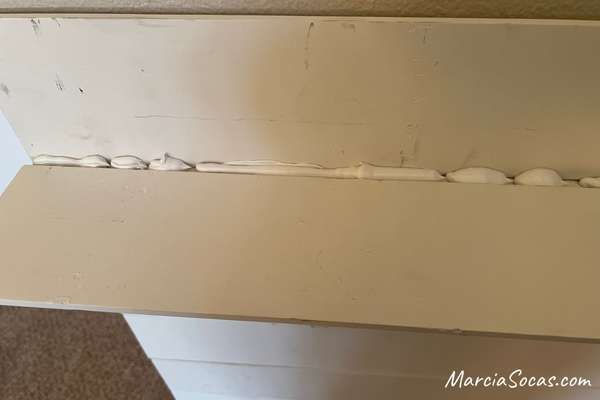
Cover your nail holes with caulking or wood filler. I used paintable caulking because I then also used the caulking to finish the shelf area and make it look more seamless.
Add the caulking to the space between the shelf and the shiplap wall:
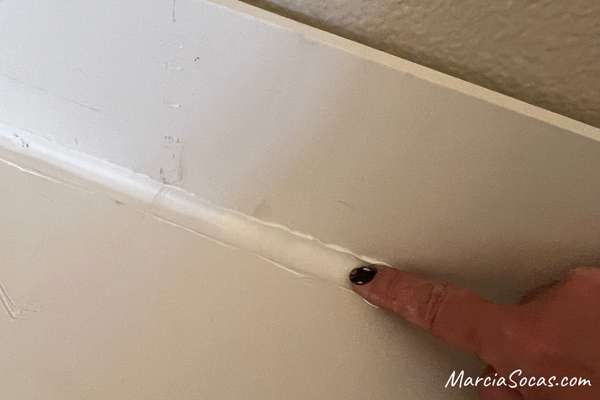
Then smooth it down with your finger to give it a nice finish (wipe away the excess):
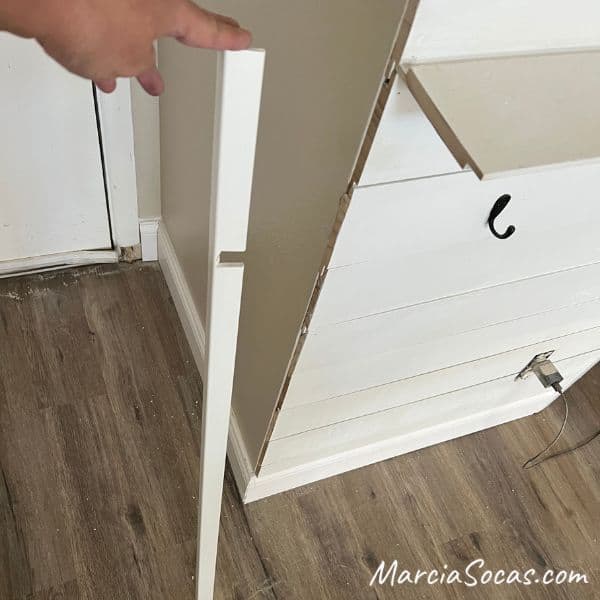
Adding a Corner Piece
Well, this doesn’t look very good from the side…
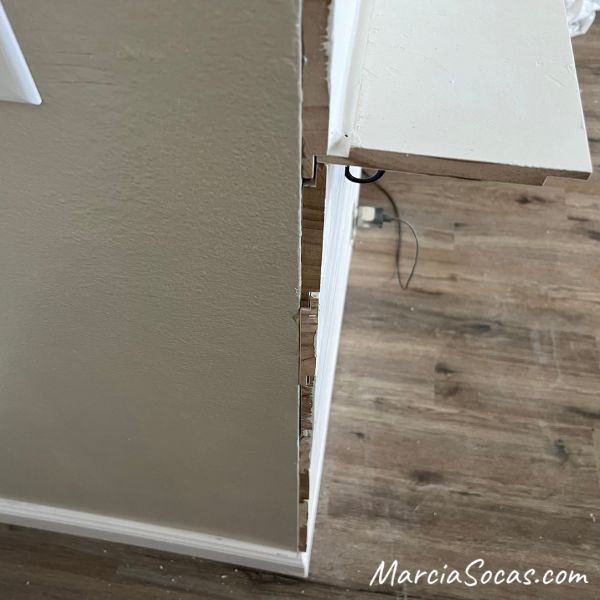
You can add a corner piece to finish off the edge of your project by the side of the wall that is exposed, by the entry door.
You’ll want to cut the trim piece with a multitool so that you can slide it right over your shelf and have it all look cohesive.
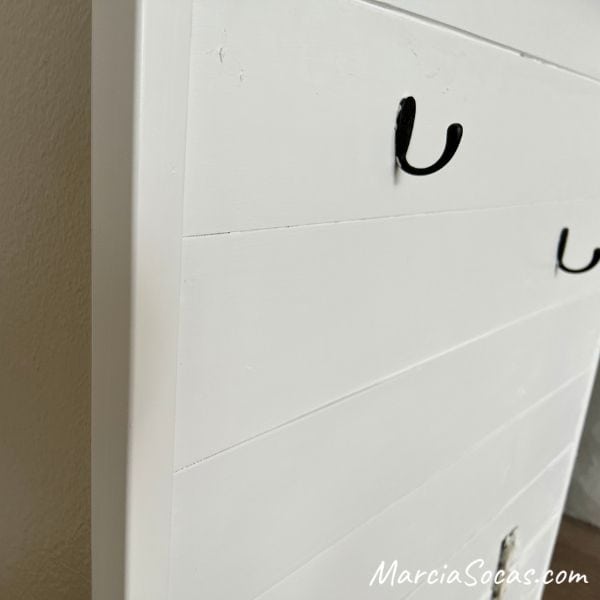
Here we go, this is much better!!
Now add some hooks to make it more useable.
The end by the pantry didn’t need any finishing since it abuts against the door jam. After that, add a couple of coats of paint to finish off the shiplap foyer area.
Caulk and Paint:
I used a Sherwin Williams white paint. It’s a great way to accent shiplap walls against a darker wall paint color. It also keeps things neutral since this is a property that’s being flipped. I love shiplap projects that showcase different paint colors, but I had to stay neutral with our white shiplap foyer walls at the entryway.
Note that if you’d like a more rustic look, you can use a painting technique that utilizes painting and sanding to give the look you want for your new spaces.
The Final Photo:
In the after photo, you’ll see a few modifications were made to this space. It is a fixer upper condo flip that I was renovating. So, the after photo not only shows the change that the shiplap entry wall made. It also shows the new floor that we installed. It was luxury vinyl plank flooring that has a look of hardwood floors. There’s also a barn door that I created from the plain pantry door you see in the “before” photo. It was another easy diy project. You can learn how make that interior door to barn door conversion here.
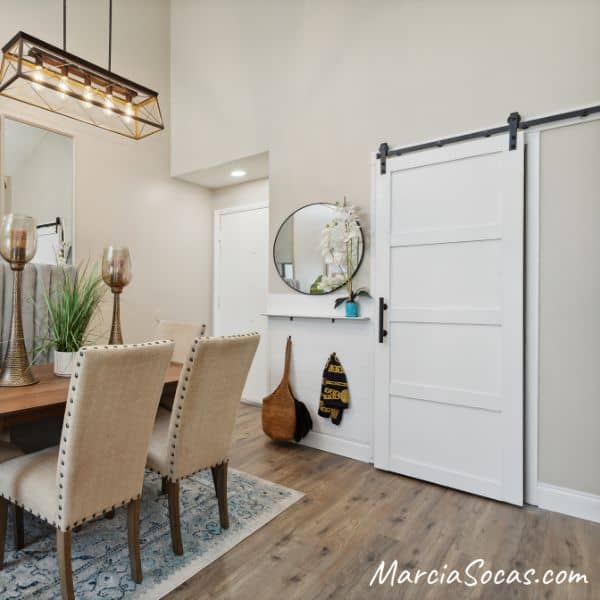
The living room in this condo flip will also feature a built in bench seat. You can subscribe to the blog to see that project and instructions once it’s ready to post. I’ll also be adding vertical shiplap in the bathroom for a different look. I love diy home projects and would love to share more of them with you!
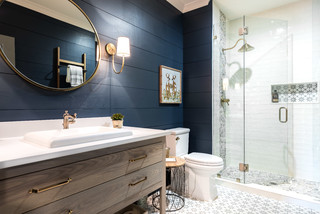
Some Inspirational Photos
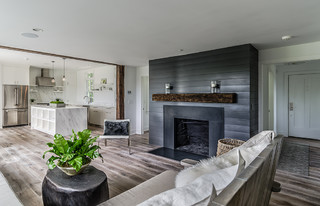
Although we’re all used to seeing a beautiful white shiplap wall, lately I’ve seen a lot of shiplap walls painted in different colors and the look is extremely striking! They make a bold statement with a pop of color. The color can give a fresh look to an interior design style which has stood the test of time.
Alternatives to the Shiplap Entryway Foyer Wall
Different ways to achieve this look could involve using shiplap wallpaper. I love a good peel and stick wallpaper that can be easily removed as your tastes change. Another good idea would be to use shiplap paneling. This is a large wooden board that looks like several shiplap pieces.
But if you know you want the rustic charm that a shiplap entry wall can give, I really do recommend trying this project. It is easy, even if it’s your first time tackling a diy project.
I hope your horizontal shiplap walls serve as a fantastic focal point for your entry way and showcase your unique style in your entire room.
Have a great day and please send photos of the look in your own home!