
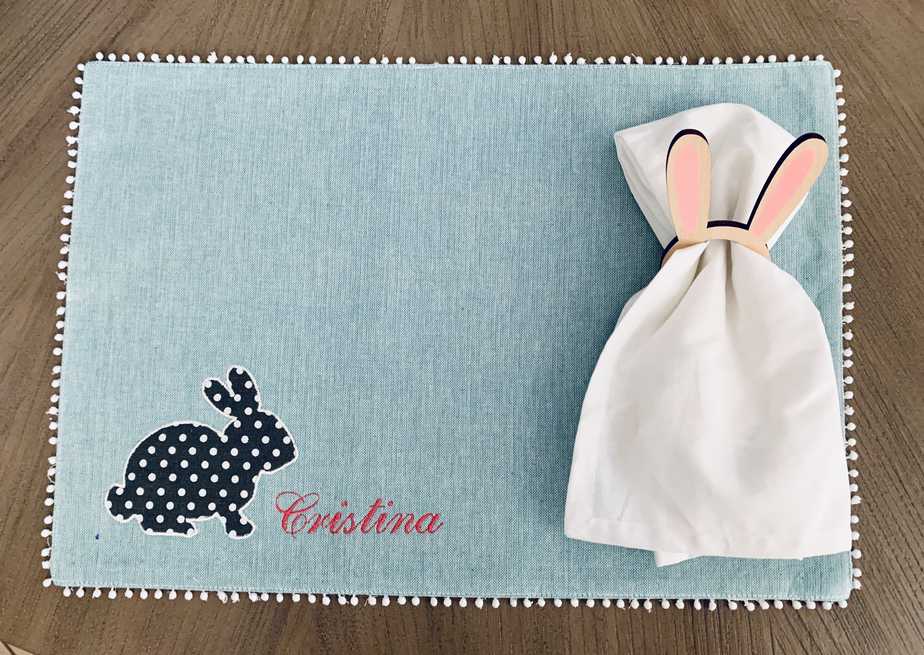
Applique Embroidery Project
I love sewing, embroidering, and applique, but I’ve learned that (for me) my sewing ability for an entire project doesn’t come out as precisely as I’d like.
So, often it’s quickest, easiest, and looks best when I start with an existing product (like these adorable place mats I found at Home Goods) and simply personalize them.
This page contains affiliate links to products in the hopes of making finding these products easier for you. If you purchase a product from an affiliate link, I may receive a small commission. As an Amazon Associate, I earn from qualifying purchases.
What’s applique and why would I use this technique?
Applique quilting or applique embroidery is the process of adding a piece of fabric over a base fabric and joining them. The result is the creation of new designs, a picture, pattern, or applique shapes.
An advantage of applique embroidery is that you can use different fabrics and different colors to make something unique. This can be done using leftover fabric, making it cost efficient and a fun way to use scraps you may have otherwise thrown away.
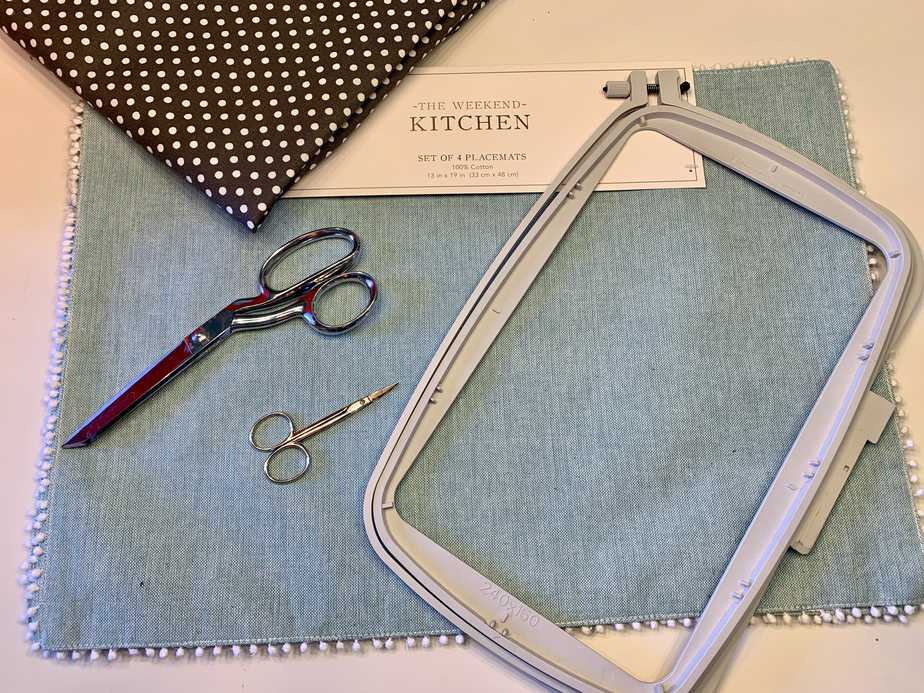
Products used in the Easter placemat applique embroidery project:
- Embroidery machine (I use a Husqvarna Viking Jake 35), but you can use a simple sewing machine as well! (steps for this are at the end of the embroidery machine applique tutorial)
- Placemat
- Polka dot fabric for applique bunny
- Fabric scissors
- Small scissors for more precise cutting
- Stabilizer
- Large embroidery hoop (I used 240 x 150)
- Embroidery thread
Step by Step Tutorial with photos of Applique Embroidery Project
How to do applique embroidery
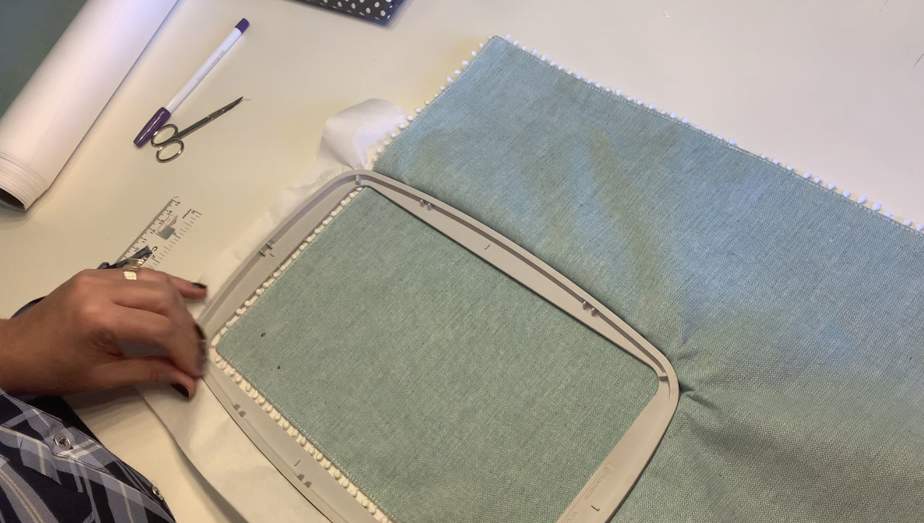
The first thing I did was measure where I wanted the bottom left corner of the design to be. This way, once I put the project into the embroidery machine, I could line up the mark with the edge of the design. This allows for all the placemats to look uniform.

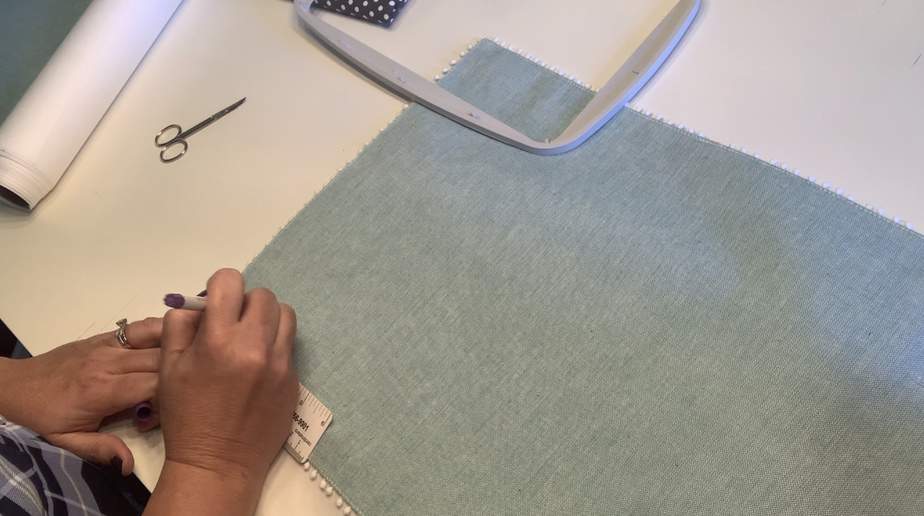
Once it was marked, I hooped the place mat.
Hooping for applique embroidery
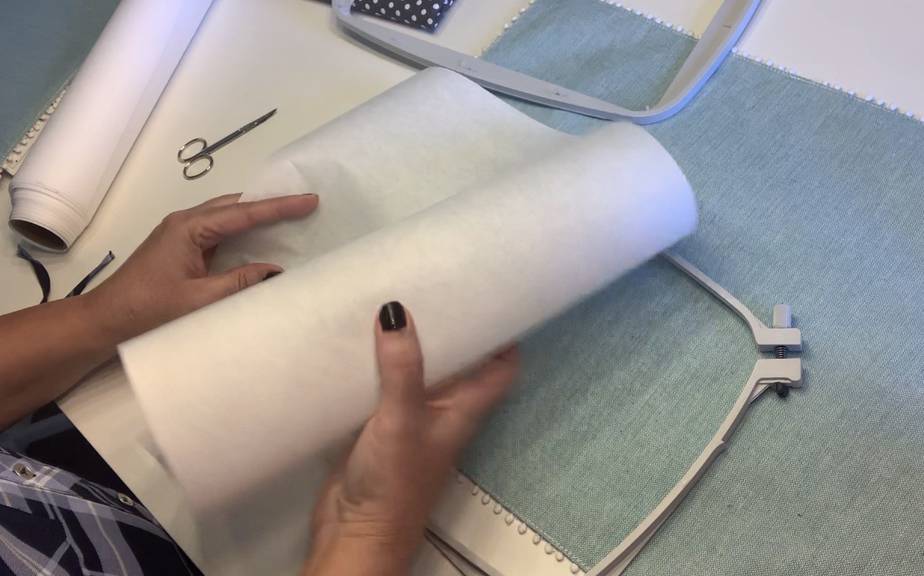
To start, I cut a piece of sturdy stabilizer to add to the bottom of the hoop. I used cutaway stabilizer (a piece of medium-weight cutaway stabilizer should would perfectly for you). This means that you will still see the stabilizer on the back of the fabric when you’re done. But I was ok with that for these placemats.
How to hoop for embroidery or applique: The bottom part of the hoop goes on the bottom, the stabilizer over that, then the placemat, and then the top hoop.
Be sure to tighten the screw completely, as this is a mistake I’ve made before and everything has come loose later in the process leading to frustration and a big mess! It is important to hoop projects correctly to avoid heartache later.
As I mentioned above, I used a 240 x 150 (5 x 7) hoop, as this is the largest hoop for my machine. If you have a different embroidery machine with larger embroidery hoops, you may be able to create a larger area of embroidery or applique designs than I was able to.
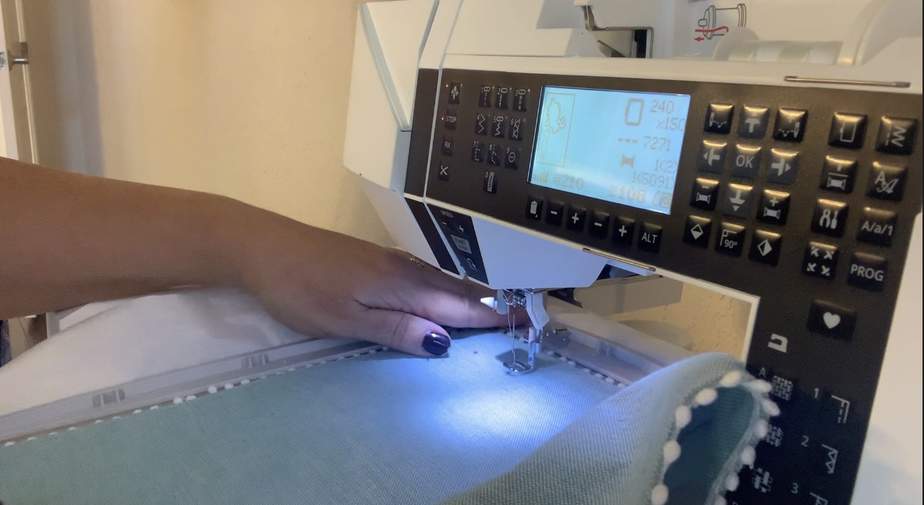
Once you’re marked and hooped, you’re ready to go into the machine!
Prepare your embroidery applique project design
If you’d like to use the bunny that I used, you can grab the silhouette from my free resource library and use your embroidery software to covert it to an applique for your machine. Or, just grab a downloadable bunny applique from Etsy to save some time.
Begin applique stitching
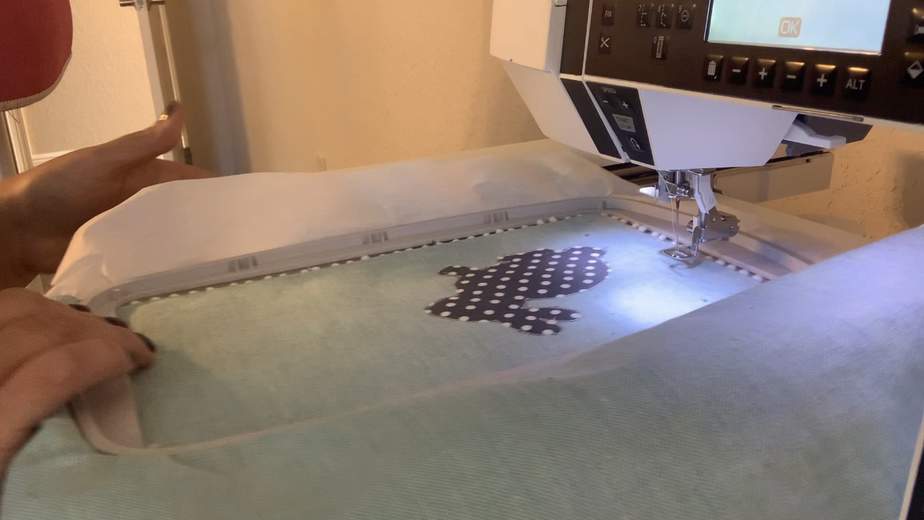
I lined up my mark with with the edge of the embroidery, and got started. The machine will first stitch out an outline stitch and stop. This will show you where to place the applique fabric because it’s where the applique design will go. It is called the placement stitch.
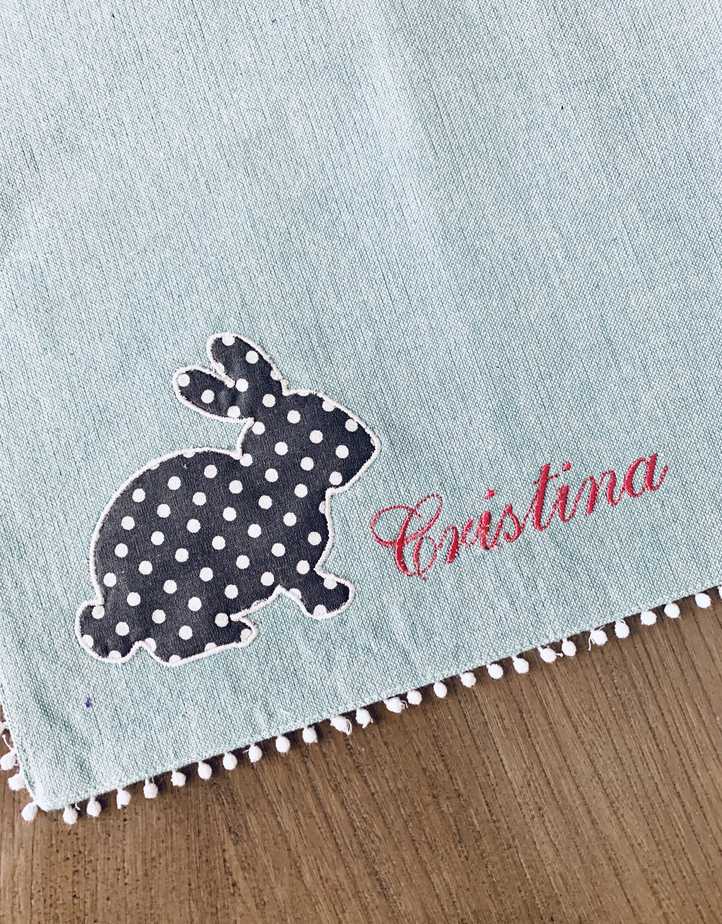
For the next step, place your fabric for the applique over that first set of stitches. As you can see, I used a polka dot fabric. However, you can add your personal touch and choose a different fabric for your project needs. Just imagine how adorable this bunny might look if it were appliqued in something like a faux fur fabric. You can really use your creativity in choosing the fabric piece for your applique embroidery design look and feel.
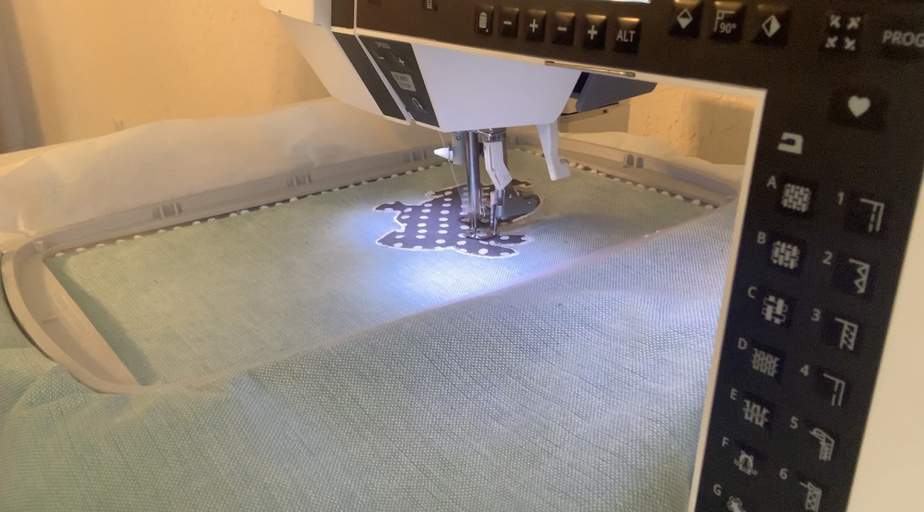
Once you place the applique fabric onto the design, the second set of stitches will stitch out to hold it in place. This is called the tackdown stitch or tacking stitch.
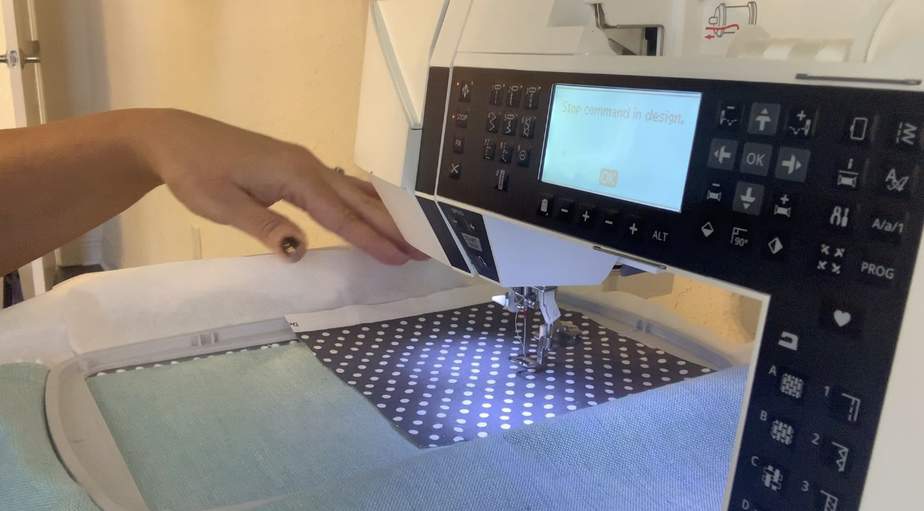
Then it’ll look like this:

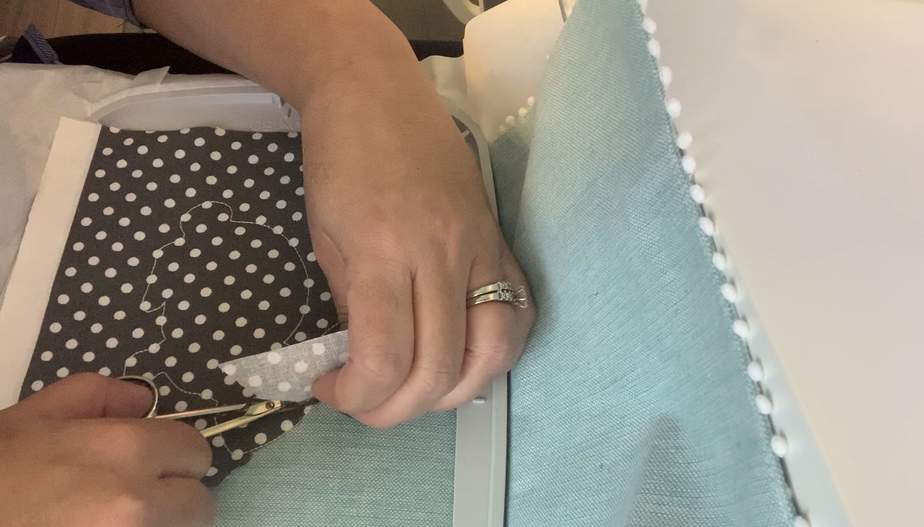
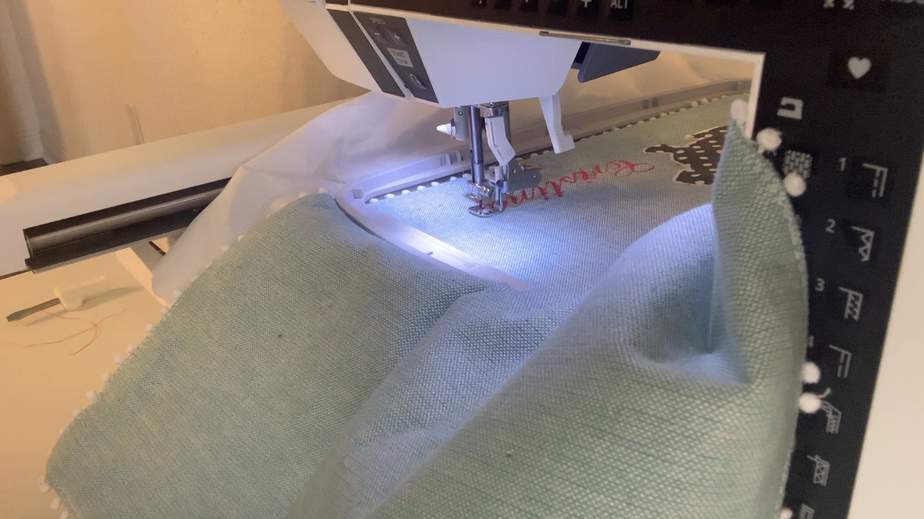
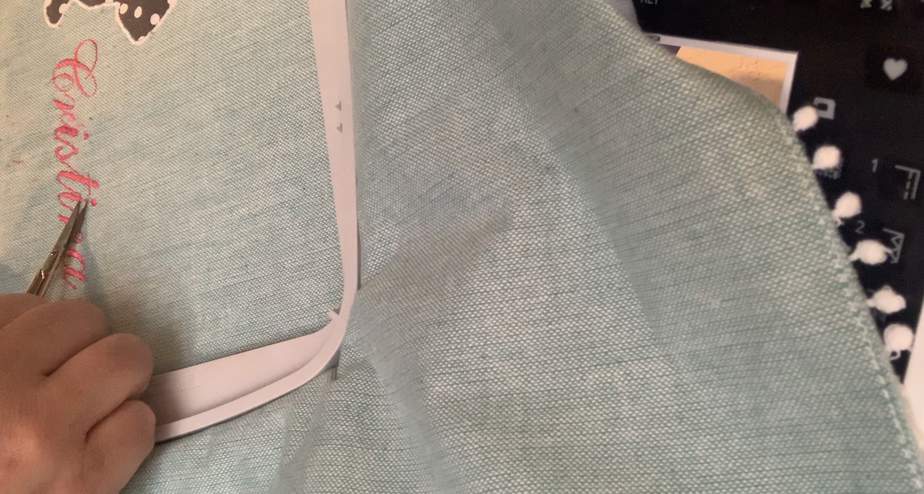
Take the hoop out of the machine but do NOT unhoop it. You’ll now use sharp scissors to trim around the design. Trim as closely as possible.

Then put it back in the machine and hit “start” again so that it can place the thicker border stitch around the edges.
I also changed thread for the contrasting color for the name. A great thread color can really make your design pop.

Alternate method of applying applique using a sewing machine:
If you don’t have an embroidery machine, you can create this Easter placemat using a sewing machine and just a few additional steps.
- Download and print a bunny silhouette from the internet, or just grab the one I used here from my site’s library. It’s free. Tip: print it onto a sturdy paper like cardstock.
- Cut out the silhouette from your cardstock. This is your printed template for your placemats.
- Place the template onto your applique fabric and draw the outline using a fabric marker. Do not cut out the applique piece at this time, you can cut it to place it on the placemat but leave a good amount of room around the applique template.
- Using straight pins, pin down your applique fabric onto your placemat exactly where you want it to be
- Slowly use your sewing machine to stitch along the bunny outline you created. It should look like this when you’ve completed this step:

6. Then cut out the fabric on the outside of the stitching
7. Look through your machine presets for stitches and use a tight stitch (like a really tight zig zag not a straight stitch) that will create the border around the bunny. You’ll need to slowly swivel and move the fabric and placemat to run this stich around the Easter bunny border. Have patience in this step and it’ll come out great! (Alternatively, you can use a blanket stitch to finish off the edge.)
8. Using a sewing machine, I wouldn’t add an entire name, but just the Easter bunny applique or the simple addition of an initial would look great and can be done with the sewing machine.
Happy Easter!
Pin this for later:
If you’d like to receive notice of more embroidery projects or home made projects, you’ve come to the right place. Just sign up for my newsletter and I’ll send you projects once a month. Projects will include basic embroidery and personalization projects using machine embroidery applique. In addition to applique designs, I’ll have simple projects to personalize a tea towel, kitchen towel, baby blankets. I love to use my embroidery machine to make wonderful things like teacher gifts for the end of the year or personalized gifts for baby showers or kids. I hope you’ll join me and sign up for my newsletter!
Tip: While I provide here a downloadable for the free design of the bunny I used, I am not a seller of embroidery designs. I love a good project though, and wanted to share with you sites that I do like for applique designs or other type of embroidery. Embroidery Library has a big collection of downloadable design file choices, as does sweet pea machine embroidery. Additionally, Etsy has been a great resource when I need a quick download for an embroidery file. It’s so easy to search their database and find the design that you’re looking for in applique work or other embroidery files. I hope these sites help you as much as they’ve helped me!