
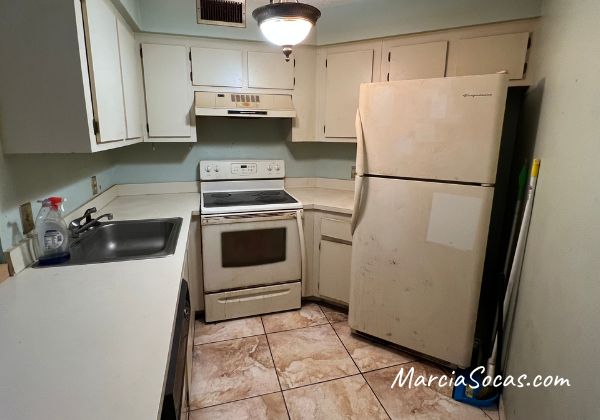
I was recently updating this kitchen and I really needed to get something done with the backsplash. I had spent a lot of time already cleaning, painting the off white cabinets a more modern color, adding new pulls, and having granite installed.
Throughout my site I provide affiliate links to products that I hope will help you with your DIY project supplies. As an Amazon Associate, I earn from qualifying purchases. This means that I may receive a small commission if you use these links to purchase products, but it does not change your price in any way.
When you look at the initial kitchen starting point, you can see just how much cleaning and prep work I had spent hours on:
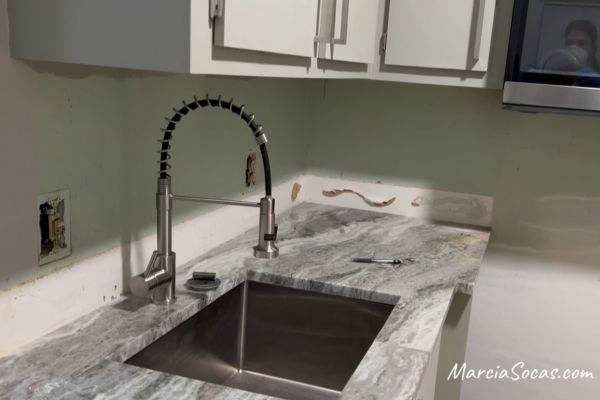
At this point, I was tired. I was ready to get something done with the backsplash that was quick and easy and inexpensive. I have worked before with one day tile setting projects, using an adhesive tile mat. But I didn’t want to deal with the grout and the cleanup that a tile backsplash entails.
I really wanted to be done in just one day on this one; and I had what turned out to be a great idea!
Here’s where it was just before the backsplash project:
I had some shiplap boards left over from one of the other DIY projects I’d worked on in this condo (a DIY Shiplap Fireplace). It occurred to me that creating a shiplap kitchen backsplash might be a really easy way to add visual interest to the kitchen design, while remaining an affordable DIY project. And, the most important thing to me at the time was that the whole thing could be completed really quickly and give a great look to this small kitchen.
Because again,
I. Was. Tired.
Here’s how my kitchen shiplap backsplash went:
Supplies, sold at all the home improvement stores
- Shiplap boards (I used 8 for my shiplap backsplash)
- Nail gun and compressor
- Outer trim pieces
- Paint of choice
Why I now love a shiplap backsplash
- Quick – This project took just a couple of hours.
- Inexpensive – especially if you’re working with a small space like I was with this kitchen. I only had to pay for 8 shiplap boards, a few nails in the nail gun, and one outer trim piece.
- Minimal cuts – Since the height of the shiplap is just about the same as the outlets (good news here!), I just had to make straight cuts. It was easy
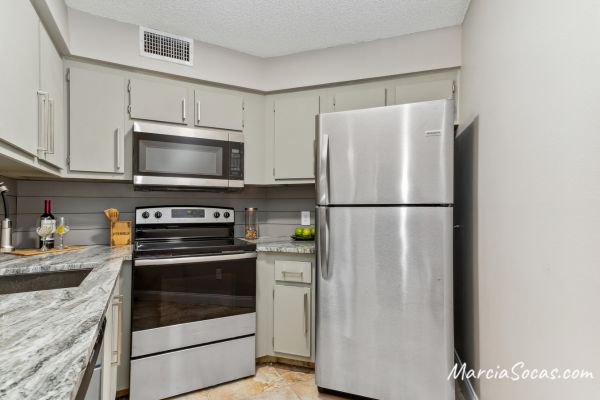
- Great covering – The shiplap really covers up a lot of imperfections. From stained walls (like the ones in this condo were), to old water damage, or ugly painted walls, its a great wall covering.
- Color Personalization – You can choose to paint your shiplap in any way that complements your kitchen. You can use bright colors, muted tones, or a simple white design. The potential for various colors makes this an excellent choice for your backsplash area.
Design Personalization – I chose to install my shiplap backsplash horizontally. But a horizontal shiplap isn’t your only option of course. You can choose to do a vertical shiplap backsplash and get a totally different look
My Kitchen Shiplap Backsplash Project
I first used a sample piece of shiplap and cut it to size for the length of my kitchen wall. I noticed that the height of the shiplap was the same as the size of an electrical outlet. So that meant that I could do this project without too many cuts whatsoever.
Painting my Shiplap
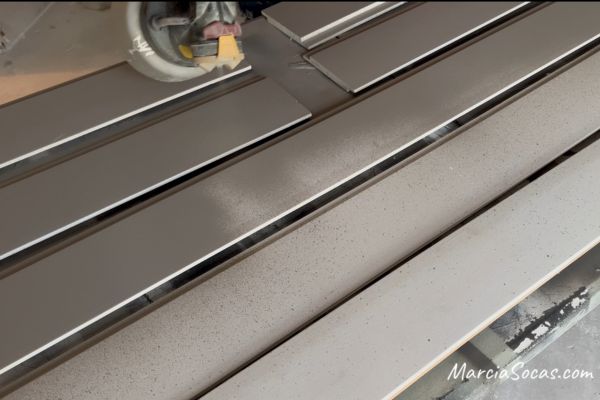
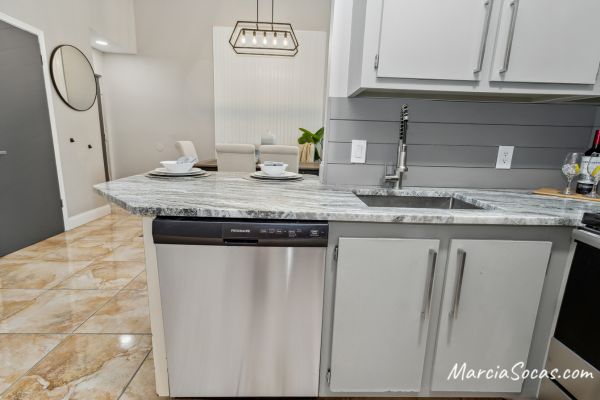
I cut my shiplap to size and then I painted it using a paint sprayer. You can paint it by hand using a brush, but it’ll just take you a little bit of extra time to make sure that you get all of the tongue sections painted well so that when the shiplap goes together the color doesn’t show any white at all. I used a gray color that coordinated with the interior design and colors throughout the rest of the condo renovation. White shiplap walls are gorgeous, but a white shiplap backsplash would have given too much of a farmhouse style to my condo. I love the way the gray looks more subdued but still adds visual interest to the kitchen walls without being a huge focal point.
Placing the first shiplap plank
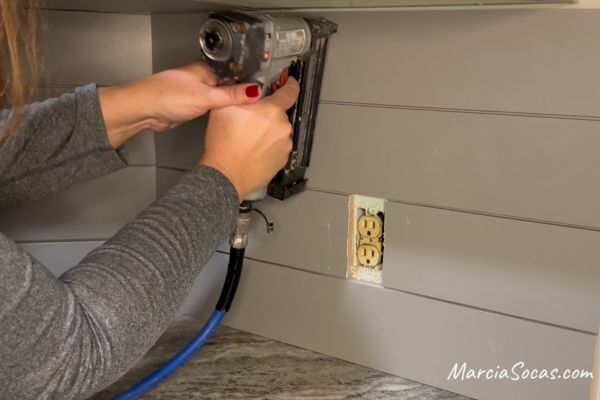
I placed my first board in the kitchen, and I made sure to mark where the outlets were.
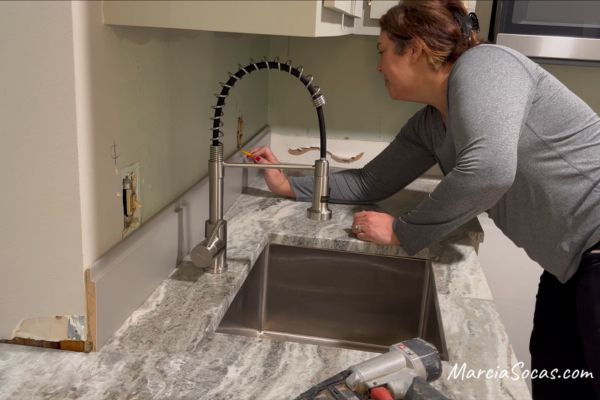
I needed to cut just the little tongue part of my shiplap to make sure that it would not go over the outlet area. A tool called a multitool was perfect for this. It worked really well for me and was quick. Once I notched out that section of the tongue, I simply placed the shiplap in place and secured it using a nail gun.
Normally with shiplap I only apply the nails at the tongue part of the shiplap because then it gets covered up by the next piece and I don’t have any nail holes anywhere in my projects. However, I didn’t want the shiplap to be flopping around loose at the bottom so for this first piece I did use the nail gun to secure it not only at the tongue but also at the bottom of the shiplap.
You can choose to add some liquid nail to the back of your shiplap if you’d like extra security. I don’t because if someone wants to remove the shiplap backsplash in the future, I’d like for them to be able to do so without damaging the wall behind it. And I worry that liquid nails pulled off would make the drywall peel if someone’s trying to pull horizontal planks of wood off the wall that have construction adhesive on them.
Going around outlets with the shiplap backsplash
I added my next piece and again marked where my outlets were on the wall. I cut the shiplap accordingly and then added those into place using the nail gun again.
Since the shiplap is the same height as the outlets, I just had to make straight cuts and take the wood to the edge of the outlet area.

For best results, you’ll install new outlets and extenders and you can buy jumbo or oversized plate covers if you need to cover any gaps from cutting your wood too short or anything.
Continuing up the wall with your shiplap backsplash
I continued this way up the wall. It took me four pieces of shiplap to get to the top of my backsplash and fit right underneath the bottom of the cabinet.
If the shiplap doesn’t end perfectly
Next, I did the same thing in the area behind the stove and cut the wood to go all the way to the next wall.
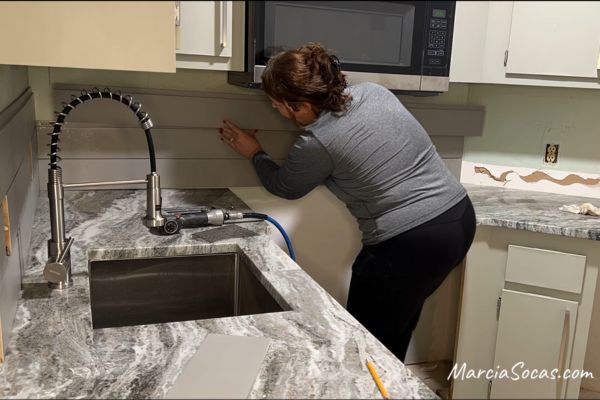
I went up to the area behind the microwave. It was necessary to cut a little bit of the tongue part off of that last piece of shiplap that went under the range hood. That’s all you need to do if yours doesn’t fit perfectly. Cut that top piece as needed. Since it’ll be up under the cabinets, you don’t need to be a perfect carpenter for it to look good.
Finishing up
Next to the refrigerator, I also added the shiplap pieces going around my outlet once again.
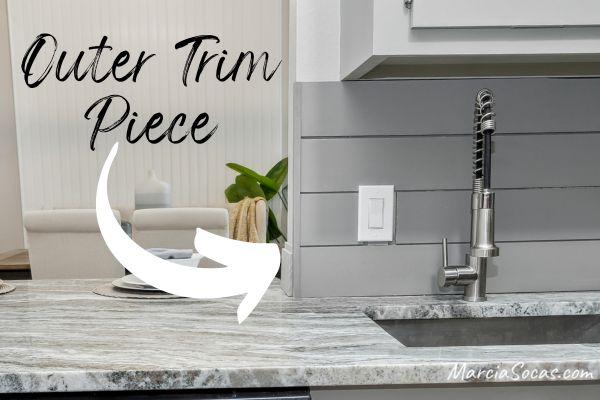
After that I put my appliances in. Then I added little trim pieces on the edges to give my project a finished look.
The entire project only took eight pieces of shiplap total. It ended up costing well under $100. And, it took only a few hours to complete the project from start to finish.
I hope this showed you that shiplap can be a great alternative to other backsplash options. It’s a great way to update the kitchen really quickly for sure!
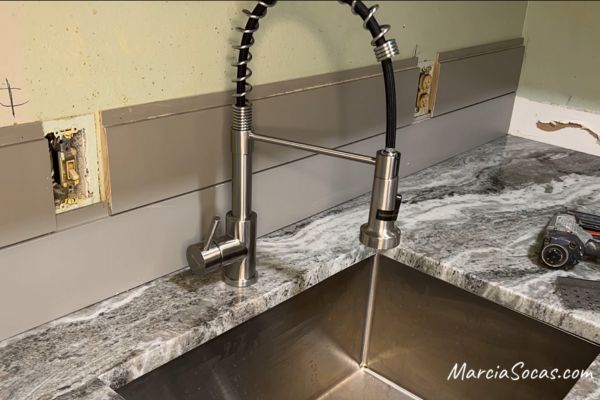
The Outcome:
very nice