
Creating a shiplap accent wall with electric fireplace insert. My favorite DIY project to date!
I knew Shiplap could be used for some great DIY projects, but I never imagined I could DIY this in just two days.
Throughout my site I provide affiliate links to products that I hope will help you with your DIY project supplies. As an Amazon Associate, I earn from qualifying purchases. This means that I may receive a small commission if you use these links to purchase products, but it does not change your price in any way.
Full tutorial, DIY Shiplap Fireplace Wall
First step, planning:
I was working on this condo flip and wanted to give the family room a modern shiplap fireplace. I thought this was the perfect addition of a shiplap wall that didn’t take over the whole area. I’d seen a shiplap electric fireplace DIY project on TikTok and I knew that it would be a great option for this space.
The only thing was, I had to figure out how to do it!
You’ll want to first figure out the size of your fireplace. For me, 50″ wide seemed perfect. It would be a substantial feature wall without taking up too much space. The ideal size for your own shiplap fireplace may be a little different, it all depends on your room of course.
This is the specific fireplace I used. I liked it because it’s electric, and it can function with LED lights only (no heat) which works well for me in Florida. And it’s remote control operated as well as touch screen operated.

Here are the instructions showing how I did it so that you can create your own fireplace.
Supplies:

2×4’s, from your local Home Depot or Lowe’s


Step by Step tutorial:
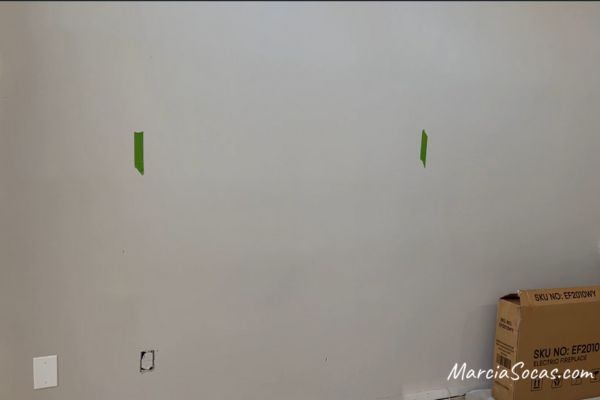
I started with this plain boring wall, identified where the studs are using a stud finder, and marked those with a piece of green painter’s tape.
The first thing I did was to create a side frame that would come out perpendicular to the wall.
To do this I cut 2 x 4s to the height of the wall. My ceiling height varies because I have an angled ceiling.

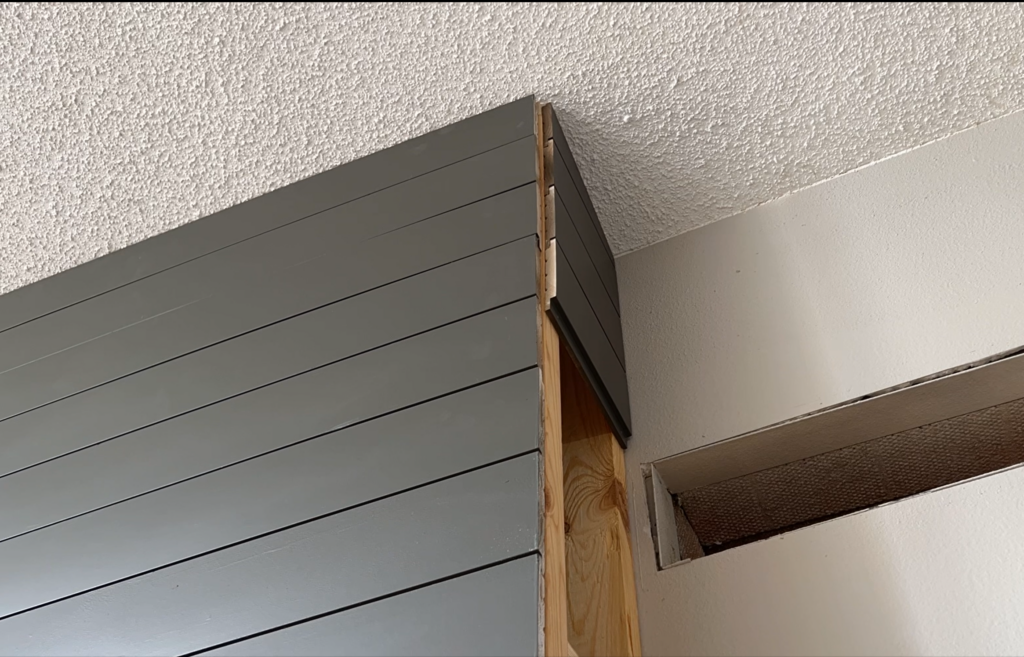
Since I had a difficult angle at the ceiling, I needed to cut the top piece at an angle and the bottom piece was cut straight so that it could sit on the floor.
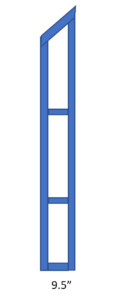
Sides of Fireplace
I cut one piece to go flush against the wall and another at the height of the ceiling, 9 1/2 inches from the wall. This gives enough depth for the fireplace to sit in the frame, and doesn’t come out so far that the fireplace surround doesn’t take up too much room. I want it to be the focal point of the room without taking over the entire room.
Then I put these pieces together to create a sturdy frame and added two support boards inside just to help strengthen it.
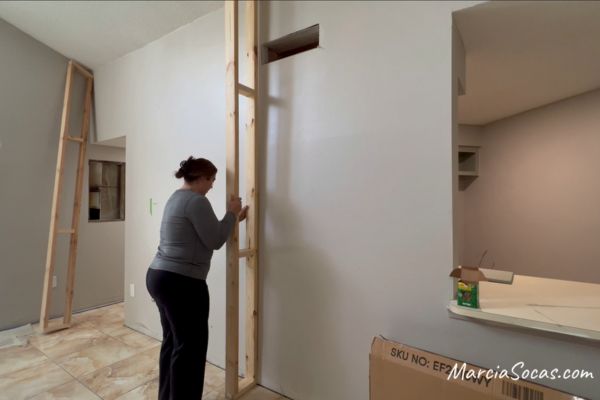
I created two of these frames and then attached them to the stud locations on the wall. (These will create the sides of your fireplace).
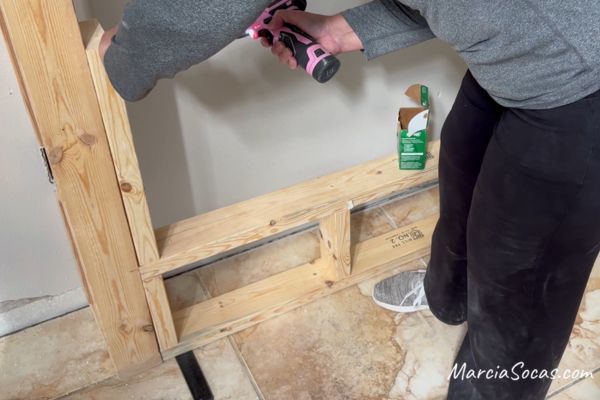
I used several long screws (construction screws) to make sure that it was very secure and also used the level to make sure that it was plumb (straight) going up the wall.
The Height of your Fireplace
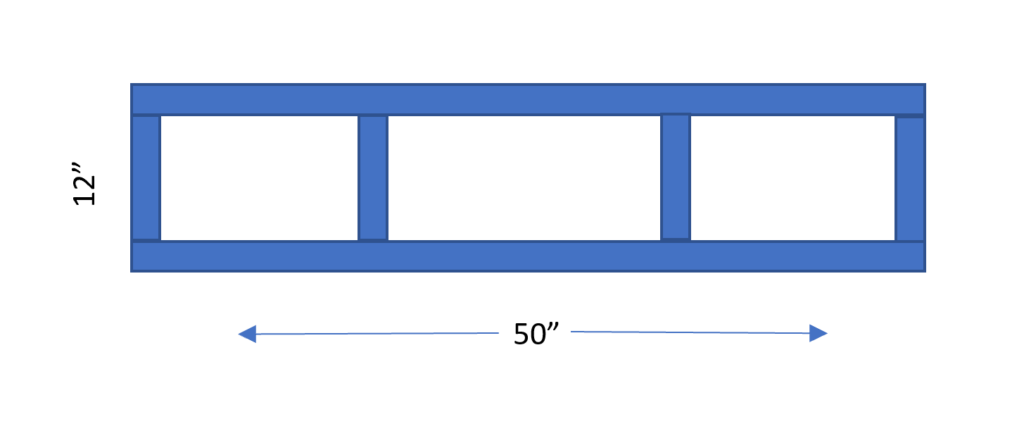
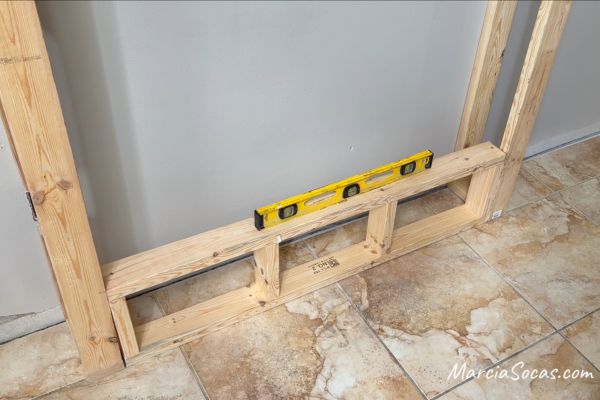
Once both sides frames were installed, I moved on to creating a bottom frame for my measurements. this bottom frame was 50 inches wide and 12 inches high. You can adjust for the height of the fireplace that works for you.
I put this together with two additional two by four pieces that supports on the inside this fit perfectly inside my two side frames.
The next step was to level it. Mine was not level, so I needed to add a Shim to the bottom left side so that it would lift the frame a bit while I screwed it into place. Once it was all screwed in andlevel I could remove the shim.
Something for the Fireplace to attach to
I knew that I wanted to set a fireplace in this space and the fireplace I purchased was 20 inches high. I added 2x4s to help create an area larger than this for the fireplace to sit into and attach to.
The Upper Frame
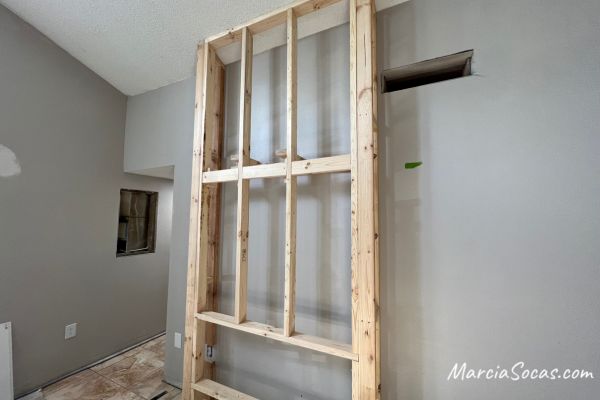
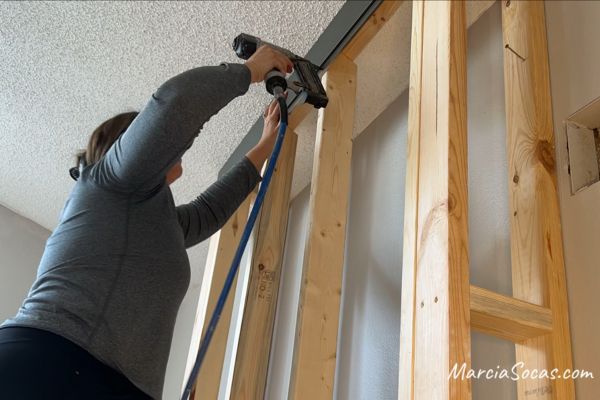
For the last part of the build out of the area, I created one more frame. This was the upper frame. Similarly, it was just 2 x 4s up to the ceiling. it looks like a lot but it’s really just screwing 2×4’s together.
The measuring and cutting is probably the hardest part since I had that sloped angled ceiling. Once that upper frame was put together I had some help lifting it in place and then secured that with several screws.
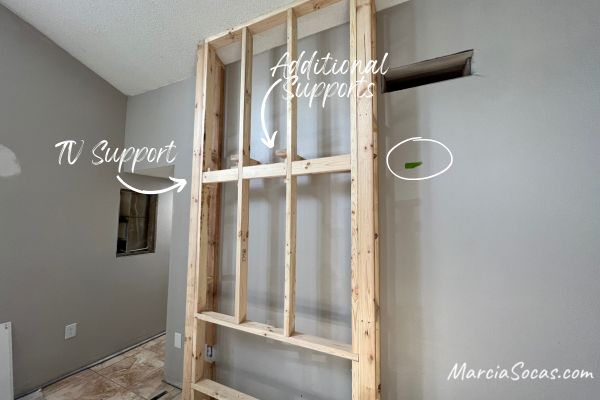
The TV Mount
One other thing I did was to add some two by fours approximately where I thought the TV would mount. I added and another piece of green tape on the wall where this wood was. This was so that later, when I covered this up, I could still see where the wood for the TV mount was and I could make a mark for it.
Behind that section I also added just a couple of additional supports to make sure the whole structure was nice and sturdy. This way, it’s not just a shiplap fireplace wall but also a TV wall.
Painting Shiplap
OK that was the hard part now let’s get on to the fun part!
I cut shiplap pieces and painted them using a paint sprayer. It’s difficult to paint the grooves of shiplap and the sprayer makes that part super easy.
The color I used was Sherwin-Williams urbane bronze. While I really like the way my almost black fireplace looks (it gave a really modern look to this new living room), a white shiplap fireplace would also look great.
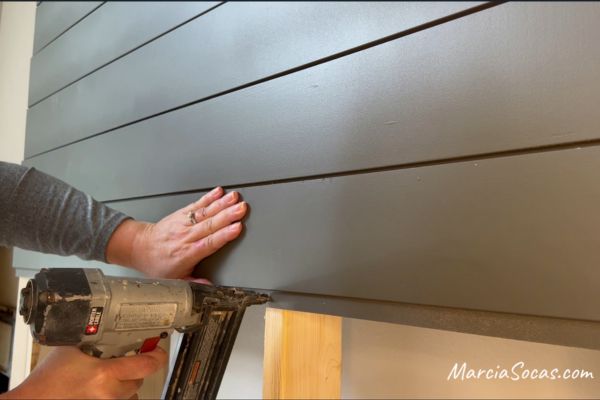
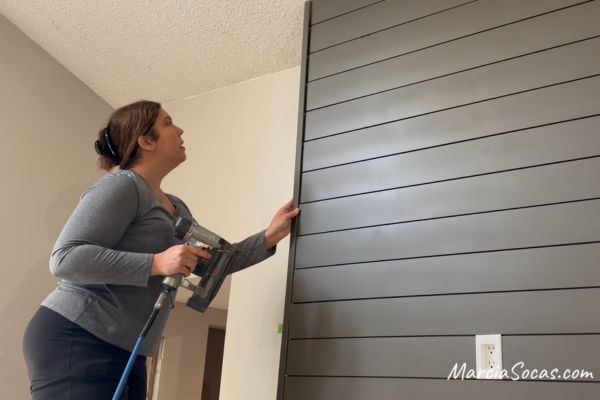
I started attaching the shiplap from the top. the reason I added the first board at the top was so that if there’s any gap when I get to the bottom then I can just cover that with baseboard.
I used the nail gun to attach it to the wood frame. If you nail it just where the tongue part is, then you cover it with the next board, and you won’t have any nail holes to cover up later.
Bowed shiplap boards on your DIY Fireplace
Of course, now that I say that, I have to show you that it doesn’t always work. I had a piece here that was bowed out a little and didn’t sit securely enough for me by just nailing it at the tongue piece.
So, I did add one more nail to secure it toward the top. I’ll go over this with a little more paint later and make sure it isn’t visible. Using a pin nailer, the nail holes are very small but if you use brad nails those are bit larger. So, if you have visible holes in your project, a great way to cover these is to add a small amount of wood filler, let it dry, sand the wood putty, and paint it.
Shiplap around the Fireplace
I continued adding shiplap down the front of the front frame, and then, when it came to the fireplace area. I cut out the shiplap a little bit to frame it around the opening.
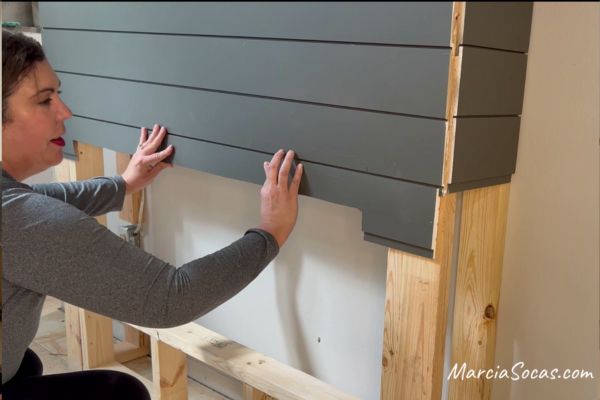
You can do this with a jigsaw or multi tool. I continued working my way down and, I have to admit, I got really lucky that my last piece of shiplap ended exactly on the floor.
This was not great measuring or anything I can attribute to myself. I just got really lucky here. I might still add baseboard to it later when I add it to the rest of the wall so that it’ll look perfectly built in.
The Sides of your DIY Shiplap Fireplace Wall
For the side of the fireplace project, I added more shiplap. Where the side walls meet the front, it looks unfinished, but this will look beautiful when we add the trim over the shiplap boards at the end.
Mounting Fireplace to Shiplap Wall
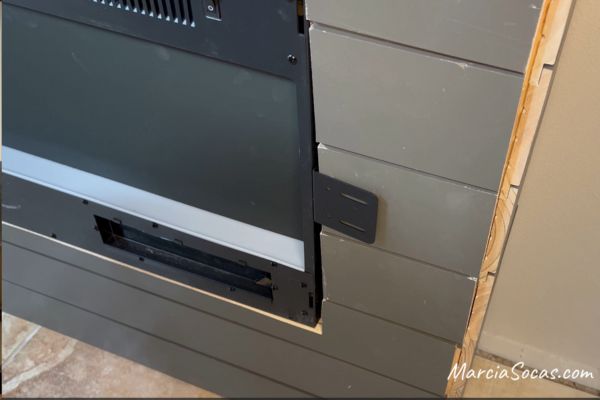
The electric fireplace comes with brackets that you attach to the side and then these brackets attach to the shiplap (and the two by four behind it).
The glass will cover up these brackets at the end.
Trim Pieces for the Outer Corners
Trim pieces– these are called outer corner trim pieces at the hardware store, cover up the edges and make it look professional.
Last Steps
From here, I added the decorative rocks and placed the glass cover onto the fireplace.
I had someone else adding the electrical outlet into my build since this wasn’t something I was comfortable doing myself.
The electric fireplace uses a remote control, so it was fun to stand back and turn it on and watch it light up!
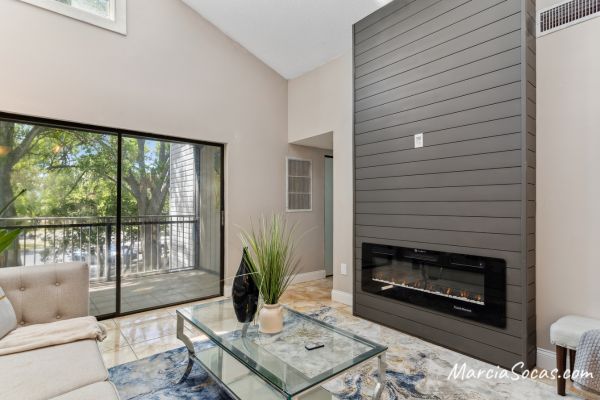
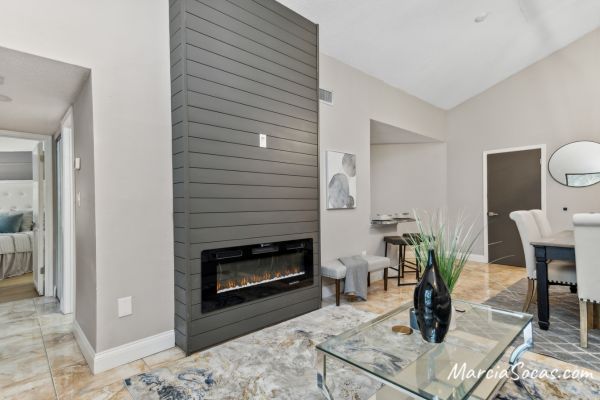
I turned it on and I was so happy with the way it turned out. This electric fireplace is designed to fit inside a wall so any heat vents forward and the heat can also be turned off so that it’s just a light feature. There’s of course no actual fire going on here next to a bunch of shiplap and two-by-fours.
I love the way it looks the total cost of materials was just under $650.
Your Turn to DIY a Shiplap Fireplace
Crazy to think you can make such a big difference without too much time, and knowing the whole thing costs so little. You may have an additional cost if you need to buy tools like the nail gun or a paint sprayer. But if you love DIY like I do, it may be a good idea to buy those for other projects too.
I think the difference it makes in the room. It gives a more modern design feel and the best part is that the value it gives is worth so much more than it cost. Next time I’ll add a fireplace mantle. I’m working on that project now and hope to have a blog post about it in the future so please follow me to see more. I hope this inspired you to build a cool fireplace insert of your own. I’d love to see it if you make it, so please send a picture and I’ll post it here on the page!
My Next DIY Shiplap Fireplace Wall
My next fireplace will be along a small angled wall in my master bedroom. I can’t wait to set it up there too and that one will be white. I love the DIY shiplap fireplace look and hope you do too!
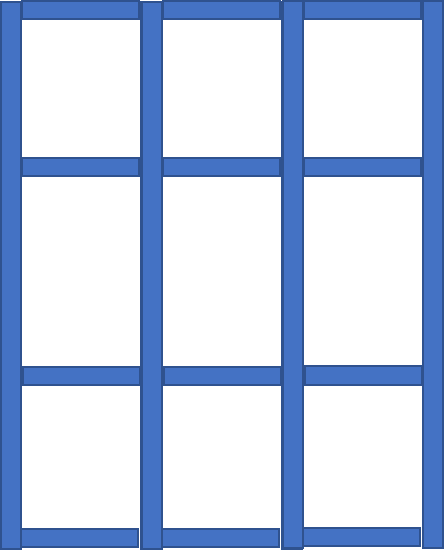
fireplace height
Download the DIY shiplap fireplace wall printable sheet
Just click on the link above and it’ll take you to my “library” where I have all the free downloadables. You’ll sign in with your email and that’ll also subscribe you to receive info on upcoming projects and tutorials as well.