
In this project, I wanted to create a dramatic accent along the entire wall of the master bedroom. There is minimal wall texture for me to deal with and I thought I could introduce some visual interest and a dramatic paint color to make the room interesting. (While the wall isn’t completely smooth, it has only a little bit of the orange peel texture which is common here in our Central Florida homes.)
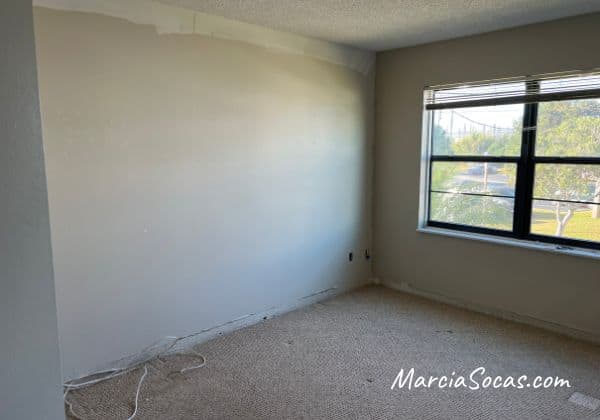
Before photo:

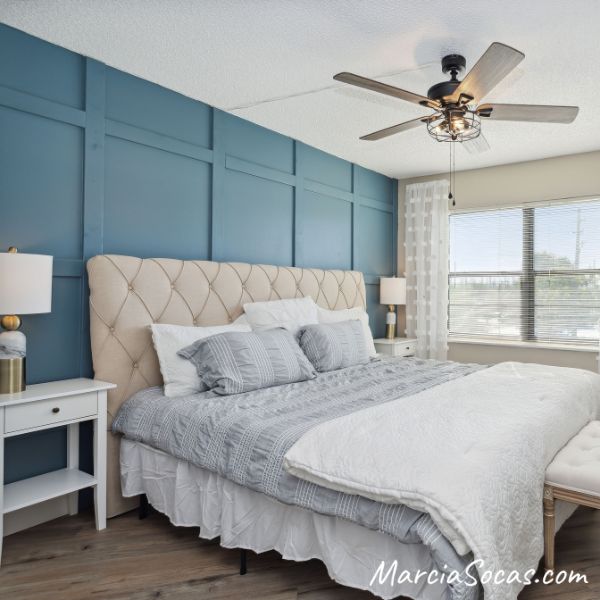
An easy board and batten style wall did the trick! I loved the way it turned out, but I learned quite a bit by making some mistakes that you can avoid. I’d like to be transparent about those learning points so that you can get the best results for your project. Here you can see what I did and learn from my project mistakes “opportunities for growth”.
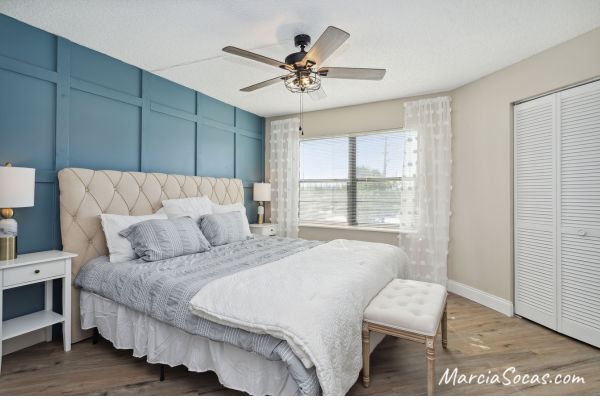
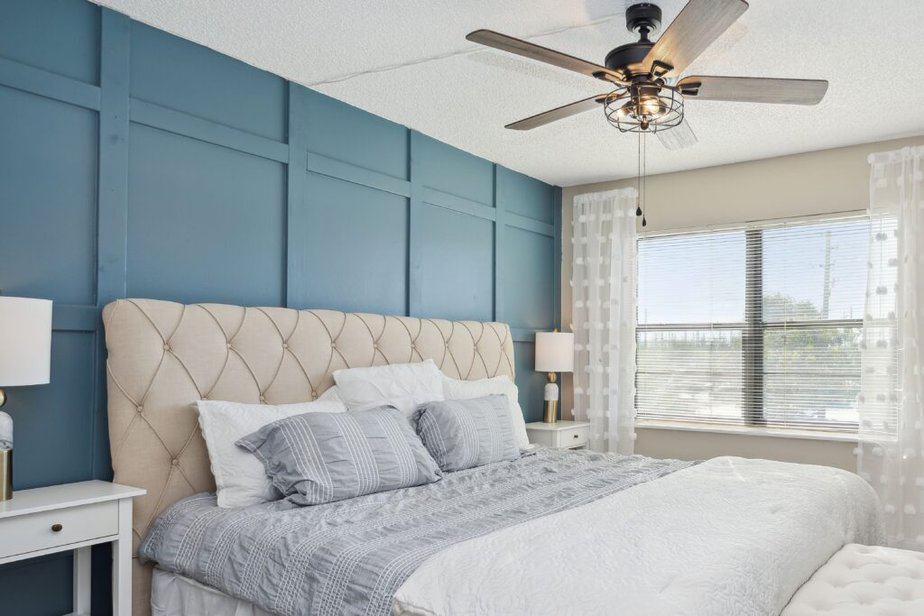
After photo of my DIY Board and Batten Accent Wall
What is board and batten?
Just a quick clarification of terms. I’ve heard about board and batten walls for a while. While I thought that the 1×4 wood pieces were my “boards”, those are actually the battens. You see, batten refers to:
a long, flat strip of squared wood or metal used to hold something in place or as a fastening against a wall.
Oxford Dictionary
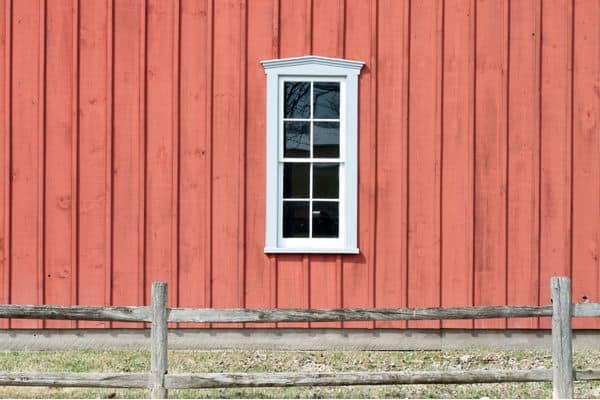
Traditionally, large boards flat were used against the exterior of a house and vertical battens were used to secure them in place.
Although we would most comfortably refer to our 1×4 wood pieces as boards of wood, these are actually the battens.
Like This:
So, now that we have our terminology figured out, please understand that I do often refer to my wood boards as “boards” even though they’re “battens”. I didn’t use any boards, so you’ll know that I’m referring to the 1×4 boards of wood.
Wall Surface
I didn’t have any “boards” to speak of. After all, I’m starting with a wall that has a pretty smooth finish with the drywall that’s already there.
If you have a very damaged or rough textured wall, you could start by installing mdf boards along the length of your wall as a starting point.
Here’s where I wanted to create a cool accent wall in the master without spending too much money or taking too much time. You can see that I was starting off with a blank wall that was really boring. I really wanted to make this a feature wall since it is the focal point as soon as you enter this master bedroom.
Choice of Wood
So, I headed down to the local Home Depot hardware store and picked up some 1 x 4s. I used the ones that are least expensive, over in the lumber section not the molding section. These cost only approx. $3, however at this price they’re not the finished, sanded, nice boards, so I had to make sure to look them over well, since some are broken or damaged.
I found the best ones and picked up 10 8-ft boards
The Cost was approx. $30

Select the material that will fit your finish the best. I used rough wood; you can use smoother wood or choose to use MDF for a really smooth finish.
Supply List for DIY Board and Batten Accent Wall
Here’s the supply list:
- 1x4s
- Brad nailer
- Brad nails
- Caulking (paintable)
- Wood Putty
- Paint
Measurements for my board and batten spacing:
My inside boxes were 24″ wide and 36″ tall.
Full tutorial, step by step for easy DIY Board and Batten Style Accent Wall
Picture framing your wall
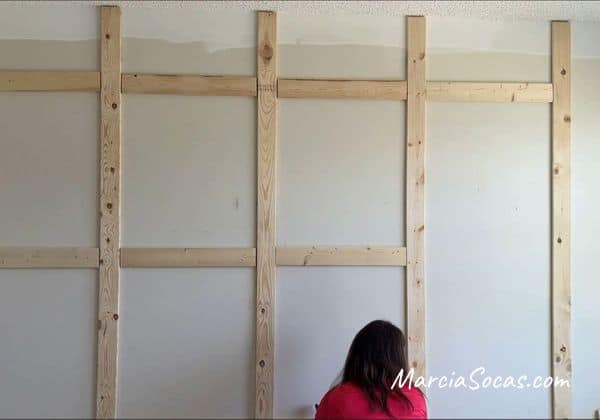
You can see that I ran my vertical batten board all the way to the top of the wall.
However, before you start, I wanted to mention “picture framing” your design. Essentially, you’d have a top board horizontal trim piece (or maybe crown molding), a bottom board (could be the top of the baseboard), and trim pieces on either side.
I didn’t do this trim work with horizontal trim pieces at the top and bottom. Does the way the vertical boards go to the ceiling bother you? Would you prefer that these finish at a top vertical trim piece? Did you notice it?
When I look back at my inspiration photo, I can see that they Picture Framed it, I just didn’t notice it before I created my wall:
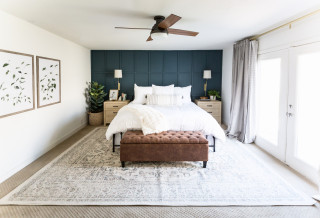
Photo by Blue Copper Design – Browse bedroom photos
Decide if you want to picture frame your wall. It does give a more professional finish.
Measuring for your project
When I got back to the condo I was renovating, I measured the width of one of the 1×4 pieces. Even though they’re 1×4’s, they’re actually closer to 3 ½” in width.
Measure your wall and mark out where your boards will go on the wall. I had to remember to calculate for the entire width of the board so that my calculations would work out correctly–except they didn’t!
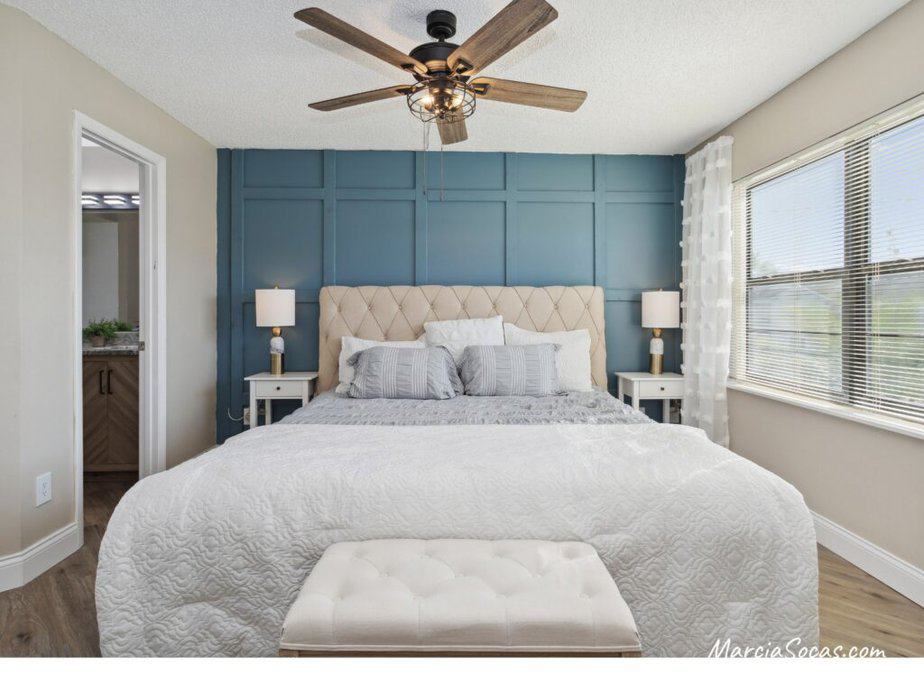
Did you notice in my after photo above that the board on the left side is several inches from the wall but the final vertical board was not? Many people didn’t notice it at all, but I made a mistake in measuring that created that problem.
Use graph paper to plan out your build, making sure to allow for the width of the boards (don’t just draw a line representing a wood piece, you have to make it a thick/wide line for the width of the board. Alternatively, if you’re better with visuals, use painter’s tape (or pencil) on the wall to actually draw out your design before you start.
Attaching the Vertical Boards for your Easy DIY Board and Batten Accent Wall
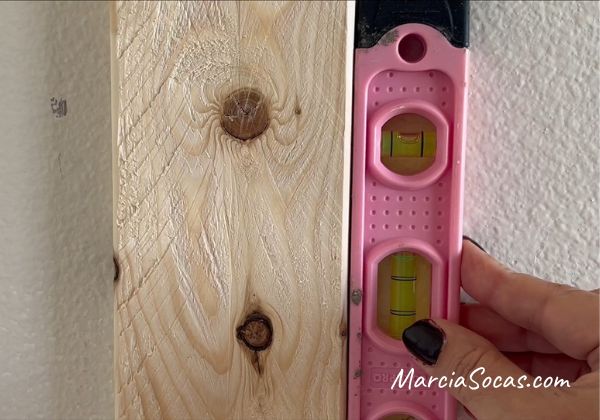
I used my simple pink level to make sure the first vertical piece was plumb.
Vertical measurements are “plumb” whereas horizontal ones are “level”. I learned this after my TikTok video of this wall got tons of comments correcting me for using the word “level” incorrectly.
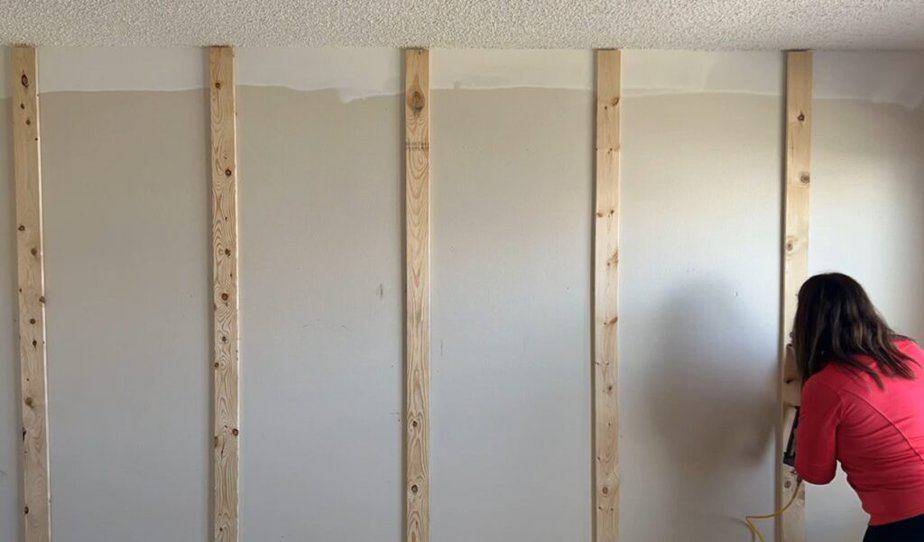
The next step was to use a nail gun (with compressor) to attach the boards vertically to the wall.
You can use a stud finder to get an idea of where your studs are so that you can make sure to attach to them.
You can additionally choose to apply liquid nails or use construction adhesive before putting the vertical boards in place.
Since I was changing out the floors in this condo renovation, I took the boards all the way to the floor, but otherwise I would have just gone down to the baseboard. As it is, we had removed the existing baseboard.
I secured all of my vertical boards of wood (the battens) in place. Once the vertical pieces were all secured, move on to the horizontal boards.
Fitting the Horizontal Pieces in place.
Now, I could Measure down for the horizontal boards. Remember again when measuring to account for the width of the board. It’s a good idea to work this out by marking it right on the wall if you can. This way you can step back and take a look at it before you start securing boards with your brad nailer and then having to use a pry bar to remove them and start over.
I wanted my final wall project to look like the boards made vertical rectangles, but of course this is where you can get creative and create the shape you like whether it’s a vertical rectangle, square, horizontal rectangle, and so on.
Then cut the horizontal boards and attach them, starting with the top horizontal board. Try to cut them to exactly the correct length so that you don’t have big gaps to deal with.
The next time I take on this project, I’ll cut my boards a bit longer and make sure they fit very snugly in place, this will help later. I would also probably use a laser level and draw a horizontal line all along the wall.
Make sure these boards are level and that they line up with each other as you go across the room.
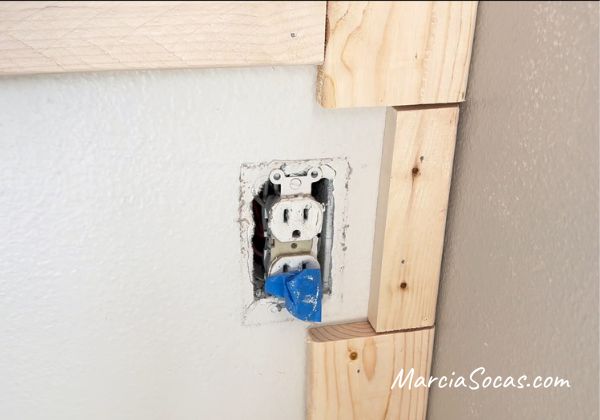
Outlets
If you have electrical outlets or light switches on your wall, you need to prepare for them. When it came to the outlet, I cut the board around the outlet area and left plenty of space around it so that I wouldn’t have any problem plugging things in in the future. Make sure you leave room to add your outlet covers when you are cutting your batten strips.
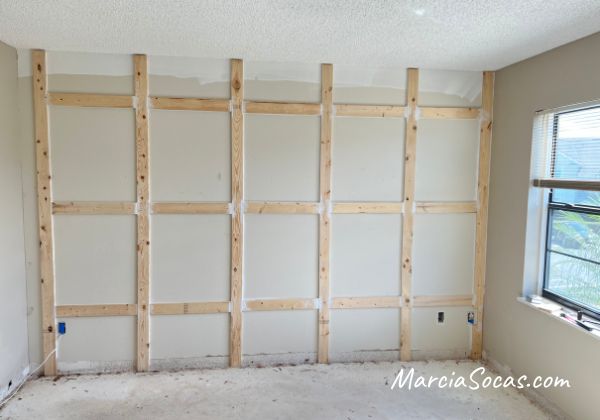
Closing the gaps
Once all of the boards are in place, you need to close up the gaps in my wood pieces so that it looks like one beautiful continuous built in.
I used caulking however you could also use wood filler and a putty knife or utility knife to fill the gaps. But again, I used caulking and it worked for me.
First, I caulked inside the edges of my newly formed accent wall boxes. This keeps the wall from having any gaps showing between the drywall and the wooden batten wall treatment.
Apply the caulking using a caulk gun. The caulking gun is the best way to get to all of the batten project spaces quickly. Run a bead of caulk all along the edges.
The use your wet finger along your caulk lines to remove excess caulk and smooth it out. A little bit goes a long way.
I also had to work on making the horizontal pieces look like they fit seamlessly with the vertical ones.
To do this, I used caulking and filled in the spaces. But it proved a bit difficult to go back and sand this down and get it to look as seamless as I’d like. Alternatively, you could use sandable wood putty. Make sure to also fill nail holes that you might see on any of your batten pieces.

Use caulk where the wood meets the wall. This gives a great finish. However, where wood meets wood, use sandable wood putty.
Once this dried, I sanded down the joints using 80 grit sandpaper. There were some rough spots, and I sanded these down too.
Here’s how the wall looks when the boards are all in place and caulked and sanded.
Once everything was sanded down, I was able to start the fun part.
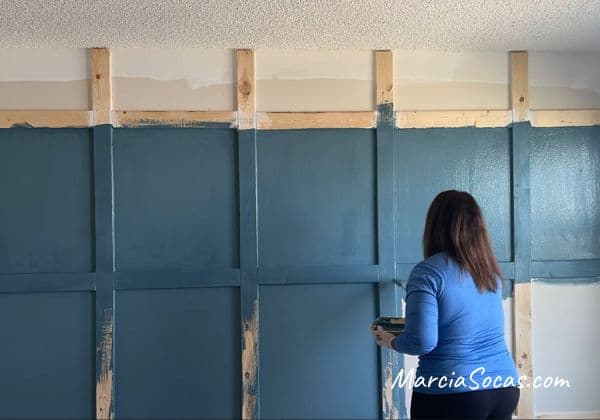
Selecting Paint Color
I picked out a blue color that I thought would look soothing in the room. I actually mixed two leftover paint colors that I had left over from another project, so I didn’t spend any money in paint. Sherwin Williams (Tempe Sky SW6229) blue with a lighter gray color (eggshell finish) and I was really happy with the result. I have also seen a modern board and batten wall project in a guest bedroom that had white walls. That guest room looked beautiful too, so I think it’s just a matter of personal preference in terms of the color you choose.
Painting took the longest time in the project. I didn’t use a paint roller because I wanted to make sure to get in all of the crevices with the brush. A paint sprayer could have worked well, but I didn’t have one at the time. I did try one out for the first time just a few days later when I painted the kitchen cabinets, and have a link to that diy project here.
As I painted it, even just after the first coat of paint, I could see it start coming together. It was really looking like a DIY board and batten accent wall!
I applied two coats of paint.
Reassessing
After painting, I reassessed the wall and found trouble spots that I wanted to address. In these areas, I caulked again, and sanded them again. Once I painted those spots once more, they looked fantastic.
We finished the new flooring, added the new baseboard, and moved furniture into the room. I set up the curtains and the room was ready!
Your Turn creating a DIY Board and Batten Accent Wall
You can see now the number of mistakes I made and how you can achieve a more professional finish. Even with my mistakes, I love this look of board and batten style accent wall. So did the buyer of this condo. It went under contract in record time and to the first buyer who viewed it!
You’ll love your wall too. All it takes is the courage to get started with your own board and batten project.
Connect with me on social media!