
DIY Beadboard Bathroom
I’ve been working on this waterfront condo this past summer, challenging myself to complete a renovation using only DIY projects that I could complete. It’s been fun, and a lot of hard work. You can view more projects from this series here.
Throughout my site I provide affiliate links to products that I hope will help you with your DIY project supplies. As an Amazon Associate, I earn from qualifying purchases. This means that I may receive a small commission if you use these links to purchase products, but it does not change your price in any way.
For the small bathroom that the condo had, I needed to think about how to maximize space and make it as useful as possible. At the same time, I wanted to keep it casual and beachy.
I felt that bead board would really work well in the space, and it would be a quick and easy DIY project to complete. And I thought it would provide the coastal vibe I was going for.
The great thing about a DIY beadboard wall is that it is going to cover up a multitude of sins that might be on the wall.
I had worked with beadboard previously, on another condo renovation where I added it to the dining area of a condo that had a large great room. It was great in allowing me to visually create the separation of the dining room without adding any structure into the room itself that would make the room feel smaller. You can view that here, in case I didn’t describe that in a way that you can envision.
The starting point for my project was this existing bathroom wall.
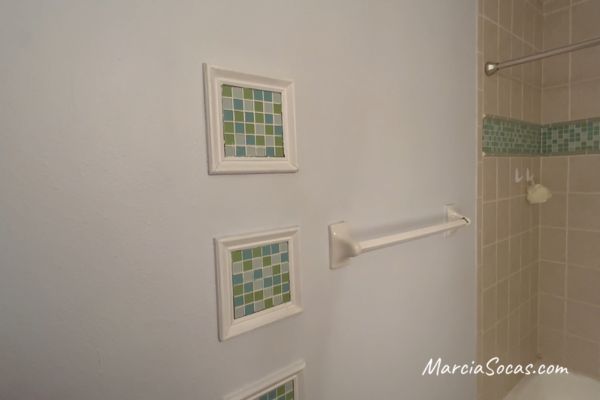
The prior owner had created some mosaic tile bathroom designs to coordinate with the decorative tile accent along the shower walls. It was cute but left a lot of unusable space on the wall, and it just wasn’t the look that I was going for. Also, there was only one towel bar in the entire space. And, since this is the only bathroom in the two-bedroom condo, I needed to find a great way to make this small space more functional.
Supplies for a DIY Beadboard Bathroom


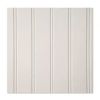
4×8 beadboard –I got mine from Home Depot. You can see them here and order them for curbside pickup!


Step-by-Step Tutorial:
Wall Prep:
The first step was to remove the existing towel bar and decorative mosaic tile pieces. I did this just by using a screwdriver and hammer. I’d get behind the tile and slowly wiggle the screwdriver behind it and lift the old trim pieces, and then the tile, off of the wall.
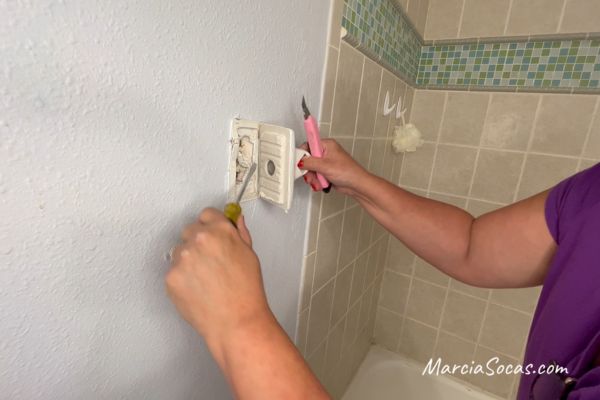
For the towel bar, I also used a razor blade to cut around the fixture first. This helped separate the paint from it and made it easier to remove.
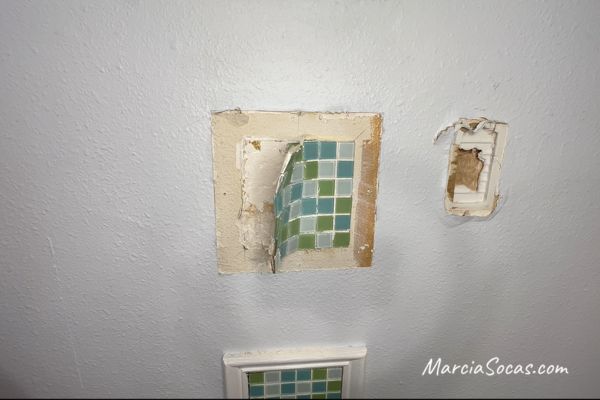
Now, I was left with a damaged wall.
This is where the genius of beadboard paneling really shows itself to be a great idea. Since it covers everything, I don’t have to worry about the extra cost of having a professional come in here to fix drywall. I’m just going to cover it right up with the sheets of beadboard.
?Genius.
Measuring:
The next step was to measure the height that I wanted for my DIY beadboard bathroom. For me, that was 60″. I wanted the top of the panel to come to the height of the decorative border tile in the shower. I liked the idea that the top of the beadboard would create a straight line running continuously with the shower border.
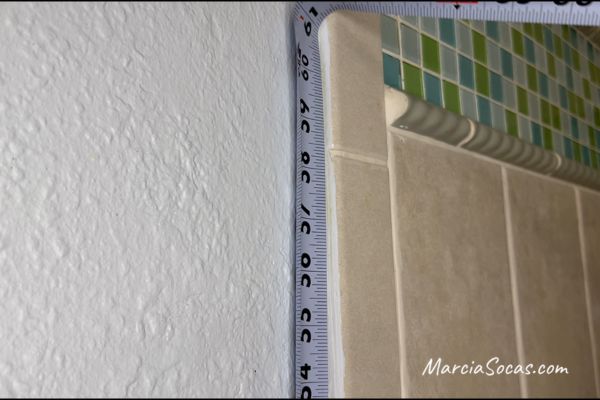
?My large sheets of beadboard measured 4 ft x 8 ft, so I’d need to cut these large panels down to size.
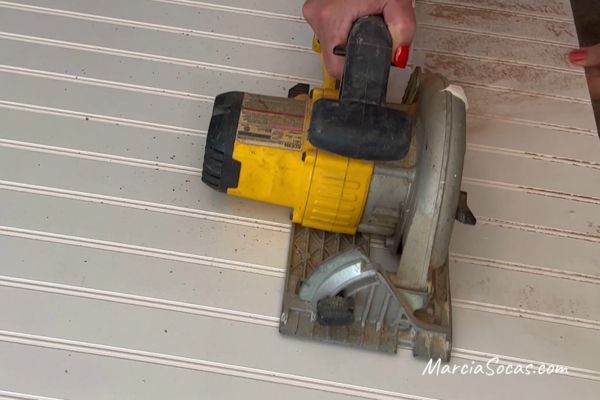
Cutting:
Using a circular saw, I cut down the height of my beadboard panels to the 60″ height I wanted.
I had purchased two sheets of white beadboard, and cut them both down to size.
Installing:
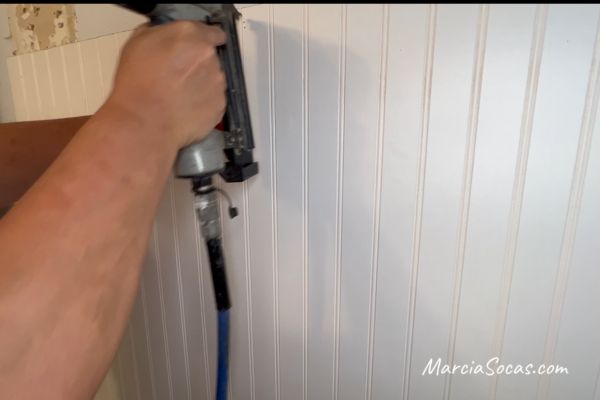
I placed my beadboard panel on my existing baseboard and matched the outside corners up with the edge of my shower.
I made sure it was a level line along the wall, and then I secured them into place using a nail gun. (You can utilize a stud finder to be sure you’re securing it into studs behind the wall).
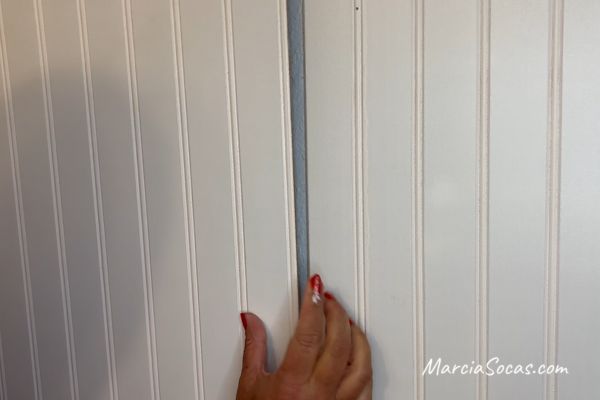
After that, I lined up the second piece of beadboard. It is wonderful how the vertical lines line up so that the entire room feels like it’s a continuous piece of board.
(I did have to cut that piece down a bit for it to fit properly with the end of the wall behind the door).
Some might want to add construction adhesive, like liquid nails, to the back of their beadboard before attaching it to the wall, but I did not. I like the flexibility to take these down in the future and change the room with another DIY project in the future.
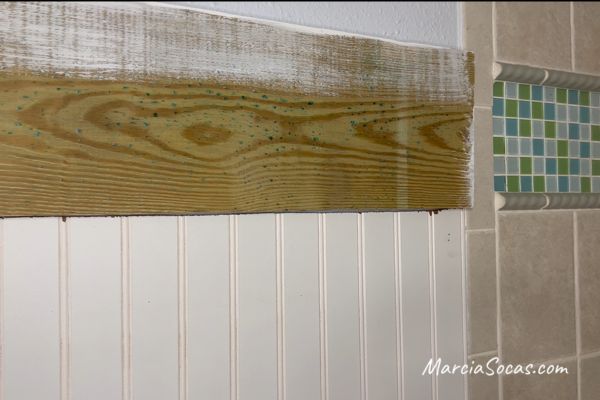
The top trim piece:
In order to finish off my DIY beadboard bathroom, I added a 1×8 board to the top. This created a finished horizontal line that matched with the width of the tile in the shower. You can, of course, adjust your choice of trim boards to fit your space. I liked this nice wide board for this bathroom.
I used my miter saw to simply straight cut this top trim piece.

Then, I painted the top of it with white paint. The reason that I painted it a bit before securing it to the wall is because I know, that no matter how much painter’s tape I add along the edge to protect the wall, if I try to paint this once it’s installed, I’m going to end up getting paint on the wall with my paint brush.
So, I painted it a bit first, then secured it to the wall using the brad nailer.
Finishing touches:
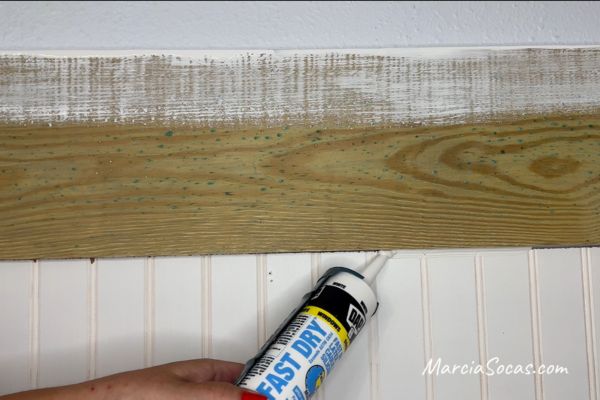
There was a small gap between the top trim piece and the beadboard.
The easy way to deal with this was simply to run a bead of caulk along the straight edge using the caulk gun.
After that, add a little bit of wood filler to cover the nail holes, and let that dry.
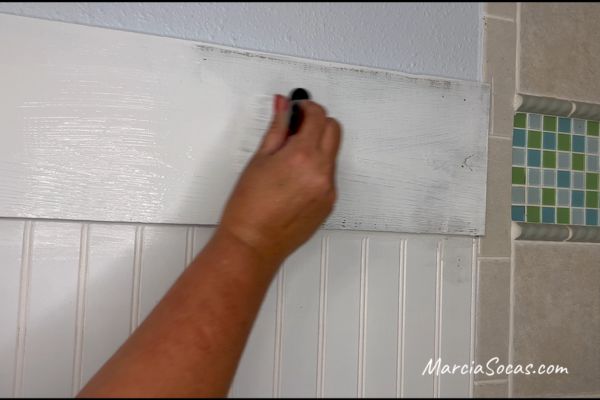
The next step was to use semi-gloss paint to finish off the wall. I applied three coats of paint on the wood border and just one coat of paint on the Bead board since it was already white and I just wanted to cover up the little nail gun holes and have everything look uniform in color and sheen.
I used white, but of course you can use a different color to match your decor. Here’s a project where I used beadboard and Urbane Bronze paint to create a more moody and modern looking master bathroom finish–in this project I used it behind the toilet just up to chair rail height. Looking at that project will show you just how much paint colors can change the look of this project.
Adding hooks:
In order to finish off my beadboard accent, I added hooks using my favorite pink drill.
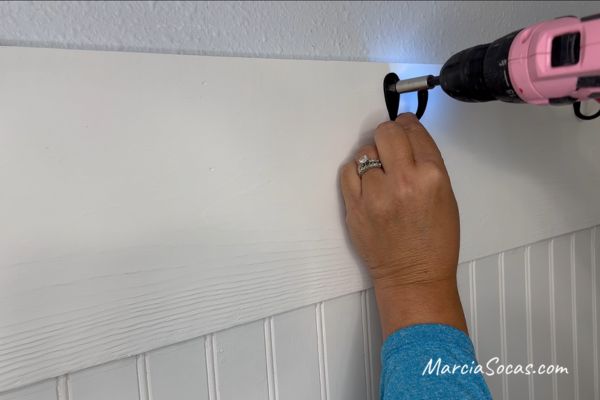
I like these black hooks, but changing the hooks could change the look as well. Boat cleats used as hooks would be nautical where a simple bamboo or wood knob would look boho, and something like square hooks would go well with the modern style.
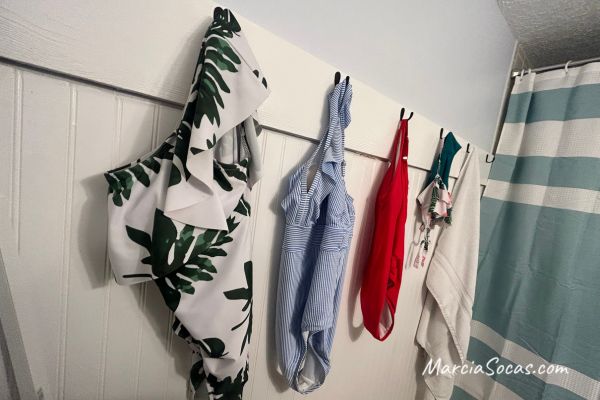
I spaced my hooks out evenly and drilled them into place. After that I added my towels and a new shower curtain and my quick little bathroom upgrade was complete.
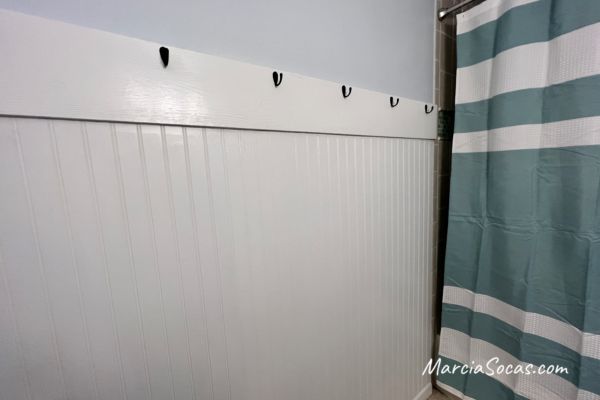
My DIY Beadboard Bathroom
And here it is! I love how much more functional the bathroom is. Whereas I previously only had one towel rack, now there are 6 hooks. This allows for lots of towels and bathing suits to be hung and remind us all of what we’re here to enjoy in this coastal condo!
Obstacles:
?In this project, I didn’t have to worry about outlet covers or light switches. But, I have had to work around these in other projects. The way I’ve done it is to use a multi-tool. This handy little tool allows you to create cuts in the center of a project. It has been the perfect solution for me several times when needing to make these types of cuts.
?Just remove the outlet cover, or light plate, cut your pieces of beadboard as needed, and then cover them again with the corresponding face plates.
Note: sometimes the beadboard is too thick for the face place to go on easily. In that case, consider adding an extender box (they’re blue at home depot) and that’ll help bring out the outlet and give a great seamless look to your project.
*Note: Type of wainscoting: there are both vinyl beadboard and traditional beadboard sold at Home Depot and Lowes. You may want to invest in the vinyl or plastic type of beadboard wainscoting in order to make sure that you’re creating a moisture resistant wall treatment.
Your turn:
I hope this DIY beadboard bathroom project is something you’ll try out in your own home. Whether it’s the main bathroom, guest bathroom, laundry room, or anywhere else you’d like to add architectural interest. If you do, send a photo and I’ll show it off here!