
Easy DIY project to transform a builder grade bathroom mirror
Here’s an easy and impactful way to update an old mirror, whether it’s a plain mirror or a builder-grade bathroom mirror. This DIY tutorial will guide you through creating a beautiful faux wood frame that can make a huge difference in your bathroom’s appearance.
The best part? You can achieve this with basic tools and materials, saving you a ton of money compared to buying new mirrors. And, the entire process takes only about an hour from start to finish.
Below are several DIY bathroom mirror frame ideas, but the first one presented is my most recent faux frame created with a peel and stick border.
Throughout my site I provide affiliate links to products that I hope will help you with your DIY project supplies. As an Amazon Associate, I earn from qualifying purchases. This means that I may receive a small commission if you use these links to purchase products, but it does not change your price in any way.
Materials Needed:
- Faux wood wallpaper (peel and stick)
- Basic tools (tape measure, razor)
Step 1: Measure and Plan
The first thing to do is to start by measuring the length and width of your mirror to determine the amount of faux wood wallpaper you’ll need. My small bathroom only required one roll of wallpaper, with plenty left over for more small projects.

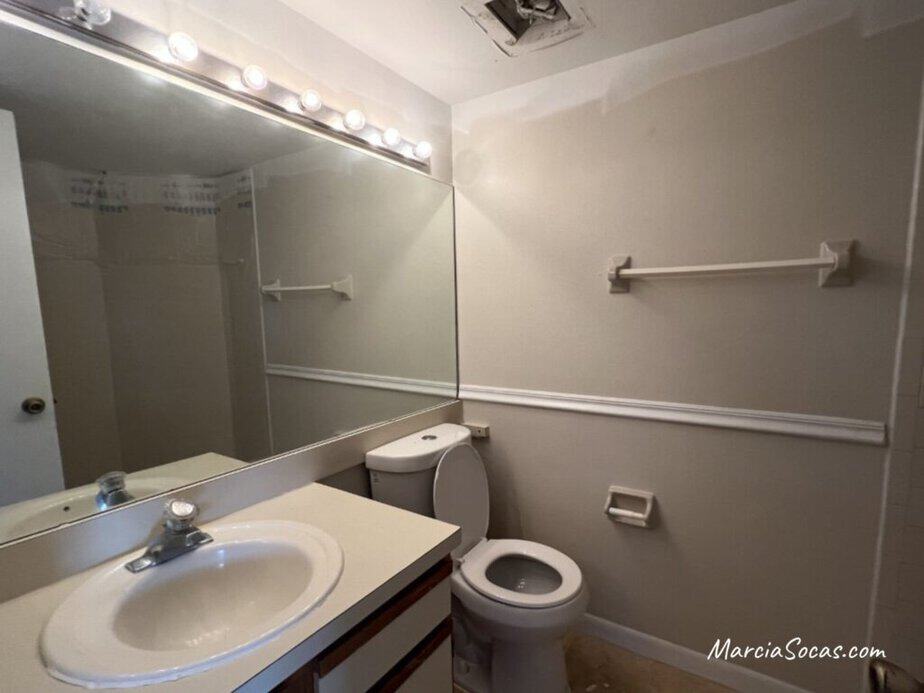
If you have a plain mirror or a builder-grade bathroom mirror, this easy project will make a big impact.
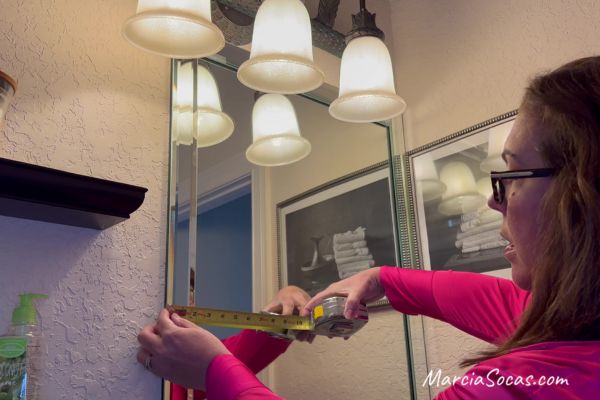
I measured the width that I needed to cut the paper in order to fully fit this kind of mirror border that I already had on the mirror. It’s important to note that you can do this on a totally flat mirror as well; I just happened to have this border that’s already built onto mine.
Step 2: Choose Your Frame Style
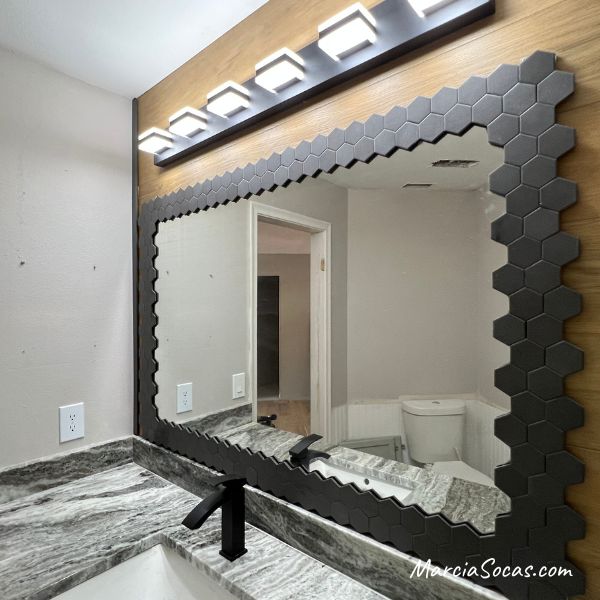
?Decide on the style of the frame you want. Whether it’s a rustic wooden frame, a modern wood frame, or a unique mosaic tile look frame, the choice is yours. I have tutorials for a hexagonal tile mirror border, and a shiplap border. But the advantage of this particular project is that it is….
SO…VERY…SIMPLE
There’s no construction adhesive to deal with, no equipment like a miter saw or circular saw. No wood, angled cuts, 45-degree angle issues, nothing!
Because it’s just simple peel and stick.
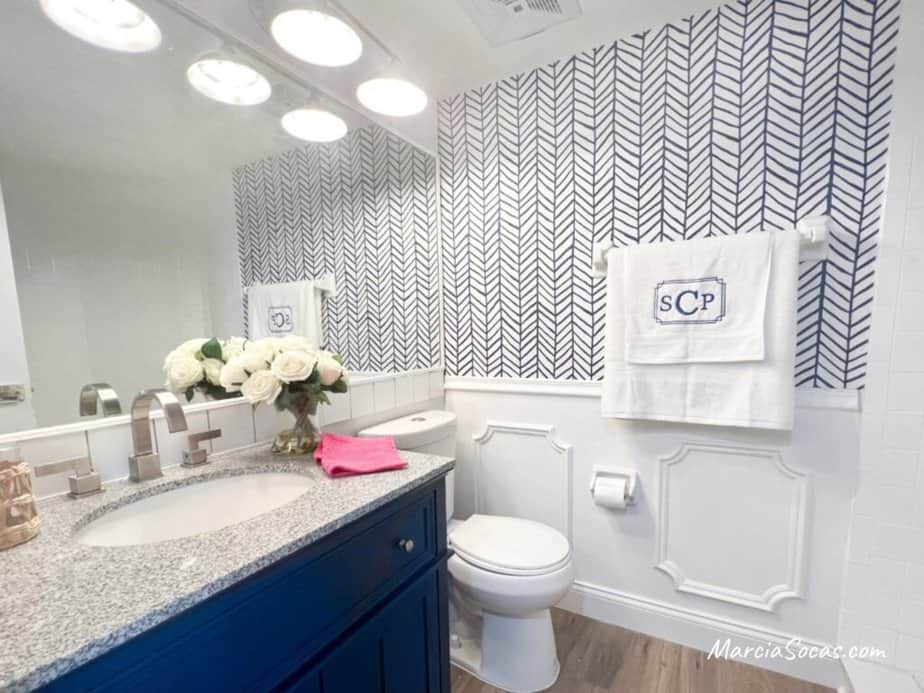
The fun part is choosing the look of the peel and stick border. I used this wood look, but I think it would look amazing to go for more of a coastal wallpaper, or a trendy blue and white look as seen here. I also loved the idea of an amazing texture wallpaper, because that would give our project depth and dimension. There are tons of different options, and it all just depends on how you’d like for the outside edge of your finished product to look.
Step 3: Cut the Wallpaper
?Cut the faux wood wallpaper into strips a bit wider than needed. This allows you to trim off excess later. Use a straight edge and a utility knife to make a straight cut.
Step 4: Apply Wallpaper
Apply the faux wood wallpaper to the edge of the mirror, starting from the top. Smooth out any bubbles or imperfections as you go. The wallpaper adheres easily, and you can adjust its position if needed.
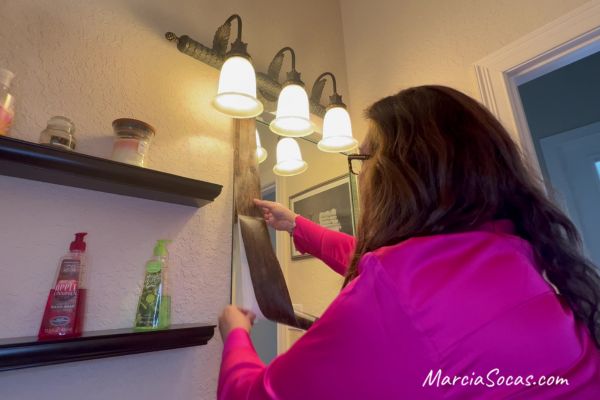
For the first step in my application, I started along the left side on my diy mirror frame. The good news about this peel and stick paper is that, if you feel yourself going askew at all, you can simply lift it back up gently and reposition it.
Step 5: Trim Excess
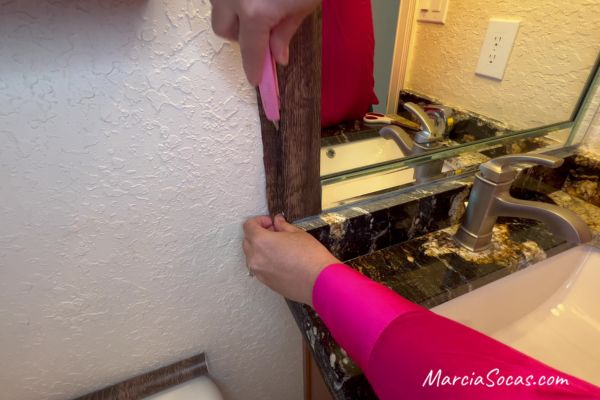
?After the wallpaper is in place, use a straight razor or utility knife to trim off any excess along the edges of the mirror. This step ensures a clean and finished look.
Step 6: Continue on the other sides
?

From here, I worked on the right side of my framed mirror. Once I had those sides completed, I worked my way to the bottom. For the next step, I measured the width that I needed and then cut it so that I would have a little bit of overlap and a really good seam on the sides. The final piece was my installation across the top of the mirror. It looked really great; it adhered easily. And then, of course, all I needed to do was to continue to go around it a little more just to fine-tune the edges and make sure that everything was attached and adhered in the way that I wanted it to look.

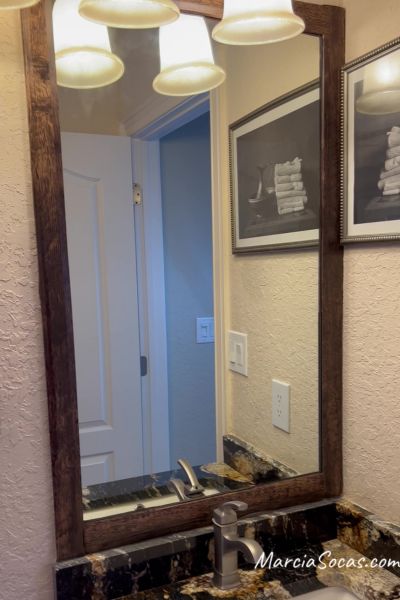
Step 7: Enjoy Your Updated Mirror
Stand back and admire your work. The new frame has made a big difference in transforming the look of your bathroom mirror. This easy and affordable DIY project is a great way to give your bathroom a fresh and stylish update.

Working with Mirror Clips
If your mirror is large or heavy, it will be secured with mirror clips. This is especially important for safety in homes with kids.
Since my vanity mirror already had a mirrored edge along the outside, I didn’t have to worry about mirror clips. However, if you’re starting with a frameless mirror, then you may have an issue dealing with these little clips. If your clips are large, I would recommend swapping them out for these smaller ones that I’ve used in several projects. They have more of a flat top to them rather than those big U-shaped ones that you’ll commonly see around an old large mirror.
You can simply use your razor to cut the peel and stick wallpaper and leave the clip head exposed if you don’t want a “bump” caused my adhering over the clip.
Additional Tips for DIY bathroom mirror frame ideas:
- Experiment with different types of mirrors, such as frameless mirrors or mirrors with unique shapes, to create a focal point in your bathroom.
- Consider using wood glue, liquid nails, or a staple gun for extra reinforcement, depending on the weight and size of your mirror.
- If you have a builder-grade mirror with clips, you can still create a frame. Just ensure the frame accommodates the clips or replace them with a more decorative option.
Remember, the key to a successful bathroom makeover is to have fun with the process and explore creative ways to add a personal touch. Whether you’re updating a rental bathroom or giving your master bathroom a new look, this DIY wood mirror frame project is a great option for achieving a stylish and customized space.
This was an easy way to make a huge impact on a builder grade mirror. I hope you have fun with you DIY bathroom mirror frame project.
Fun Ideas
One of the reasons that I love this project is that it is a good choice in a rental situation, since you can remove it later. It’s also great that you could use it a kids’ bathroom, since you could incorporate a theme they love into a beautiful frame.
Really the only thing limiting you is your own imagination. It’s a great project that doesn’t cost a whole lot and really lets you express your own unique look.
Using the leftover paper
For an even more finished look to your bathroom or powder room, you can create coordinating bathroom accessories using the wallpaper scraps, like I did here.
It’s wonderful to find a good reason to use leftover product to create another update at no extra cost!
Other DIY bathroom mirror frame ideas

Here’s a one weekend, $500 bathroom renovation that you’ll love!
From this…
To This
Other projects you may enjoy for different rooms throughout your entire house: