
DIY faux wood ceiling beams
I’ve renovated around 70 properties in my life so far, and this time I challenged myself to renovate a waterfront condo using only DIY projects. I wanted to see if I could really do it all, or at least almost all, by myself and on a budget.
Today, I’ll show you how I (with the help of my husband) built and installed faux wood beams.
Throughout my site I provide affiliate links to products that I hope will help you with your DIY project supplies. As an Amazon Associate, I earn from qualifying purchases. This means that I may receive a small commission if you use these links to purchase products, but it does not change your price in any way.
Supplies:
1×3 common board wood from Home Depot
1×4 common board wood from Home Depot
2×4 pieces
Stain of your choice
Brad nailer and brad nails
Wood putty and sandpaper (if needed)
Creating DIY Faux Wood Beams:
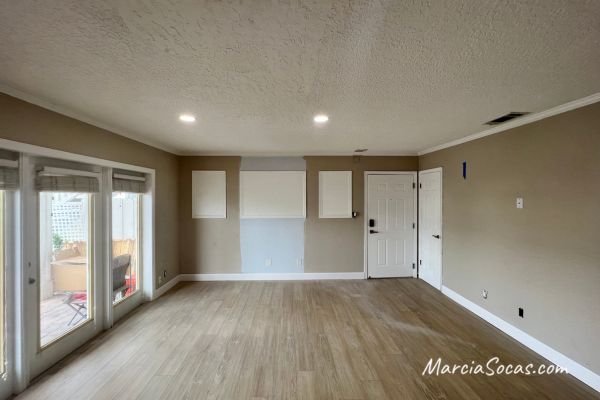
Here’s the “before” photo of the living room.
Preparing the area:
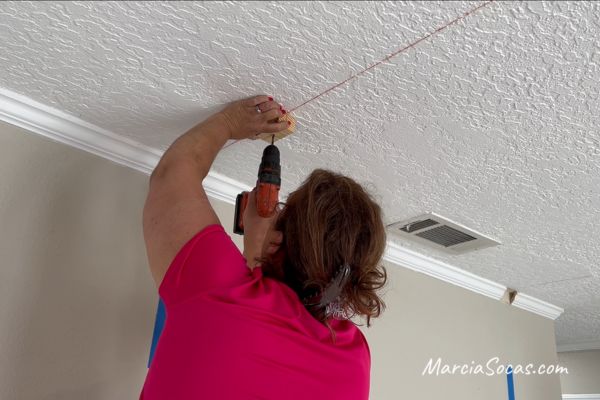
The first thing I did was to mark where I wanted my faux beams to go.
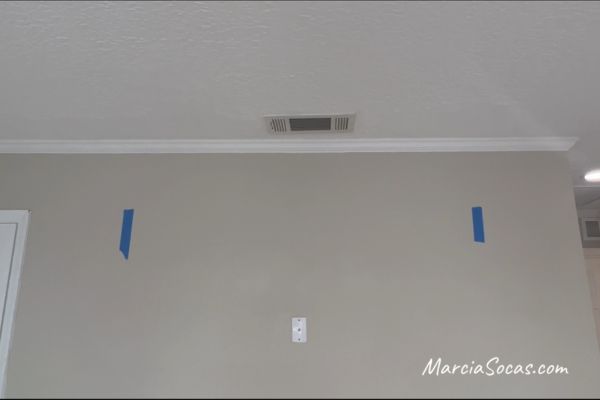
I centered the area for my beams along this wall and marked the location with some painter’s tape. After that I wanted to mark a line across the ceiling to help guide me as to where the wood beam would go.
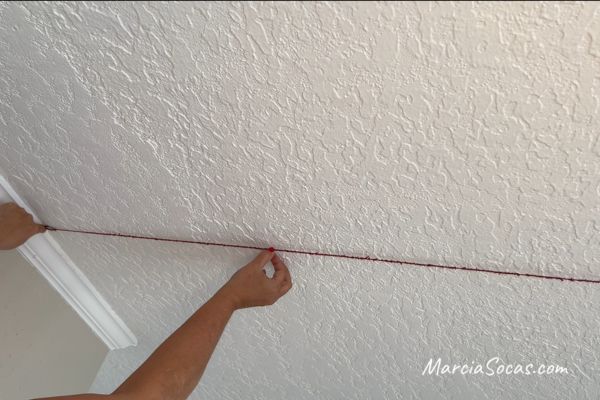
I did this using a chalk line my husband stood on the other side of the room, at the opposite wall, while I stood on this side and snapped the chalk line onto the ceiling.
This gave us a great guide to work off of. The only problem here is that I realized that the crown molding needed to be cut out in order to allow the wood beams to fit into place.
So, I cut those out using a multi tool which is a handy little tool I’ve used in a lot of DIY projects. I don’t like buying a lot of special tools, but this one has been the perfect solution for me in a lot of projects.
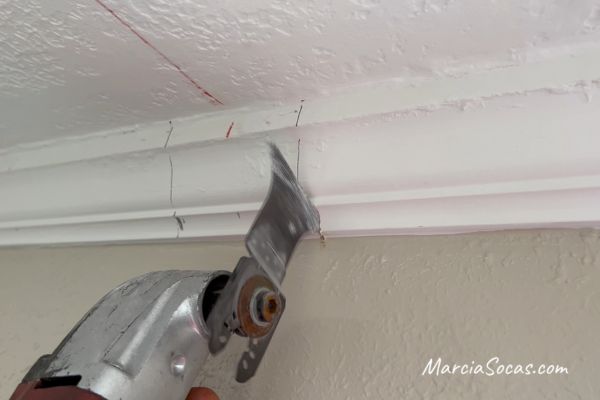
Once the crown molding was out of the way I was ready for the fun part of creating the beam.
Building the faux wood beam
Here’s where the trick comes into play. Rather than installing one heavy solid wood beam, we created a hollow faux wood beam.
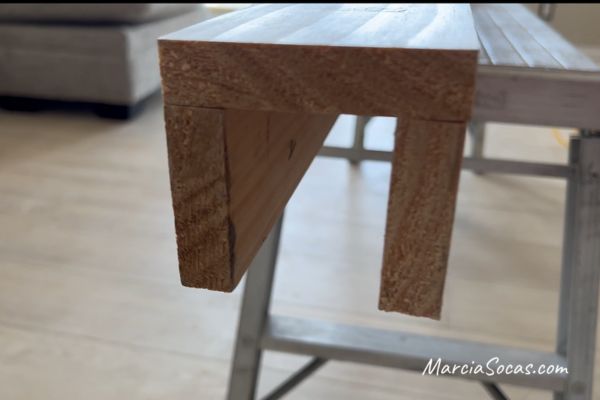
There are a few ways you could do this, but what we did was to use 1×3’s as our side pieces and a 1×4 for our bottom facing piece.
The reason I used 1×3’s for the side pieces is because I didn’t want the wood beam to hang too low into this small room; but obviously you can adjust this depending on the size of the room you’re working with.
I took the 1×4 and placed it on top of the 1×3’s and used a nail gun to secure this into place.
I did not mind that my pieces were squared off at a 90 degree angle on the edges, it made the job much easier for me and I thought it looked great. But, you could also choose to miter cut your corners and then put the three pieces together with miter cuts.
You’ll have to take a look at how my boards looked at the end and see if that’s something that you feel is important to you or not. Here here’s a look at how the faux beam looked when it had the sides and bottom piece put together you can see that it just creates a U shape with the wood.
Attaching the Faux Wood Beams to the Ceiling
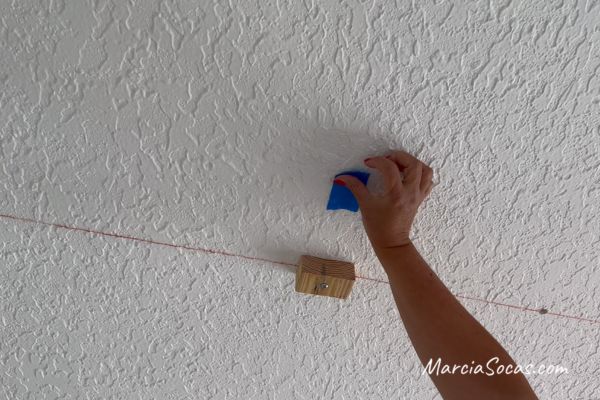
Now we need to attach this to the ceiling somehow. You’ll use a stud finder to look for ceiling joists or trusses; basically, some way for you to attach to the ceiling itself with some supports.
If you don’t have wood to attach to above your ceiling, you may want to consider using toggle bolts.
We cut 2×4’s to the width of our U-shaped faux beam. In our case, this was approximately 2 inches.
We then attached a few of those along our guideline.
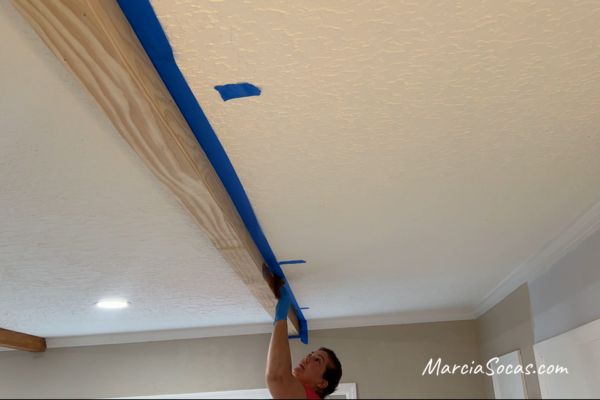
Now this part is important. Use a piece of tape to mark where your 2×4 piece is–you’ll need this later.
Then, with each of us standing on a step ladder, we lifted our u-shaped beam up into place. There’s a lot to be said for the ease of installation on this project. The fake wood beams just slide right over the 2×4’s.
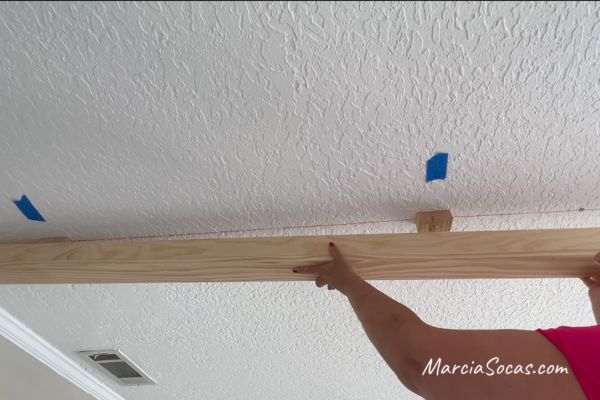

if it is tight when you are putting your stainable faux wood beams over the 2×4 pieces, you can use a rubber mallet to help hit the board into place.
Now you can see how vital the marking tape was. Without it showing me where the 2×4 pieces were, I wouldn’t know where to secure the beam.
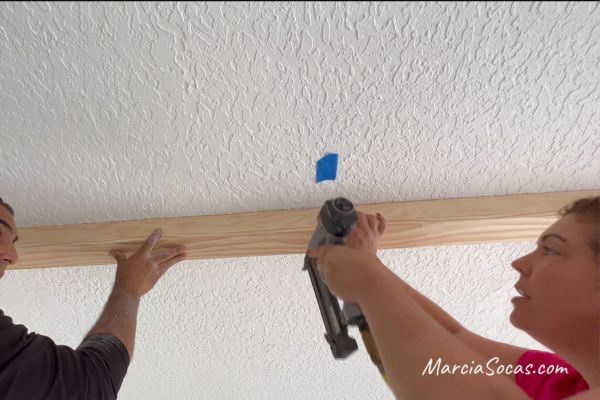
Then it was just a matter of securing these with our nail gun. We used a Brad nailer because this utilizes longer nails.
That’s important because we’re going through the 1×4 side pieces all the way to the 2 x 4 center piece that we had mounted to the ceiling.
So, we used brad nails that were 1 1/2 inches in length to be sure that we got through everything that we wanted to.
Your Wood Beam Length
Our wood was 8 feet in length, but the room was almost 16 feet across, so we actually had to join two beams together to accommodate the length of the ceiling in our room.
The best way to do this was to install the decorative beams and then add some wood putty at the seam and then sanded it down to blend the seam as best as possible.
Staining the Faux Wood Beams
Once those went up, the room already looked transformed, but in order to finish it off I also added a stain to the wood. The natural wood gave it a great rustic look but I wanted to stain it so that my decorative ceiling beams would match the shelves and other wood pieces that I would be adding to this family room.
You might wonder why I didn’t stain the wood before I put it up on the ceiling– the reason is because I needed to join these two faux wood beam pieces together and I was afraid that if I stained them before putting them up then I might have variations in the two different beam pieces.
This way I was staining it in place so that I knew that I was applying the stain in a uniform motion across both of the beams that joined in the center of the room. In order to apply the stain with the wood beams in place, I simply added some painters tape to protect the ceiling, then
I applied the wood stain using a lambswool pad rather than a paint brush (because I like that I can apply different amounts of pressure depending on whether or not I want the wood darker or lighter in that particular spot).
I liked my faux wood beams to look smooth, but some people prefer the look of older, worn, solid wood beams. You can recreate this look and have it look like the real thing by using a hammer to distress your beams and give them the worn distressed texture of real wood that has been through a lot.
Staining the wood was quick and easy, and I absolutely loved the way that our wood beams turned out.
The End Result, My Faux Wood Beams
Here’s a photo of the end result.
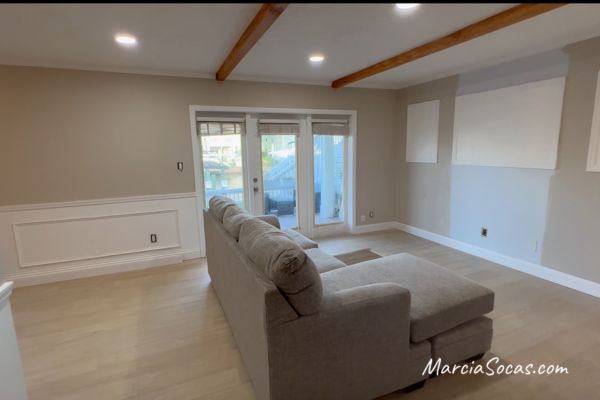
I think that they add a great element to our room. They look like real wood beams rather than faux ceiling beams. They cost approximately $250 in total and took two days.
I hope that this inspires you to add some faux wood beams where you otherwise thought you couldn’t have before. I love that this project can work on a flat ceiling like ours, a cathedral ceiling, sloped ceiling, or vaulted ceiling.
Check out my blog section to see how I built a DIY shiplap fireplace along that long wall where the blue stripe is! That was another of my favorite decorative element projects in this condo.