
I wanted to update the living room in this condo that I’m renovating. It’s a waterfront condo that I wanted to renovate using all DIY projects and really doing everything that I could by myself. You can view more projects from that condo here.
I had already created a wood beam project in the space and thought that a white shiplap wall with an electric fireplace insert would be the perfect addition and focal point for this main living area.
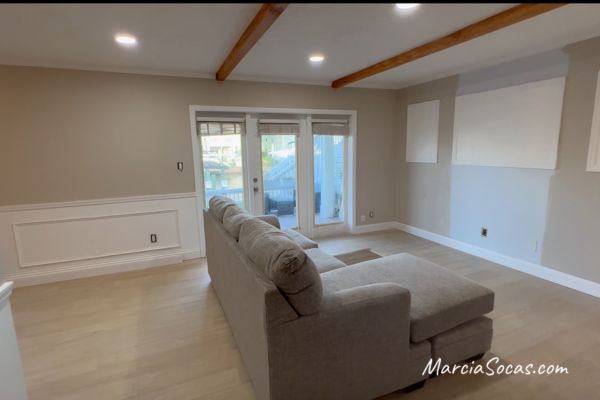
Here’s the starting point:
Throughout my site I provide affiliate links to products that I hope will help you with your DIY project supplies. As an Amazon Associate, I earn from qualifying purchases. This means that I may receive a small commission if you use these links to purchase products, but it does not change your price in any way.
The full tutorial, step by step guide:
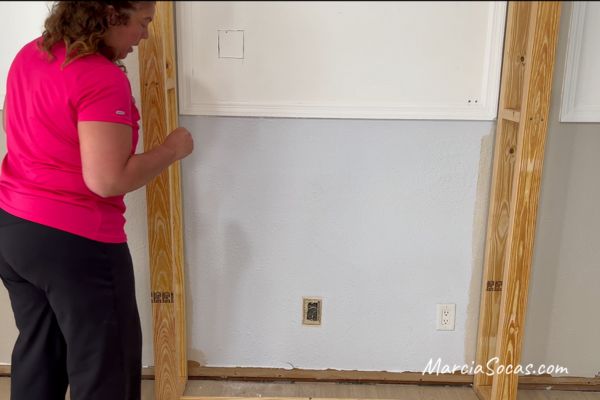
The wall supports:
You’ll want to use a stud finder to identify the studs in your wall so that you can attach the frame to. This is really the first thing you’ll want to do because it’ll help determine where your own fireplace will go in your room.

If you don’t have studs where you want to build your fireplace surround, then you can use toggle bolts in your wall if necessary.
I didn’t have studs behind this wall, so I did actually use toggle bolts in this project. While I was hesitant at first, it was actually extremely secure and it allowed me to place my new fireplace in the center of the wall exactly where I wanted.
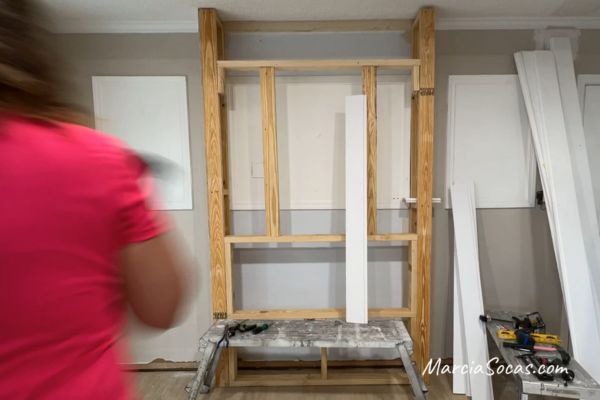
Building the Wood Frame:
Using 2×4’s, I built a wood frame using wood screws to encompass the fireplace.
The first step was to start with the side of the fireplace. I measured the height of my wall, which was around 9 ft, and knew that I wanted my DIY shiplap fireplace to come out around 12 inches from the wall. You’ll decide what’s best for you. For me, I just knew that I wanted avoid the entire wall projecting too far into the room. The main reason I was building it was to make the room feel coastal, and allow me to incorporate shelves on the sides, without taking up the entire room.
So, I built my sides according to the height and depth I wanted, and they looked like this:

I secured those to the wall (using toggle bolts in my case).
The next step was to create the part of the frame that the electric fireplace would sit on. The fireplace I chose was this one from Amazon:

 The Bottom Frame
It was 50″ in length, so I planned my frame just a bit longer to accommodate it.
As far as the height of this frame, just think about where you want the front of the fireplace to sit in your shiplap accent wall.
I built mine to 18″ which was perhaps a tad high. But, the great thing about this entire process is that you can really customize it to your space.
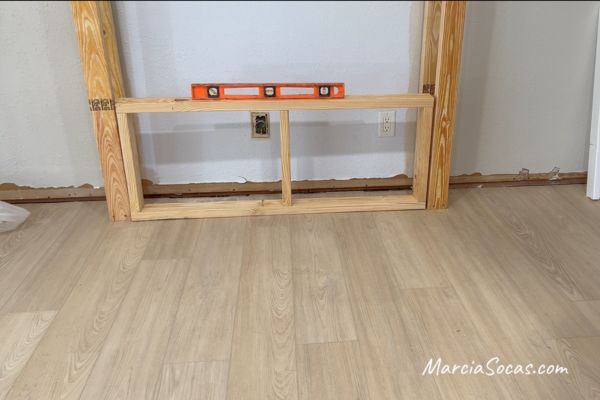
When securing this part of the frame, make sure that it’s level. If it isn’t, use wood shims to prop up the bottom as needed. It’s important because this frame forms the bottom of the inset box that your electric fireplace will be sitting on.
Once that was done, I added 2×4’s to the sides here, because they helped me get a good fit around the fireplace and also will give it something to secure to–you’ll see this toward the bottom of the post. I created the 2×4’s to match the height of the fireplace insert.
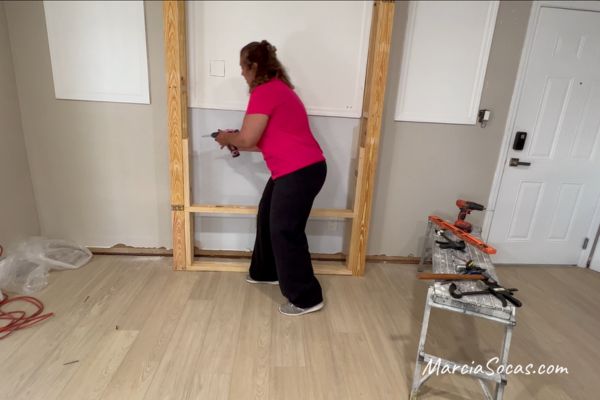
Upper Frame
Then, the last steps in the framing were just building the upper frame area. I created the upper frame with supports in the center since I knew I wanted this DIY shiplap fireplace wall to also serve as a TV mount.
Here’s what the entire frame looked like when it was complete:
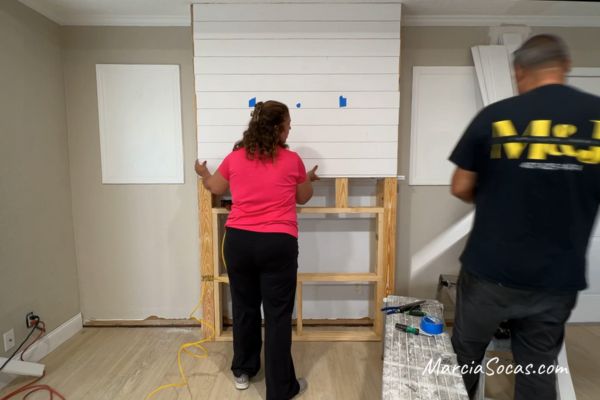
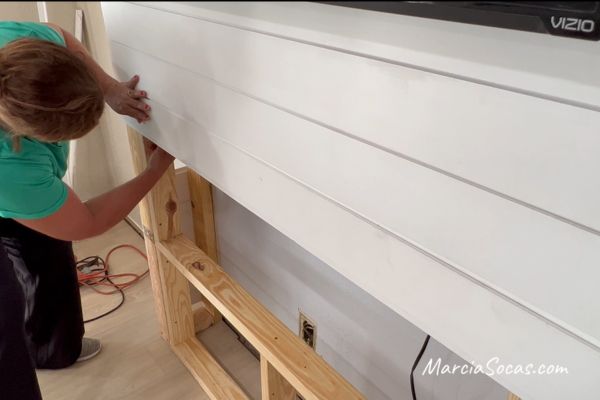
Attaching the shiplap boards:
I started at the top of the framing and added my first board there. Some other DIY project tutorials mention starting at the bottom; but I really prefer starting at the top. When I have the last board at the bottom, it is an easiest way for me to get a nice finished look. This is because, if the final piece needs to be cut or looks weird, I can cover it up with baseboard.
I started with the tongue of the shiplap facing down. This way, I used the nail gun to secure the shiplap board to the frame by nailing it at the tongue. Then the next board covers up the tongue and, therefore, the nail holes too! The easy way this comes together is just one more thing to love about a shiplap wall.
It’s a good thing to use brad nails because they’re longer than finishing nails and will secure your shiplap fireplace wall to the frame securely.
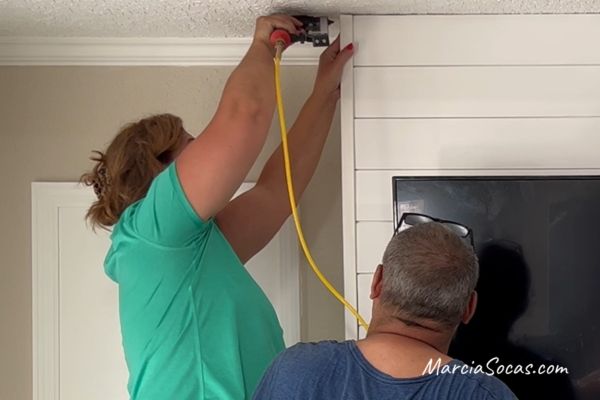
The TV mount area
Notice that I placed blue tape on the shiplap to mark where the frame was. This way I could see where to attach the TV mount when I was ready for that step.
(I also tucked the tv wires behind the shiplap later when I mounted the TV)
The fireplace opening:
When measuring for the fireplace, I placed my shiplap board there and then I used a pencil to mark the back of the shiplap board where the opening needed to be. then I could just cut it along the pencil mark area.
Once it was cut, I added it along the front of the fireplace opening area and here’s how it looked
Shiplapping the sides of the fireplace
The next step was to add shiplap along the sides of the fireplace.

By the way, I left one shiplap board on the side “loose” so that if I ever needed to remove it and get at the wires behind the fireplace, I could do so.
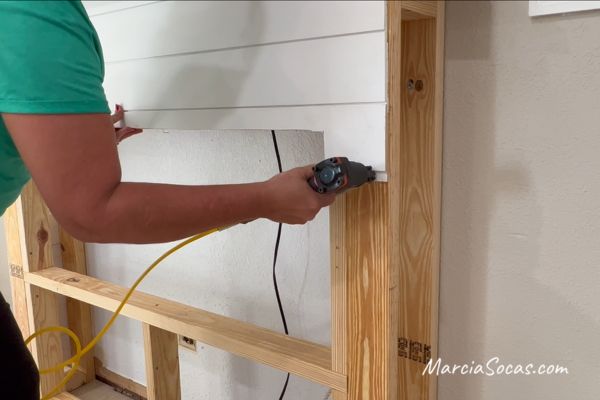
The Finishing Touches:
In order to finish everything off properly, I needed to add trim pieces that would cover up imperfections at the corners of the shiplap. Rather than brad nails here, finishing nails will be easier to hide. However, if you don’t have two different nail guns, don’t worry. You can fill in any nail holes in your shiplap. Use wood filler and press in that wood putty using putty knife and then just sand it down a bit.
You can also add trim boards along the side walls to finish those off.
Installing the Electric Fireplace
The next step was to mount the fireplace in place and use the side brackets to attach it to the shiplap.

Before moving on, I used the remote control to make sure that my DIY shiplap fireplace was working properly.

Then the glass covered everything.
If you’d like to download the step by step tutorial, you can find one in the free project library I have here on the site. You just need to sign up as a VIP user (which means you’ll get a newsletter with new projects every once in a while) and you’ll get the password to the project library.
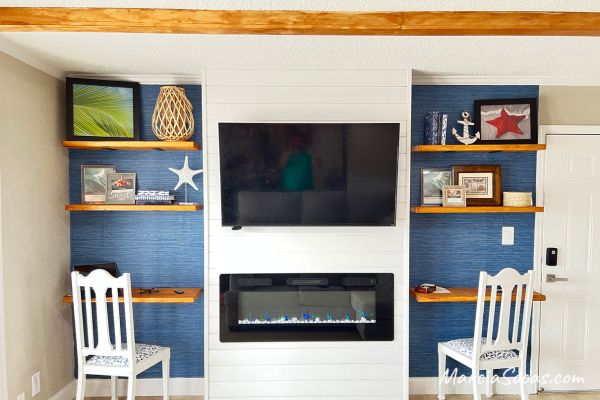
Here’s how it looks after I also added wallpaper and some DIY shelves made with wood. Also, if you’re interested in creating the faux wood beams, you can see that tutorial here.
I hope you love it as much as I do!
Good luck creating your own DIY shiplap fireplace! Be sure to send me a picture of your modern shiplap fireplace and I’ll post it here below for everyone to see.
I love my white DIY shiplap fireplace, but I also created a black shiplap fireplace in another condo renovation, in case you’d like to view that, you can check it out here.