
DIY Shiplap Ceilings: A quick and easy way to cover up those old popcorn ceilings.
I’m sure you’ve seen a lot of shiplap projects before but I don’t know if you’ve ever seen shiplap installed here…
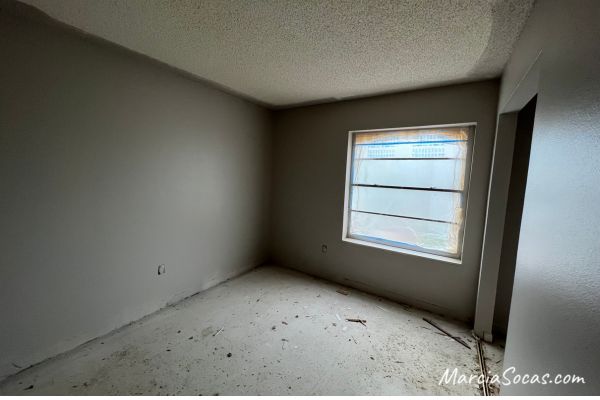
This condo had popcorn ceilings that I didn’t want to scrape off and retexture so I decided that I wanted to try my hand at installing shiplap on the ceiling that would also give the room a more Beachy kind of feel.
In order to get started, I first needed to find the dimensions of my room. It was a little over 9 feet long, and a little over 8 ft wide.
Before:
Throughout my site I provide affiliate links to products that I hope will help you with your DIY project supplies. As an Amazon Associate, I earn from qualifying purchases. This means that I may receive a small commission if you use these links to purchase products, but it does not change your price in any way.
Supply list:


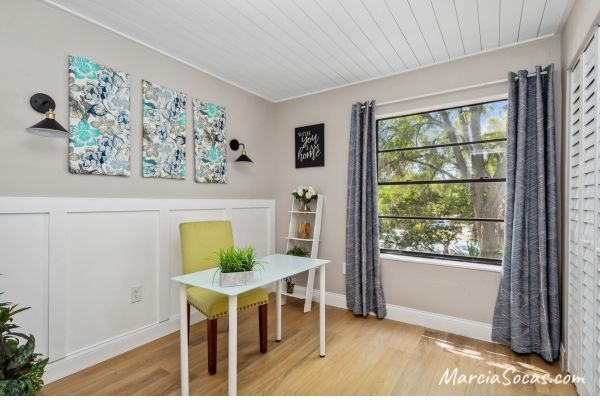
The 5th wall: your ceiling
When working on renovating a room, don’t forget the “5th wall”. Your ceiling can really set the tone of a room. Shiplap gives it so much character.
My Ceiling
Unfortunately, I had to buy the 12-foot-long boards in order to cut it down properly to accommodate my ceiling length. This turned out to be a little bit more expensive than if my room were smaller.
Here’s the step-by-step instruction showing how I did it:
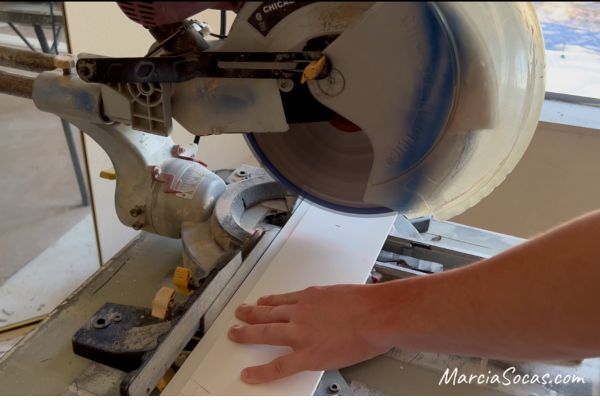
The first step: I cut my shiplap pieces to length and then I got them ready for installation. I cut them using a miter saw, which I use for many diy projects. Then I cut the shiplap plank pieces to size, or just a little under since I knew that I would be finishing the room with trim pieces around the edges to account for any uneven cuts and give a great finished look at the end. I didn’t miter the edges at all, I just used straight cuts on this project.
The great part is that I didn’t have to scrape the popcorn ceiling or anything. I was going to just cover the entire ceiling with the shiplap. It’s really a great way to cover up problem ceilings if you have them.
A Note About Shiplap

Now, just a little something about shiplap ceiling planks–actually, all shiplap. I wanted to point out here that there is an orientation to shiplap boards.
The boards, when placed together properly, have a nickel sized gap between them. However, if you place the boards the wrong way, you’ll eliminate the gap that you’re used to seeing in most shiplap installations. Or, if you install some one way and some another accidentally then youll have some boards that go together with gaps and others that are tight together and it just won’t look right.
You can sometimes tell with where the back of the shiplap is because it’s more damaged than the front but sometimes the boards are in pretty good condition and sometimes you can’t tell the difference, so I always try to make sure to place them together first to make sure I have them in the proper orientation.
Planning a Project? Let my Renovation Organizer help! Available here as a download-so you can print a new packet for every project. Or you can find it on Amazon as a printed book.

Back to my DIY Shiplap Ceiling:
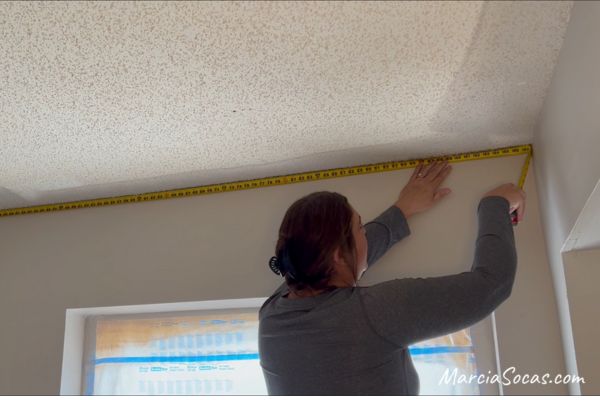
The next step was to make sure that I could identify the studs, ceiling joists, or trusses; basically, supportive pieces of wood up in the ceiling that I would be attaching the shiplap boards to. After all, the last thing I want is a piece of board to fall on someone’s head while they’re sleeping!
If you’re creating shiplap walls rather than a diy shiplap ceiling, then you’d identify the wall studs instead.
We used a stud finder to identify the places that we could attach to and then marked them using a chalk line. Once we marked them, we also went back with a screw and tested screwing it into the ceiling, just to make sure that we were in fact going into wood at those positions.
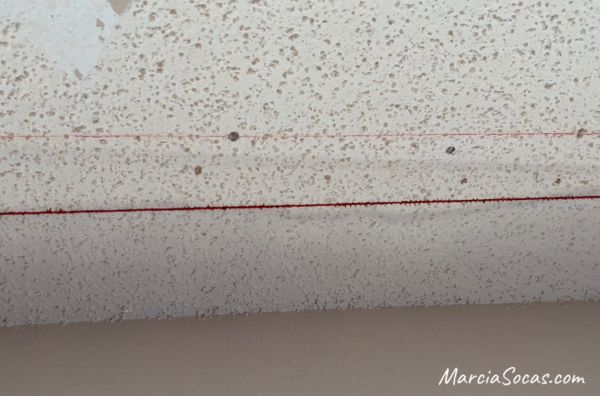
In one case we did have to make an adjustment so it’s a good idea to always double check everything before you start.
Heading up to the Ceiling
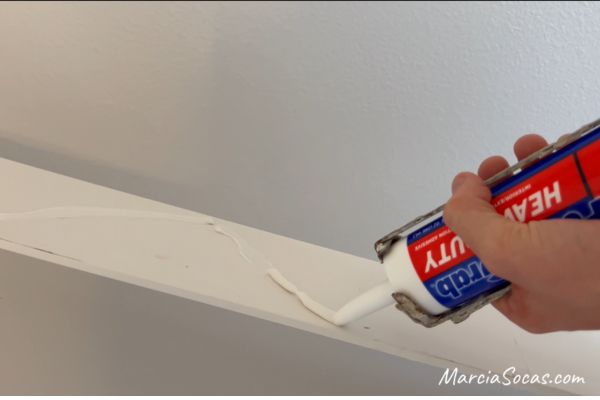
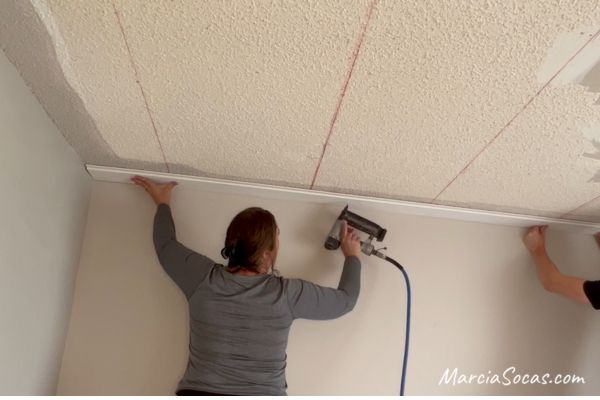
The next step was to place liquid nails on the back of the shiplap and then, using a nail gun, attach this to the ceiling. I used a brad nailer for this project. By the way, since you’re working above your head with long planks, this is really a two-person job.
My intern Brady and I worked on this together and we used a long step ladder. This long step up thing is much easier to use than going up and down on a ladder all the time, since you can walk across it easily. It’s an easy way for me to save a lot of up and down on my knees.

Installing the first DIY Shiplap Ceiling Plank
The first board is the most important because this first row will set the stage for the next row, and so on. If this first plank is uneven then the rest of the room will look uneven and slanted. A laser level would be great to have if you’re working on a big space like a living room or large master bedroom to make sure it’s all starting off perfectly square.
Usually when I’m working with shiplap, I only place a nail hole at the tongue part of the shiplap but in this particular project (again because I didn’t want to take any chance of the shiplap being loose or falling down), I placed 3 nail holes per section. It was a bit of overkill, but I wanted the wood planks to be really attached well throughout the entire space.
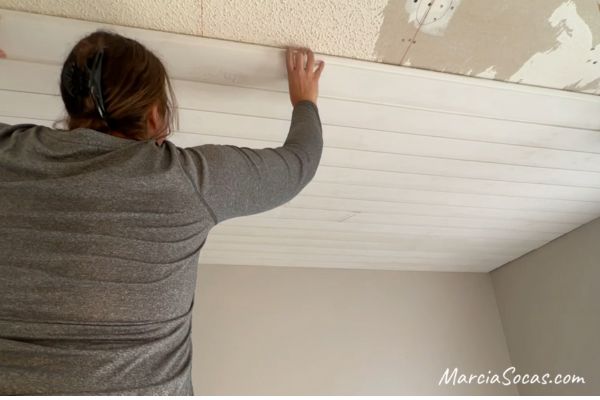
Continuing on with your DIY Shiplap Ceiling
After that I added the next board.
Once we got into the groove of things it went pretty quickly.
When you get to the last plank, hopefully it’ll fit right into place. But, if it doesn’t, you can cut the shiplap lengthwise and then install the last board.
I did get lucky in that this room didn’t have any vent covers on the ceiling. The vent was on the side of the room and there were no ceiling vents in this small space. However, if you do have to work around the vent in your own home, you can just cut the shiplap appropriately. and then I needed to cover up the nail holes using a little bit of caulking or wood filler.
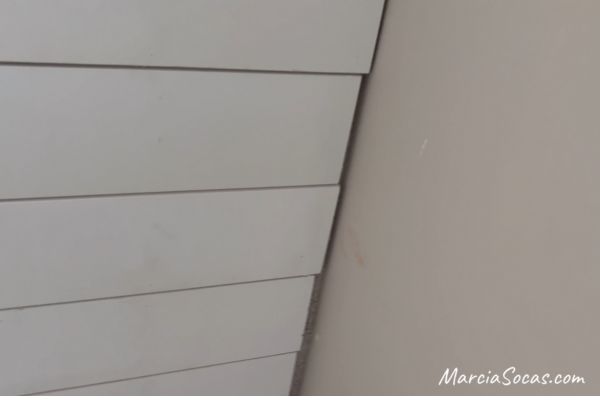
Once the room was complete the next step was going to be to add trim along the sides to cover up these gaps
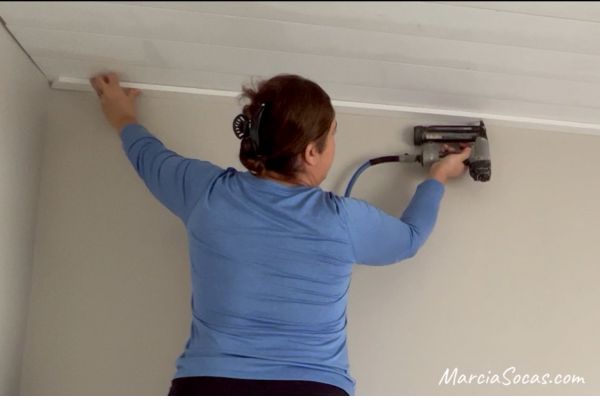
Final Trim Piece
As much as I try to cut the boards the same length, there’s always a little bit of variation. So, this trim piece kind of covers for that. My rough edges disappear because they’re covered up.
I made sure to miter cut the corners of the trim pieces at 45-degree angles so that they would fit together properly in the corners. I attached these again using construction adhesive and the nail gun.
Caulking your DIY Shiplap Ceiling
Once the trim pieces were attached then I was ready for my final step. I used caulking to seal the little gaps at the corners and also ran a bead of caulking along the outer edge because I wanted it to look finished and seamless.

Painting
The ceiling looks great, but it definitely needed some paint to finish it off and make it look clean and bright. I used ceiling paint that only required one coat, painted it using a roller, and then I was done.

My ceiling was a white shiplap ceiling, but if you plan to have another paint color for your whole ceiling, then I strongly recommend using a paint sprayer to spray every single board first. This is the easiest way to get the tongue part of the planks painted. It’s very difficult to get those small gap spaces painted once your DIY shiplap ceiling is installed. You don’t want to paint your ceiling an awesome color and then have annoying white seams of the planks showing through.
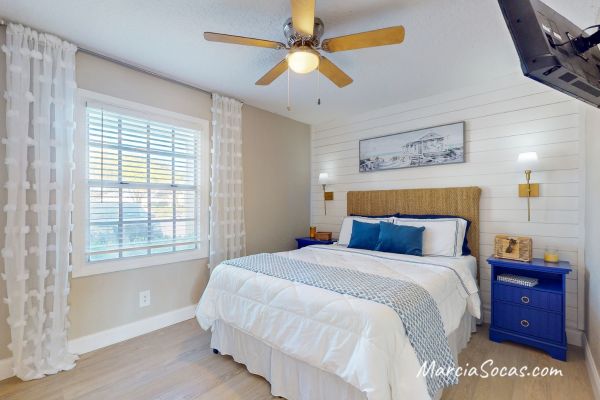
I love the way it looks!
The nickel gap spaces between the shiplap is perfect, the edges look really nicely finished due to the trim, and the caulking and the whole room has more of a coastal type of feel perfect for this Florida condo.
I can’t wait to get to work on the next projects in this room and hope you’ll follow me on to view those projects and see the whole condo.
What about light fixtures?
I didn’t have light fixtures for me to worry about on this ceiling. You might have a light or fan that you need to work around.
You can choose to cut around the obstacle, or, have an electrician install an extender box that’ll bring the electrical out over the shiplap. That way you can install the light right onto the shiplap and your project will look much more professional that way.
In this particular room, I introduced light using these really cool wall sconces that don’t require a plug! They are battery powered lights and work with a remote control and you can change the brightness and colors. They were really great for this project.
Another option is lighting that is rechargeable and also doesn’t require wiring, I used these in a waterfront condo I also renovated, again using DIY projects and another shiplap project, this time on the wall.
If you’d like to find those lights (above), they’re here.
Prefer a faux shiplap ceiling or faux shiplap wall?
If you don’t want to work with real shiplap planks, but you love the look of shiplap, I have the perfect solution. There are wallpapers that can give you the look of a shiplap ceiling. Here a few that you might like. The only thing is, remember when installing wallpaper that you may need to make sure your ceiling (or wall) doesn’t have a heavy texture to it because it really might not look right if you have bumpy-looking faux shiplap.
Other ceiling treatments
There are lots of different ways to spruce up ugly ceilings. I love this diy shiplap ceiling and it was great in this condo fixer upper, but if shiplap isn’t your personal preference for the ceiling, there are other options too. Recently, in another condo renovation, I tried my hand at installing a faux beam (the real thing would be too heavy) and you can see that upcoming project here.
The price:
This room was approx 80 square feet and the cost was around $500
It’s more than I would have liked, but it had to do with the size of my room requiring me to get the 12ft long shiplap boards. I do think the cost was worth it though and now I have leftover shiplap pieces that I can use for another diy project!
Your turn with a DIY Shiplap Ceiling!
Good luck covering up your existing ceiling. Let me know how it turns out and send me a picture. I’d love to post it here!
This project turned out great! It looks really good! Thanks for all the useful information.