
My Favorite DIY Shiplap Wall Ideas and Projects You Must Try
Ever dreamed of having a more rustic look dining room? Or maybe you’re more of a coastal-inspired person. No matter your style, shiplap walls can help you achieve your dream home.
So today, I am excited to share with you my favorite DIY Shiplap Wall Ideas and Projects. I’m a big fan of any shiplap wall project and trust me, once you fall into the world of shiplap, you’ll find yourself hooked on the timeless charm it brings to any space.
So, what exactly is shiplap?
It’s a type of wood paneling that’s made up of overlapping boards with a grooved edge. Its name originates from the shipbuilding industry, where it was primarily used to create watertight and sturdy ship exteriors, but it’s now a popular choice for home décor. Shiplap walls can add a touch of rustic charm, coastal elegance, or even bold contemporary style to your home. They’re also relatively easy to install, so you can DIY your own shiplap wall. Of course, if you prefer different ways or a more modern look, you can always paint the shiplap in a different color to match your style.
I promise you can DIY a shiplap wall in your own home! Whether you’re a seasoned DIYer or just starting out, I hope you’ll find some inspiration from my previous projects below!
Installing Shiplap
?
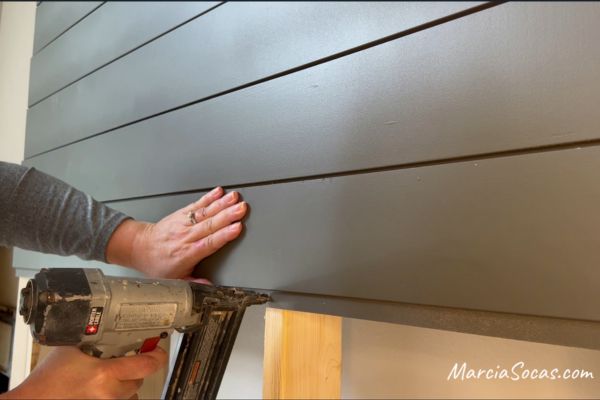
One of my favorite things about installing shiplap is that you can end up with a project that looks seamless. You install the first board with the tongue side (the part that sticks out) toward you and the direction in which you’re working. Then you’ll use brad nails in your nail gun and an air compressor to nail these to your wall studs. When you add your second board, it goes right over the first row of shiplap and the nail holes are covered up. I usually work from the bottom and up to the top of the wall, unless there’s a reason to build it differently (like the shiplap fireplace wall below).
If you do have to nail into any planks due to the shiplap bowing out, you can cover this with wood filler (wood putty). By the time you add your white paint, or other coats of paint, the nail hole should disappear.
As for the edges of the boards, if your own diy shiplap wall doesn’t extend to the edges of your room; I would recommend adding a trim piece to cover up any rough edges.
DIY Shiplap Fireplace Wall
This project was one of my favorites, a shiplap accent wall with an electric fireplace insert! I always thought Shiplap was perfect for cool DIY projects, and it was so much easier than I thought it would be, and can you believe it only took me two days?
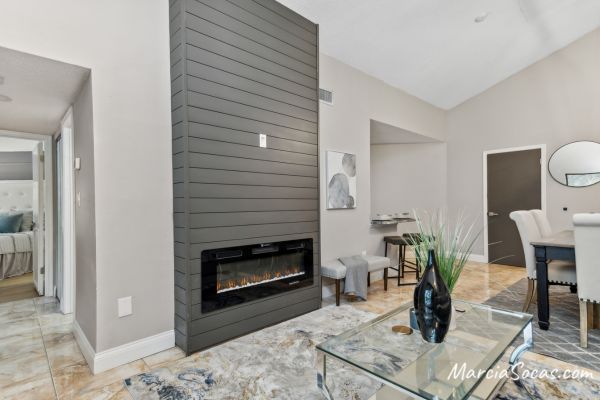
So while flipping this condo, I wanted to add a modern touch to the family room with a shiplap fireplace. I discovered a shiplap electric fireplace DIY project on TikTok, and it was a good idea for the space. But here’s the thing – I had no clue how to make it happen! The first thing and the first step, I had to determine the right size for the fireplace. I settled on a 50″ width, creating a standout feature wall without overpowering the room. The fireplace I used is electric, with LED lights for ambiance and remote control and touch screen operation. It’s amazing how DIY projects can transform a space, right?
For this Shiplap Fireplace wall idea, you’ll need the following:
Electric Fireplace (not a gas fireplace), Nail gun, Paint, Paint Sprayer, 2×4’s, and real shiplap boards
The paint I used here was Sherwin Williams Urbane Bronze. It’s amazing how painted shiplap takes on a different look than the traditional farmhouse style Joanna Gaines type look of shiplap.
For a step-by-step tutorial, read my previous blog: DIY Shiplap Fireplace Wall [with free plans]
DIY Shiplap Backsplash Wall
Let me tell you how this DIY shiplap backsplash saved my kitchen renovation. I recently tackled a kitchen renovation, and one of the last things I needed to address was the backsplash. After spending hours cleaning, painting the cabinets, and installing new countertops, I was ready for a quick, easy, and affordable solution. That’s when it hit me—I had some leftover shiplap boards from a previous project (a shiplap fireplace) in the condo.
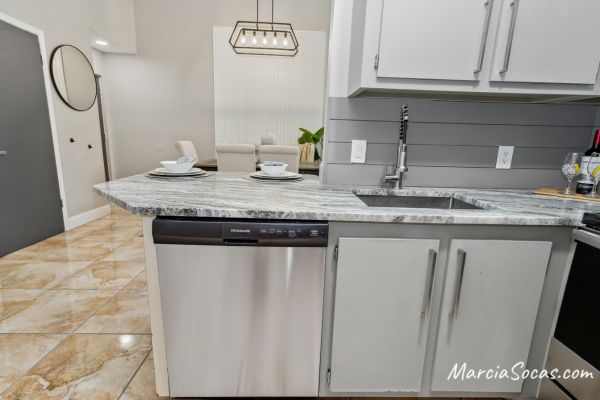
Using shiplap for the kitchen backsplash seemed like a brilliant idea. It would add visual interest, fit my budget, and, most importantly, be completed in just one day. Plus, shiplap has the added benefit of covering up imperfections, allowing for color and design customization. With the right tools in hand, including shiplap boards, a nail gun, plywood strips, and paint color, I got to work. The best part was that the height of the shiplap matched the electrical outlets perfectly, minimizing the need for additional cuts.
In just a couple of hours, my shiplap backsplash project was complete. It was a cost-effective and great way to transform my kitchen while adding a personal touch to the design. If you are interested in my step-by-step tutorial, here’s the link to my previous blog: DIY Shiplap Backsplash Wall
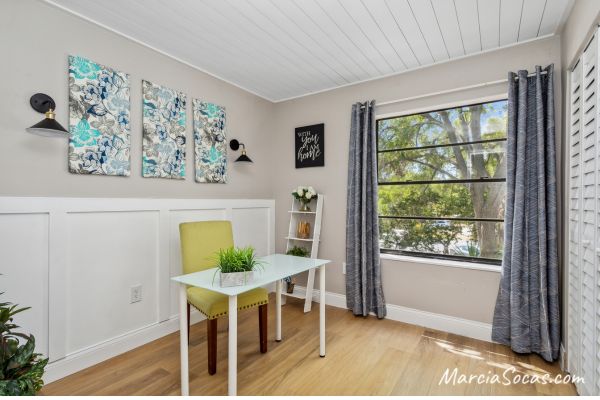
DIY Shiplap Entryway (Wall + Shelf)
For this project, I was in the middle of renovating this condo for one of my fix-and-flip projects, and I found myself with some leftover shiplap boards from a previous project. I thought, why not put them to good use and create something cool? And that’s when I came up with the idea of a DIY shiplap accent wall in the entryway.
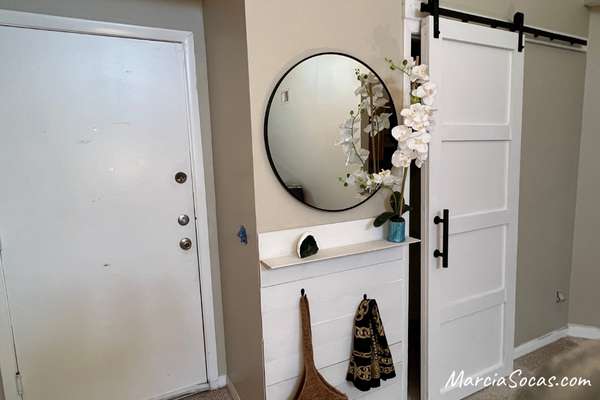
Let me tell you, it turned out to be the perfect solution for cleaning up that small area. I wanted to give the condo a modern farmhouse vibe, and the shiplap accent wall and shelf totally nailed it. But here’s the best part – I also added a mirror and some hooks to make the whole thing super functional. In addition to the shiplap wall, we also installed new flooring. We opted for luxury vinyl plank flooring that gives the appearance of real hardwood floors. It completely elevated the look of the space.
This DIY shiplap wall project is a game-changer. It adds style and much character to the entire wall, even if you’re dealing with a small space. So, if you’ve got some leftover shiplap planks lying around and buy the other tools at home depot (if you don’t have them yet), why not give it a shot? Trust me, you won’t be disappointed. For a step-by-step tutorial, be sure to click this link: DIY Shiplap Entry Wall
Unique Alabama Airbnb
For this project, my son Eric and I created this incredible Airbnb vacation rental in Alabama. He’s a talented kid, and he actually renovated his first condo at the young age of 19! So, we went about creating this football-themed vacation rental. Eric wanted to ensure that his Airbnb stood out from the rest in the area. After all, unique homes are highly sought after, and are located in such a prime spot, we knew it would work wonders.
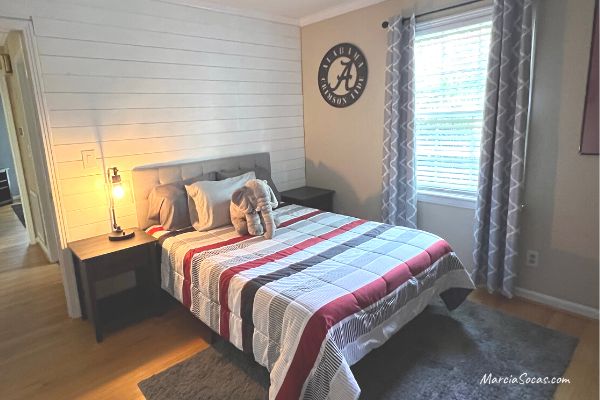
Eric’s room serves as the master bedroom, and he keeps it locked when he’s away during rental weekends. The rest of the house is dedicated to guests and provides enough space for up to 6 people. We created a few themed Airbnb rooms, including the 1831 Room, this room is inspired by the year the university was established, giving it a historical vibe. When we first started, the wall behind the full-size bed was just plain, so we decided to install a shiplap wall. By the way, you can find a tutorial on that in the Projects here: Unique Alabama Airbnb
You’ll notice that this shiplap plank wall involved going around the light switch. When dealing with light switches and shiplap, you can install extender boxes that bring the electrical box forward so that everything sits flush on the shiplap as opposed to being sunken in behind it.
We also made some changes to the closet doors. We painted them black and added wooden frames, instantly giving the whole house a much nicer and more stylish appearance. Overall, creating this unique lodging experience for visitors to our University of Alabama-themed Airbnb was such a rewarding project!
Small Bathroom Remodel
I recently did a budget-friendly bathroom remodel for this house. The bathroom was pretty small, only about 5×8 feet, but I knew I could make it look amazing. So in this project, I tackled several different aspects of the bathroom, including wallpaper, accent molding, new lighting, a new vanity, and a shiplap surround around the mirror. This project shows a bit more what a vertical shiplap wall looks like, since that was the orientation of the shiplap in this project.
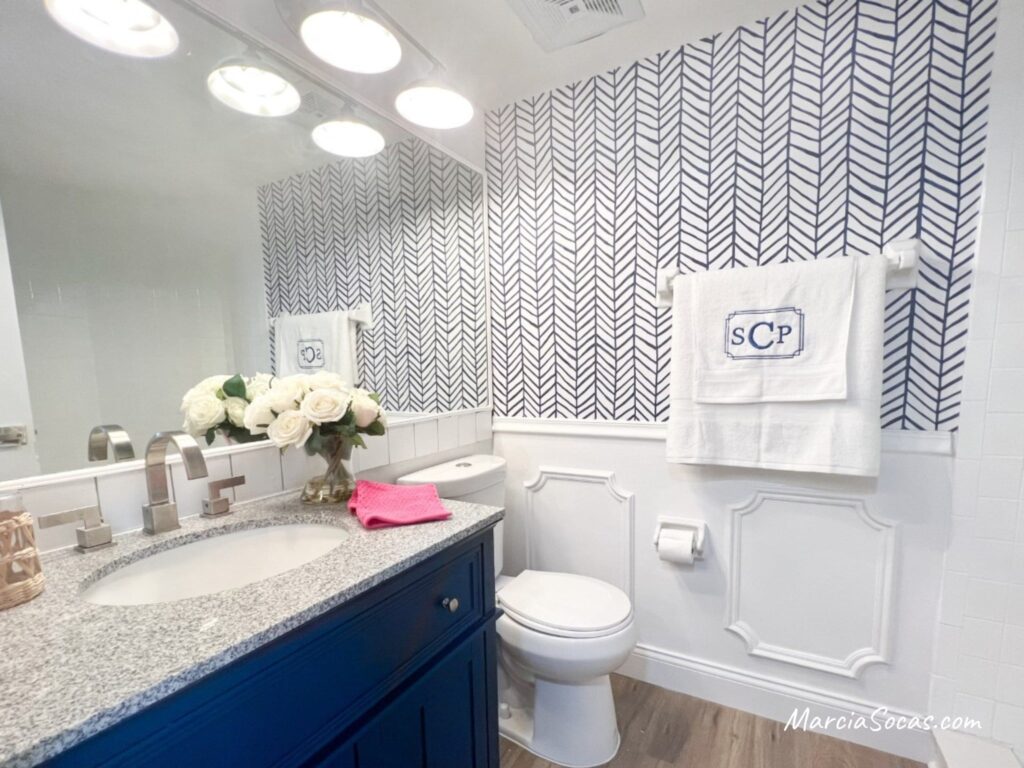
Let’s talk about this mirror where I did a DIY shiplap. I wanted to give it a more interesting and finished look, so I decided to trim it out using some leftover shiplap from another project. Since the shiplap was in smaller pieces, I couldn’t use them in the traditional horizontal lines. Instead, I placed them in vertical lines along the top and bottom of the mirror, measuring and cutting them in place to ensure a snug and secure fit. I used a nail gun to secure them in position. and prevent a small gap.
The tricky part was dealing with the mirror clips. They were in the way, but I noticed that the clips were smaller than the tongue part of the shiplap. So, I simply cut away a section of the shiplap to accommodate the mirror clips. This way, the clips fit perfectly, and the next row of shiplap went right over them. It was an easy way and effective solution! I finished off the mirror with a small piece of molding, this helped to create a more seamless look, and it also hid the mirror clips.
I was able to transform this bathroom mirror into a beautiful focal point, in simple steps and all while staying within my budget. For the whole Bathroom Remodel transformation and the step-by-step tutorial, the link is here: Small Bathroom Remodel
Shiplap Ceiling
Last but not least, one of my favorite shiplap ideas: DIY shiplap ceilings! You’ve probably seen shiplap used in various projects, but have you ever considered installing it on your ceiling? Well, I did!
This DIY shiplap ceiling is a quick and easiest way to cover old popcorn ceilings because I really didn’t want to deal with scraping off and retexturing. So, we came up with the brilliant idea of installing a shiplap on the ceiling instead. Not only would it cover up the popcorn texture, but it would also give the room a fantastic beachy vibe that I absolutely love. We started with a stud finder and chalk line on this one, to help guide our project.
I also used construction adhesive in this project. I usually don’t use a product like liquid nails when dealing with shiplap since I’m nailing it into studs, but since this was on the ceiling, I just felt better about the extra “hold”.
Now, here’s a little tip about shiplap that I learned along the way. There’s actually an orientation to the shiplap boards. When properly placed together, there should be a nickel-sized gap between them, which is the classic shiplap look we all adore. However, if you accidentally install them in different directions, you’ll end up with some boards tightly fitting together and others with noticeable gaps, and trust me, it just won’t look right. So, I always double-check the orientation and ensure that the boards are aligned perfectly.
And the end result is absolutely stunning! The nickel-gap spaces between the shiplap create a beautiful visual effect, and the trim I added gives the edges a polished and finished look. The overall ambiance of the room now screams coastal living, which is perfect for this condo. I’m absolutely amazed by how my DIY shiplap ceiling turned out, and I can’t wait to tackle more projects in this room.
Your turn!
So remember, the beauty of true shiplap lies not only in its visual appeal but also in the satisfaction of knowing that you’ve created something unique and special with your own hands. So, go ahead and give these shiplap ideas and projects a try, in your living room, powder room, or bedroom, you name it. Your small walls will thank you for it!