
An easy way to create a wood feature wall
I love the way that wood boards look against a wall. Something about the little bit of natural material in a room, against a blank wall, really makes a huge impact and seems to ground the entire interior decor. I’ve created a lot of DIY wood accent wall tutorials over time, including:
- Board and batten accent wall
- Wood Slat Accent Wall (with LED lights too)
- Wood look DIY accent wall using leftover Luxury Vinyl Plank flooring
- Using trim boards to create picture frame molding
- And even how to build DIY wood shelves
But today’s modern wood accent wall is totally different from those. Inspired by an amazing wall that I saw in a restaurant, I knew I could find a way to turn this into a DIY project for my own home.
Actually, I built it in a condo I was living in and renovating over the summer. The condo was on the water in Florida, and I spent the summer enjoying it and working on DIY projects throughout the renovation. You can view them here.
Throughout my site I provide affiliate links to products that I hope will help you with your DIY project supplies. As an Amazon Associate, I earn from qualifying purchases. This means that I may receive a small commission if you use these links to purchase products, but it does not change your price in any way.
Supplies for a Wood Shim Wall


Wood shims –I got mine from Home Depot because they had the best pricing. You can see them here.
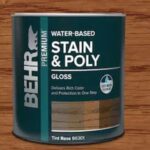
Stain (water based), I used Antique Walnut Gloss from Behr
Here’s a photo of the Wood Shim Wall inspiration:

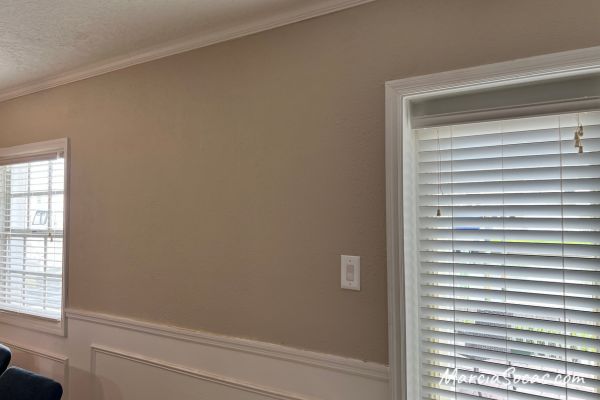
And here’s a look at the wall in the little condo dining room area that I wanted to transform:
Steps to creating a DIY Wood Accent Wall
Staining:
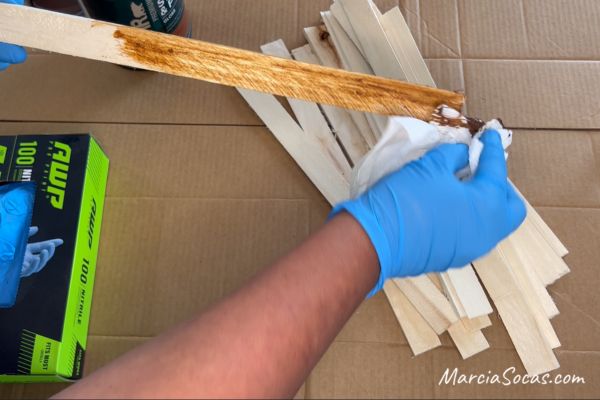
The first step was for me to stain the wood shims. I had purchased two different sizes (8 inch and 15-inch shims) in order to have some variety in the size of the wood pieces.
Using wood shims was a great way to save time. I’ve seen some other DIY wood wall projects where people spend lots of time with a miter saw and MDF boards in order to create trim pieces that kind of look like wood. But, using the shims was not only quick, it was also an inexpensive way to take on this project.
The pricing for the large shims was around $4 for 42 of them, and the small shims packages were under $2
The first thing I did was open up my packages of shims and start covering them with stain. The first time I started this project, I rubbed the stain on using a paper towel.
This was not a great idea.
The paper towel kept falling apart and leaving little chunks of paper on the little wood trim pieces. So, I switched to using a rag, which worked a lot better. I like that the rag allows me to control the amount of wood stain that I’m adding depending on the pressure and amount of product I apply. Next time I might try a paint brush, but I am more in my comfort zone when I can use the rag to cover the shims and turn them around in my hands as I add the stain.
Please note, these shims do not have a smooth surface. So be careful of splinters!
I added several coats of stain to the shim wood planks. Some had just one coat of wood stain, while others had up to seven coats. I really wanted some variety in the colors of the shim wood panels.
Drying:
The next step was to let these dry overnight.
Adhering the Wood Wall Pieces:
As the delimiter for the bottom of the wall, I had chair railing. I was also working in between a window frame on my left, and a door frame on my right. These made for easy and natural stopping points for my wood accent wall.
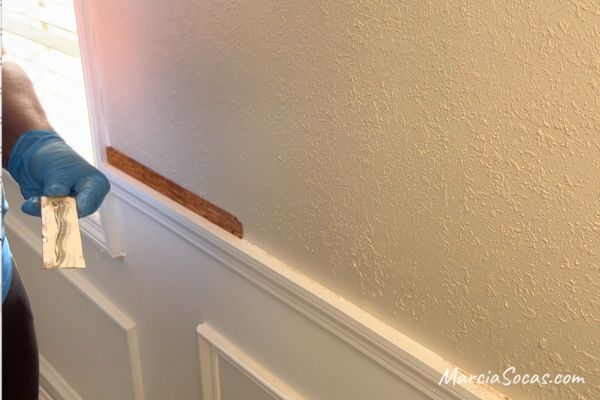
I started by adhering my first board to the bottom left of my white wall. I applied liquid nails to the back and just stuck it on.
Super easy project.
Since the wood pieces were so light and I was just adhering them with liquid nails, it eliminated the need for a stud finder, a nail gun, nail holes, or wall studs.
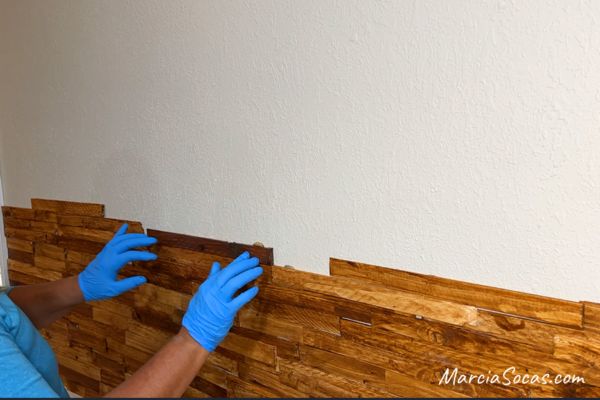
Varying the Design in my Ombre Wood Wall:
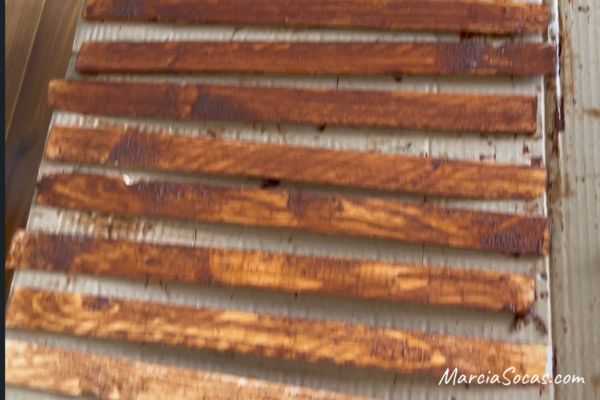
I was loving the variation in color of the wood pieces, and I tried to make sure to vary the color as randomly as I could.
Of course, you could do something different and group your pieces by stain (or different color) and create more of an ombre wood wall if you wanted to. But, for me, I wanted the random pattern along the entire wall. I varied between the small wood shims and the large ones. But once I really got into the project, I found it was ultimately fastest to add the long wood shims first and then the smaller ones on top where needed.
Gaps in my DIY Wood Accent Wall:
There were gaps in my wood walls, but I used the smaller shims to cover the gaps. This also created more texture as some of the wood pieces were thin and close to the wall, whereas other areas had thicker wood accents.
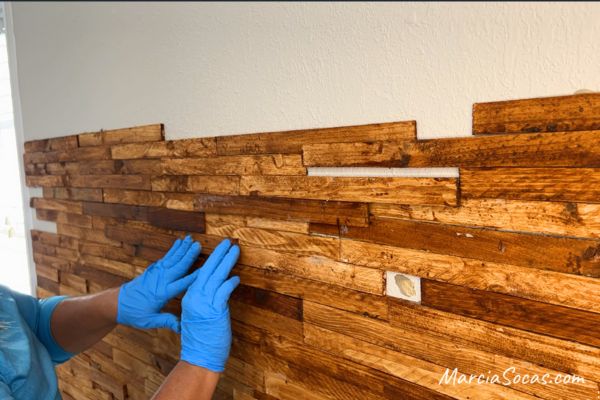
Outlet covers and light switches:
When I got to my light switch, I simply worked right to their edge. I cut a few pieces as needed for them to fit properly.
Finishing touches:
I added a horizontal piece of trim along the top to finish off my DIY wood wall. I didn’t have the need for any vertical piece, since I had the window and the door frame on either side.
My Modern Accent Wall:
Here’s a photo of my finished DIY Wood Shim Accent Wall
I love that you can see this wooden accent wall not only from the dining room, but also from the living room as you enter the condo. The natural variety of colors of the wood pieces are the perfect choice for providing a natural feel to this coastal condo. I love the way it creates a focal piece for the entire room.
Wood Wall Decor:
The one last thing that I haven’t done, but I might end up doing, is adding a piece of decor over my wood shim wall so that it serves as more of a background piece. That’s what they did in my inpiration room at the restaurant.
So, I’m working on searching out the perfect artwork or decor to finish off my room.
Your Turn!
I hope you enjoyed this home project and that you’ll create your own DIY accent wall. If you do, please send me a photo and I’ll upload it here for others to see as well! I’d love to see the different designs and different styles you could come up with on your own accent walls.
Let’s be Friends:
Sign up for my newsletter to see the latest projects, delivered to your inbox monthly.
great idea