In my work as a home flipper and renovator, I have come across several 80s kitchens. Creating and renovating these kitchens has been a lot of fun. So, I wanted to put together this list of kitchen cabinet makeover tips. There are also photos of how 4 of my 80s kitchen cabinet makeovers turned out.
Throughout my site I provide affiliate links to products that I hope will help you with your DIY project supplies. As an Amazon Associate, I earn from qualifying purchases. This means that I may receive a small commission if you use these links to purchase products, but it does not change your price in any way.
Spraying 80s kitchen cabinets
The first project I’d like to show you here from the 1980s is one that we are all used to seeing. This kitchen makeover involved some cabinet doors that were in good shape but they were really dated looking. They were plastic laminate like feeling or melamine kitchen cabinets, so they were a little more intimidating to me then the regular oak cabinets which I have painted before. I was worried that I would not be able to update this kitchen without cabinet refacing or installing new cabinetry.
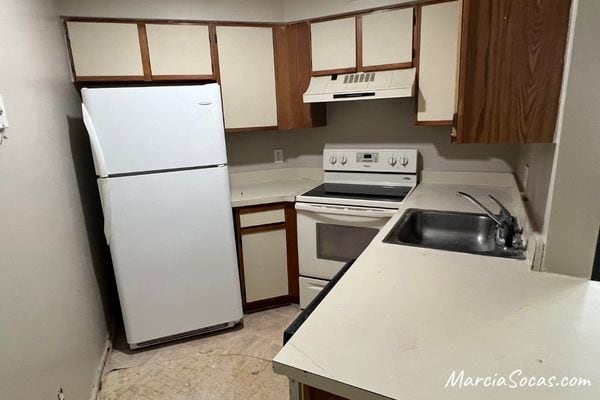
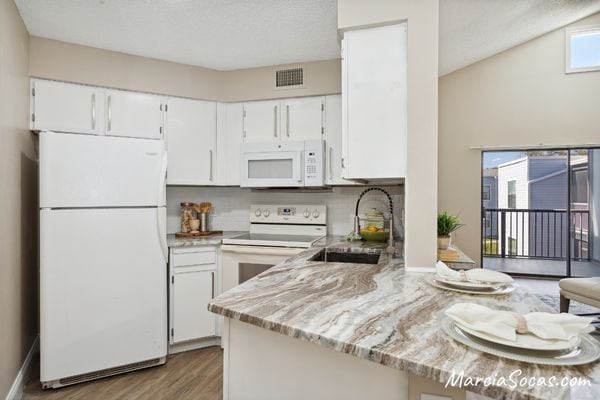
I gave the existing cabinets new life by painting them and adding hardware that would give it a modern look. This outdated kitchen was renovated by painting it to have white cabinets. I also changed the countertops to granite counters, which you will see that I have done in all of my renovation projects sampled below. Adding white subway tiles also made a nice difference and I did that in just one day (DIY project for that here).
I do already have a I have a tutorial here regarding painting the cabinets, but to summarize it:
Painting 80s kitchen cabinets with a sprayer:
- Remove the doors from the hinges.
- Clean the cabinet doors and cabinet boxes really well
- Tape off your work area
- Paint using an oil-based enamel paint (I used a sprayer for this particular cabinet project)
- Add new hardware
- Take stunning “after” photos!
Regarding the hinge hardware and cabinet pulls, you’d be amazed at what a huge difference these make in the final look of your kitchen renovation. The simple change to modern style pulls are a great way to give your cabinets a whole new look without spending a lot of money.
I have made my share of mistakes in adding cabinet pulls to freshly painted cabinets, and you can see my Mistakes to Avoid when Installing Cabinet Pulls and get a free downloadable cabinet pull template here.
In this first kitchen, here’s how it looked when I was done painting it with a sprayer. I chose to paint it to white cabinetry because the floor plan in this small condo meant that the kitchen overlooked the dining room. The dining area had its own white touches (a barn door that I DIY’d, and also a shiplap shelf and drop zone at the entry that was also white), so I didn’t want to use a bold color in the kitchen that would take away from the rest of the condo.
Painting wood cabinets from the 80s
Solid and study wood cabinets are used in the next project example in our 80s kitchen cabinet makeovers.
In this condo flip, I had a really small budget and limited time. I wanted to have fun though and create a dramatic impact through my choice of paint colors. I ran to the paint store and picked up a Sherwin Williams blue paint in this kitchen project.
Here’s the starting point. The cabinets were in pretty good condition. The kitchen didn’t have any natural light, so the idea of using any warm wood tones or dark colors was out. You’ll see in a moment how the bright blue and the silver hardware provided a nice contrast.
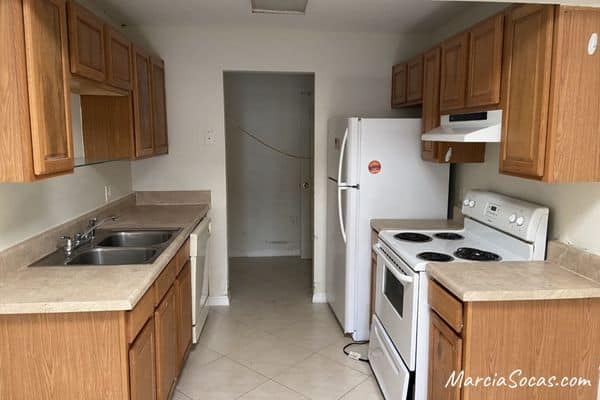
The hardest part of this easy kitchen update was the elbow grease involved in cleaning these cabinets! The previous owners had mobility issues and the upper cabinets had not been cleaned in years, so it was a lot of work. Here’s the rundown of that condo flip (including the profit and expenses) and also the painting cabinets blue tutorial.
In this kitchen I used a brush to paint the cabinetry and a Rustoleum Transformations Kit from Home Depot (except for the blue paint which I purchased separately).
I learned a lot from these cabinets and the mistakes I made. Mistakes like this, which I then learned to correct (and prevent repeating).
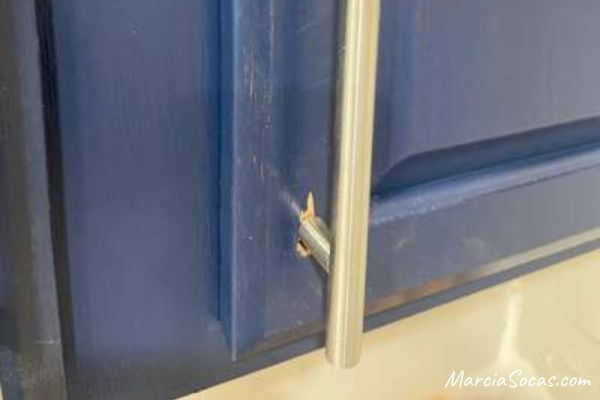
This kitchen also had the counter tops removed and replaced with the countertops of my dreams and of pretty much all my renovations (Fantasy Brown granite). The combination of the blue color palette contrasted with the silver cabinet hardware and the countertops really became a focal point in this fixer upper. The kitchen here was truly the heart of the home, as it was completely visible from the entire family room / living room area.
Here’s how it turned out:
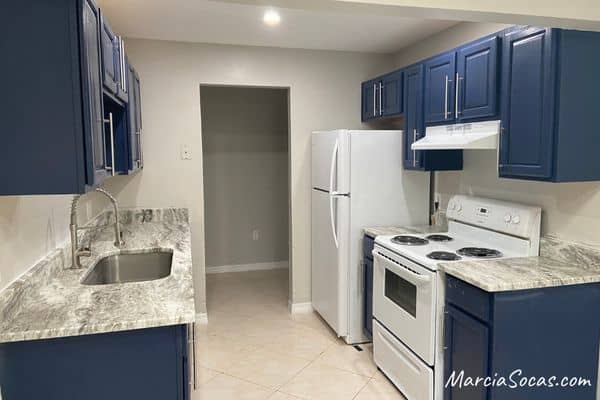
Adding new cabinet doors to an 80s kitchen
This was one of the creative ways we updated another 1980s condo kitchen that was in the same community as the kitchen in the first example above.
In this particular project, I taught my son how to flip his first condo. He was home from college while it was closed due to covid and we really had fun working on it. You can view all of the before and after photos, the projects, and his profit report here.
This was the starting point. Good bones and kitchen storage, but a dated look. The perfect recipe for 80s kitchen cabinet makeovers.
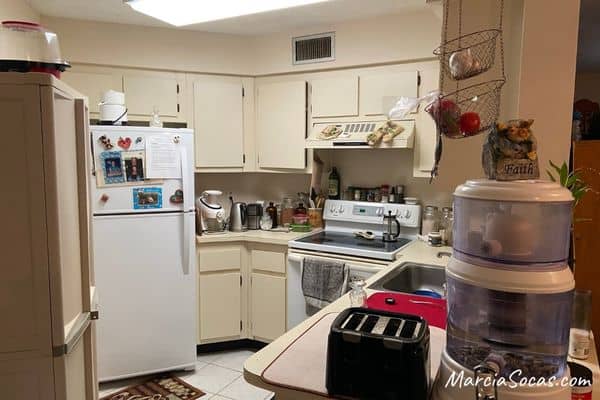
The cabinet boxes were in great shape but the cabinet doors were pretty bad. Rather than buy all new cabinets, we purchased just the cabinet doors from IKEA.
At that time they had a line called Haggeby, which has since been discontinued. They were just flat front doors and they ranged in price from just $2-$10.
Finding deals like that are one of my favorite things for sure!
Although they discontinued that Haggeby line, I do think they have one now called Enhet which is similar. You’ll have to go to their site and search and hopefully you’ll find a great price and simply style. Just be sure their hinges will work for you–they use a different hinge style.
The good thing is, if you can use them, that they have different colors and styles that you really make like in your new doors.
They also sell handles, but I found that for the actual handles I have used, I find a much better price on Amazon.
Here’s how that kitchen looked after we painted the cabinet boxes and added the new cabinet doors (and cabinet pulls of course)
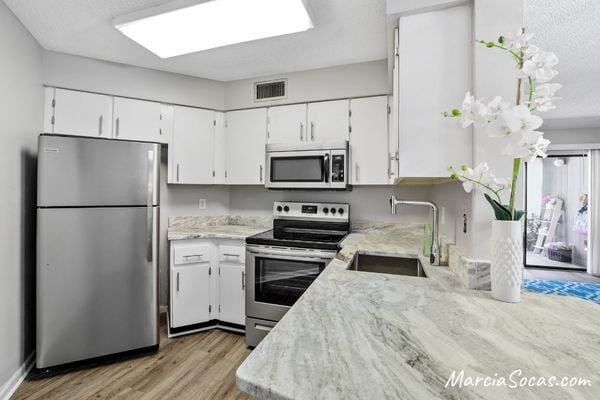
Here’s a link to my favorite kitchen upgrade products on Amazon.
Open shelving
Another option when updating your 1980s kitchen is to focus only on your lower cabinets and forgo upper cabinets altogether. (Technically, this 80s kitchen cabinet makeover involved installing new cabinets rather than updating the existing ones.)
You can add open shelves for easy access to your beautiful kitchen dishware and items.
(Learn tips on how to style open shelving here)
I personally couldn’t have everything out in the open like this, so I have only utilized open shelving in a small space in a kitchen renovation.
The shelving was installed over the sink. It was helpful because another cabinet wouldn’t fit in the empty space the prior owners left there (they had started a renovation and never finished it) and it was a creative way to incorporate a new trend into the renovation. It also added a little more storage space for pretty items.
This kitchen was actually in a townhouse that I flipped while mentoring a group of teens. They are the ones who actually added the glass tile backsplash and worked on many other projects in the property. We also added cabinet pulls and a new faucet in this project too.


Small changes go a long way
Notice that in the kitchen renovations, there were other changes. Light fixtures go a long way here. Sometimes these 1980s kitchen have old fluorescent lighting. Changing these to more modern lighting fixtures or to canned lights are also easy ways to create an amazing kitchen.
And, although they certainly come with an additional cost, new appliances can be worthwhile. Look at how the first kitchen had a range that looked white when we started, compared to the yellowy and dark cabinets. But then when the cabinets were painted white, you can tell that the range was really an ugly almond. It looked totally out of place.
Ideally, for me, I like stainless steel appliances in a kitchen. Sometimes though, they aren’t in the budget, and we can change out only appliances which aren’t working properly.
Larger modifications for 80s kitchen cabinet makeovers
If your 1980s kitchen has a drop down ceiling, you may want to go a step further in your renovation. Often the drop down ceilings have flourescent lighting covered by plasstic similar to this:
If you remove the drop down ceiling then you significanly add to your ceiling height. This can make the whole space feel better. This is a larger project though. So, you have to decide if you want to get to a place where you remove all of the drop down and undergo repair to the ceiling drywall.
Alternatively, you can just remove the fluroescent light coverings and get a bit more height, although it doesn’t give quite the same feel.
Good luck in your 80s kitchen cabinet makeovers! You’ll be amazed at what a fresh coat of paint can do; and how much fun you’ll have in taking charge of your home decor and making your home truly an expression of yourself!